 Domain SearchInstantly check and register your preferred domain name
 Web Hosting
 cPanel HostingHosting powered by cPanel (Most user friendly)
 KE Domains
 Reseller HostingStart your own hosting business without tech hustles
 Windows HostingOptimized for Windows-based applications and sites.
 Free Domain
 Affiliate ProgramEarn commissions by referring customers to our platforms
 Free HostingTest our SSD Hosting for free, for life (1GB storage)
 Domain TransferMove your domain to us with zero downtime and full control
 All DomainsBrowse and register domain extensions from around the world
 .Com Domain
 WhoisLook up domain ownership, expiry dates, and registrar information
 VPS Hosting
 Managed VPSNon techy? Opt for fully managed VPS server
 Dedicated ServersEnjoy unmatched power and control with your own physical server.
 Website Builder
 Online Store BuilderLaunch a professional e-commerce store without writing code.
 Web Design ServiceGet a custom-designed website tailored to your brand and goals. From just KES 15,600
 BlogRead our guides on web hosting, online business, digital marketing, and more
 SupportOur support guides cover everything you need to know about our services
 ContactContact us via chat or email
Nameservers are, in simple terms, the address book that tells the internet where to find a domain’s DNS information.
When someone types your domain into a browser, nameservers are what point that request toward the correct hosting or DNS provider, so the right website, email and other services actually load.
Think of your domain name as a person’s name, and the nameservers as the directory that tells the world which phone book to look them up in.
The domain itself does not store the actual DNS records, it simply points to whichever nameservers are responsible for holding that information.
Get the pointer wrong, and none of the underlying records can be found, since nothing will know where to look for them.
When you change your nameservers, you are essentially telling your domain where its DNS information should now be managed.
This is a bigger change than it might sound like at first, since nearly everything tied to your domain, including your website and email, depends on this setting being correct.
Because so much rides on this single setting, it is worth treating a nameserver change as a deliberate, planned step rather than something to rush through between other tasks.
Most problems people run into after switching nameservers trace back to a detail that was skipped or rushed at this stage.
Truehost nameservers are the specific nameservers customers may need when pointing a domain toward Truehost hosting.
Whether you are setting up a brand new domain or moving an existing one over from another provider, this guide covers the following:
- How to find your Truehost nameservers
- How to access your current nameservers
- How to change your nameservers
- Where to make the change
- What happens after changing them
- How to troubleshoot common issues
Things to Check Before Changing Your Nameservers
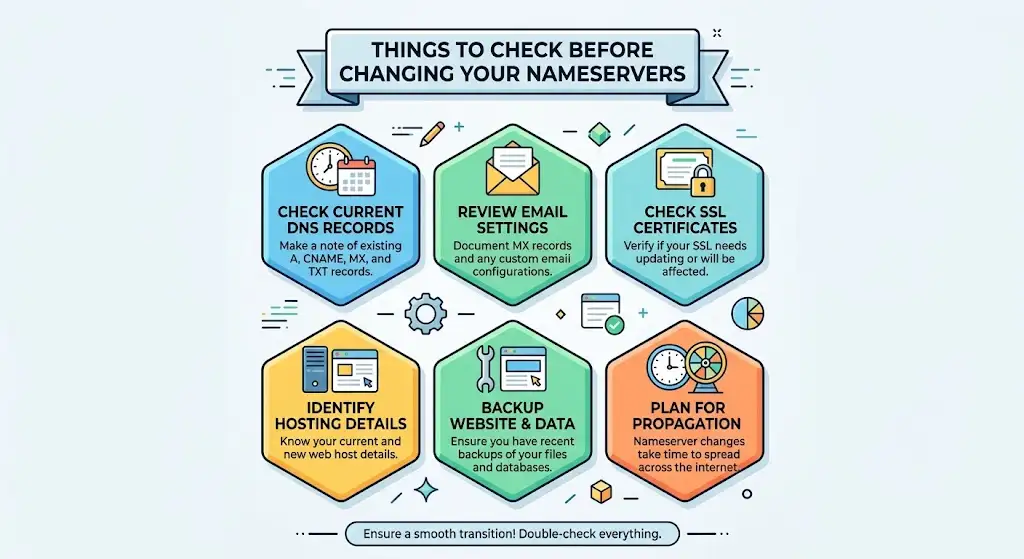
Before making any changes, run through this quick safety checklist.
- Know where your domain is currently registered
- Have the correct Truehost nameservers ready and confirmed
- Make a note of your existing DNS records, in case you need them later
- Check whether your domain uses third-party email, such as Google Workspace
- Check whether any other services depend on your current DNS records
- Make sure the domain has already been added to your Truehost hosting account
- Avoid repeatedly changing nameservers while waiting for propagation, since this can reset the propagation process
Taking a few minutes on this checklist before making changes can save you a considerable amount of troubleshooting later.
A rushed nameserver change without confirming these details is one of the more common reasons website owners end up chasing down email or website issues right after a hosting switch.
How to Access Your Truehost Nameservers
This is the first practical step, and it is worth getting right before touching anything at your domain registrar.
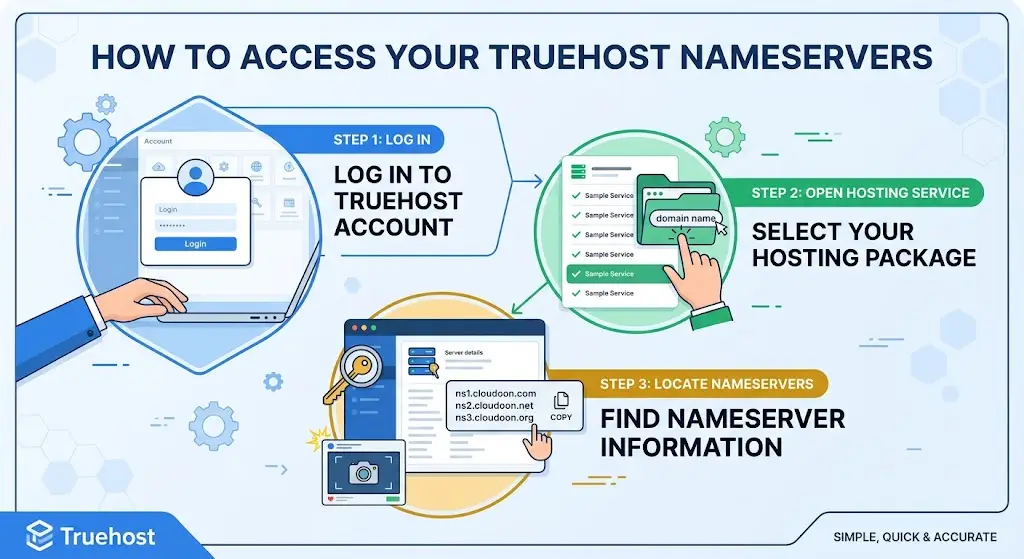
Step 1: Log In to Your Truehost Account
Open the Truehost client area and sign into your account using your usual login details.
Once logged in, locate your hosting services from your account dashboard.
Step 2: Open Your Hosting Service
Select the relevant hosting package tied to the domain you are working with, then find the hosting or service details section for that specific package.
This is usually just a click or two away from your main account dashboard once you know where to look.
Step 3: Locate Your Nameserver Information
Look for the section listing your account’s nameserver information.
The exact dashboard labels can shift over time as Truehost updates its client area, so if a label mentioned here does not match exactly what you see, look for anything referencing nameservers, DNS, or server information instead, since providers occasionally reorganize their dashboards without much notice.
Copy the nameservers exactly as displayed, without adding extra spaces or altering the text in any way.
As of recent updates, Truehost’s shared hosting nameservers are ns1.cloudoon.com, ns2.cloudoon.net and ns3.cloudoon.org, though it is worth confirming this directly in your own client area, since nameservers can differ depending on your specific hosting package, server location, or Truehost market.
VPS and dedicated server customers in particular should check their own account details rather than assuming shared hosting nameservers apply to their setup.
It helps to take a screenshot or copy the values into a plain text file the moment you find them, rather than retyping them from memory later.
Nameservers often follow a similar naming pattern to each other, which makes them surprisingly easy to mistype if you are working from recall instead of the original source.
How to Change Your Nameservers to Truehost
With your correct nameservers in hand, it is time to make the actual change at your domain registrar.
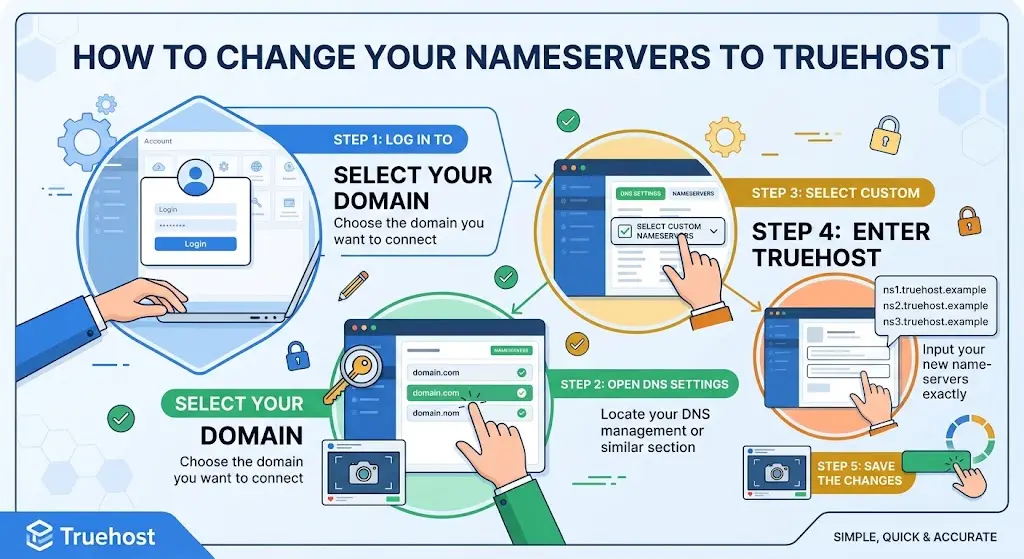
Step 1: Log In to Your Domain Registrar
Go to the company where your domain is actually registered.
This may or may not be Truehost, depending on where you originally purchased the domain.
Sign in, then locate the specific domain you want to connect to your Truehost hosting, since registrar accounts often list several domains at once.
Step 2: Open Your Domain’s DNS or Nameserver Settings
Depending on your registrar, this section could be labeled Nameservers, DNS Settings, DNS Management, Custom Nameservers, or Change Nameservers.
The exact wording differs quite a bit between registrars, so look around your domain’s settings page if the first label you try does not match what you see, since most registrars group DNS-related options fairly close together.
Step 3: Select Custom Nameservers
Choose the option to use custom nameservers, if your registrar requires this step explicitly. Only remove your old nameservers once you are actually ready to replace them with the new values.
Step 4: Enter Your Truehost Nameservers
Enter the nameservers supplied by Truehost exactly as they appeared in your client area.
Double-check the spelling carefully, and avoid adding unnecessary spaces or altering the values in any way, since even a small typo can prevent your domain from resolving correctly.
It is worth entering each nameserver into its own separate field one at a time, rather than pasting a whole block of text at once, since some registrar forms do not handle bulk pasting well and can accidentally merge or truncate values.
Step 5: Save the Changes
Confirm the change to apply it.
Some registrars display a warning message before applying the update, letting you know that DNS changes can take time to take effect.
This is normal and expected, and it does not mean anything has gone wrong with your change.
How to Check if Your Truehost Nameservers Are Working
Once you have made the change, there are several ways to confirm everything is working as expected.
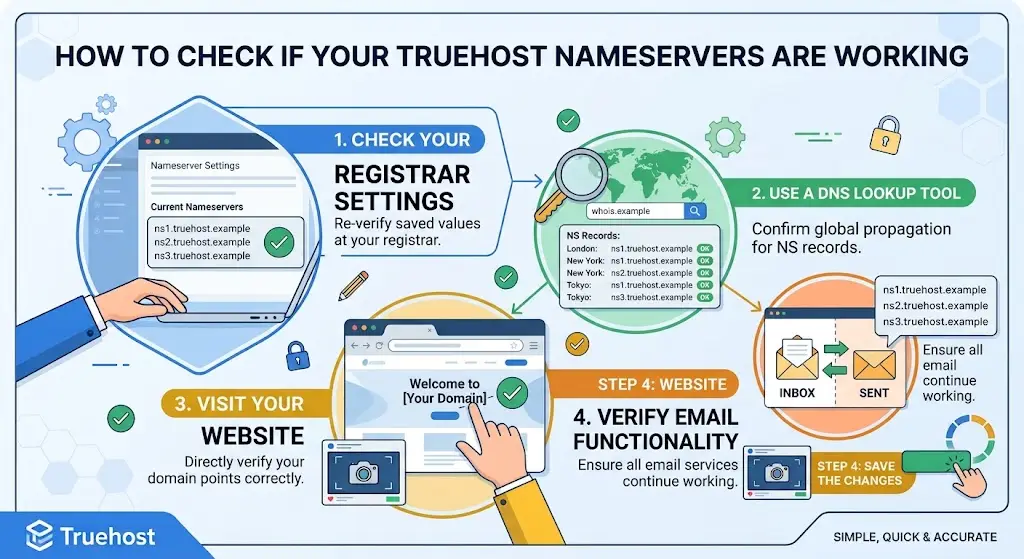
1) Check Through Your Domain Registrar
Reopen your domain’s nameserver settings at your registrar and confirm the new values were actually saved correctly.
2) Check Through a DNS Lookup Tool
Use a free online DNS lookup tool to search your domain’s NS records.
Confirm they correspond to the Truehost nameservers you entered, rather than showing your old provider’s values.
Many lookup tools also let you check from multiple global locations at once, which can give you a clearer picture of how far propagation has progressed.
3) Check Your Website
Open your domain directly in a browser and check whether the expected website loads.
This is the simplest and most direct way to confirm your domain is pointing correctly, and it is usually the first thing most people check without even thinking about it.
4) Check Email
If your domain uses email, whether through Truehost or a third-party provider, verify that email continues working correctly after the DNS change.
This is one of the easiest things to overlook, and one of the most disruptive if it breaks, since a missed message from a client or supplier can go unnoticed for days before anyone realizes something has gone wrong.
How to Change Back From Truehost Nameservers
Nameserver changes are never permanent, and reversing them follows a similarly straightforward process.
- Log in to your domain registrar
- Open your domain’s nameserver settings
- Replace the Truehost nameservers with your new provider’s nameservers
- Save the changes
- Wait for the DNS changes to propagate fully
Before making this switch, confirm that your new DNS provider already has the necessary records configured on their side.
Changing nameservers before the new provider is ready can cause the same kind of downtime you are trying to avoid.
Many people underestimate how much can depend on a correctly configured DNS zone before a switch happens.
Website records, email routing and any third-party integrations tied to your domain all need to exist at the new provider before you point your nameservers there, otherwise you risk a gap where none of these services are reachable at all.
Common Problems After Changing Truehost Nameservers
A handful of issues tend to come up after a nameserver change, and most have a fairly straightforward fix once you know where to look.
| Problem | What to Check |
|---|---|
| Website isn’t loading | Confirm the nameservers were entered correctly, the domain is added to your hosting account, DNS records are configured properly, and enough time has passed for propagation. |
| Website shows the wrong page | Check the domain’s A record, review the domain configuration inside your hosting account, and confirm the document root is set correctly. |
| Email stops working | Check your MX records, and confirm your email provider’s required DNS records exist in the new DNS zone. |
| HTTPS isn’t working | Confirm the domain has an SSL certificate installed, check that it resolves to the correct hosting environment, and allow time for SSL provisioning where applicable. |
| Nameservers still show the old provider | Confirm the change was actually saved at your registrar, check the domain’s current NS records through a lookup tool, and allow more time for the update to propagate. |
| Some visitors see the old site, others see the new one | This is usually a normal part of propagation, since different DNS servers around the world update at slightly different times. |
| Domain works on some devices but not others | This can point to local DNS caching. Clearing your device’s DNS cache or trying a different network often resolves it. |
If a problem persists well beyond the usual propagation window, it is worth double-checking every step in the change process rather than assuming the issue will simply resolve itself with more time.
In most cases, working back through the checklist from the very start of this guide will reveal exactly where something went off track.
DNS propagation timelines can also vary more than people expect, since your internet service provider, your device’s own DNS cache, and the specific registrar involved can all introduce small delays on top of the standard 24 to 48 hour window.
If everything was configured correctly and enough time has genuinely passed, the issue is more likely to be a caching delay than an actual configuration problem.
Need Truehost Nameservers for Your Website?
If you are looking to connect your domain to Truehost hosting in Kenya, you can explore Truehost’s hosting plans and get the specific nameserver details tied to your hosting service directly from your client area.
Current plans typically include cPanel access, domain management tools, SSL certificates, email hosting, general website hosting resources and customer support, giving you most of what you need to get a domain fully connected and running in one place.
For anyone setting up a new website or switching providers for the first time, having all of these tools available under one account tends to simplify the whole process considerably, rather than piecing together separate services from several different companies.
Explore Truehost Hosting Plans to find a package that fits your website, then follow the steps above to get your domain pointed correctly and running on Truehost hosting.