Domain SearchInstantly check and register your preferred domain name
 Web Hosting
 cPanel HostingHosting powered by cPanel (Most user friendly)
 KE Domains
 Reseller HostingStart your own hosting business without tech hustles
 Windows HostingOptimized for Windows-based applications and sites.
 Free Domain
 Affiliate ProgramEarn commissions by referring customers to our platforms
 Free HostingTest our SSD Hosting for free, for life (1GB storage)
 All DomainsBrowse and register domain extensions from around the world
 .Com Domain
 WhoisLook up domain ownership, expiry dates, and registrar information
 VPS Hosting
 Managed VPSNon techy? Opt for fully managed VPS server
 Dedicated ServersEnjoy unmatched power and control with your own physical server.
 SupportOur support guides cover everything you need to know about our services
Running n8n on a VPS is one of the smartest moves you can make for your automation stack.
n8n is an open-source automation platform used to connect apps, automate repetitive tasks, process APIs, sync data, and streamline daily operations.
But why is learning how to run n8n on a VPS important?
Well, running it on a VPS gives you full control over your workflow automations, your data, and the execution environment, since you host everything on your own server.
Plus, you pay a single flat monthly fee instead of watching per-task charges pile up as your automations grow and scale freely as your automation needs grow.
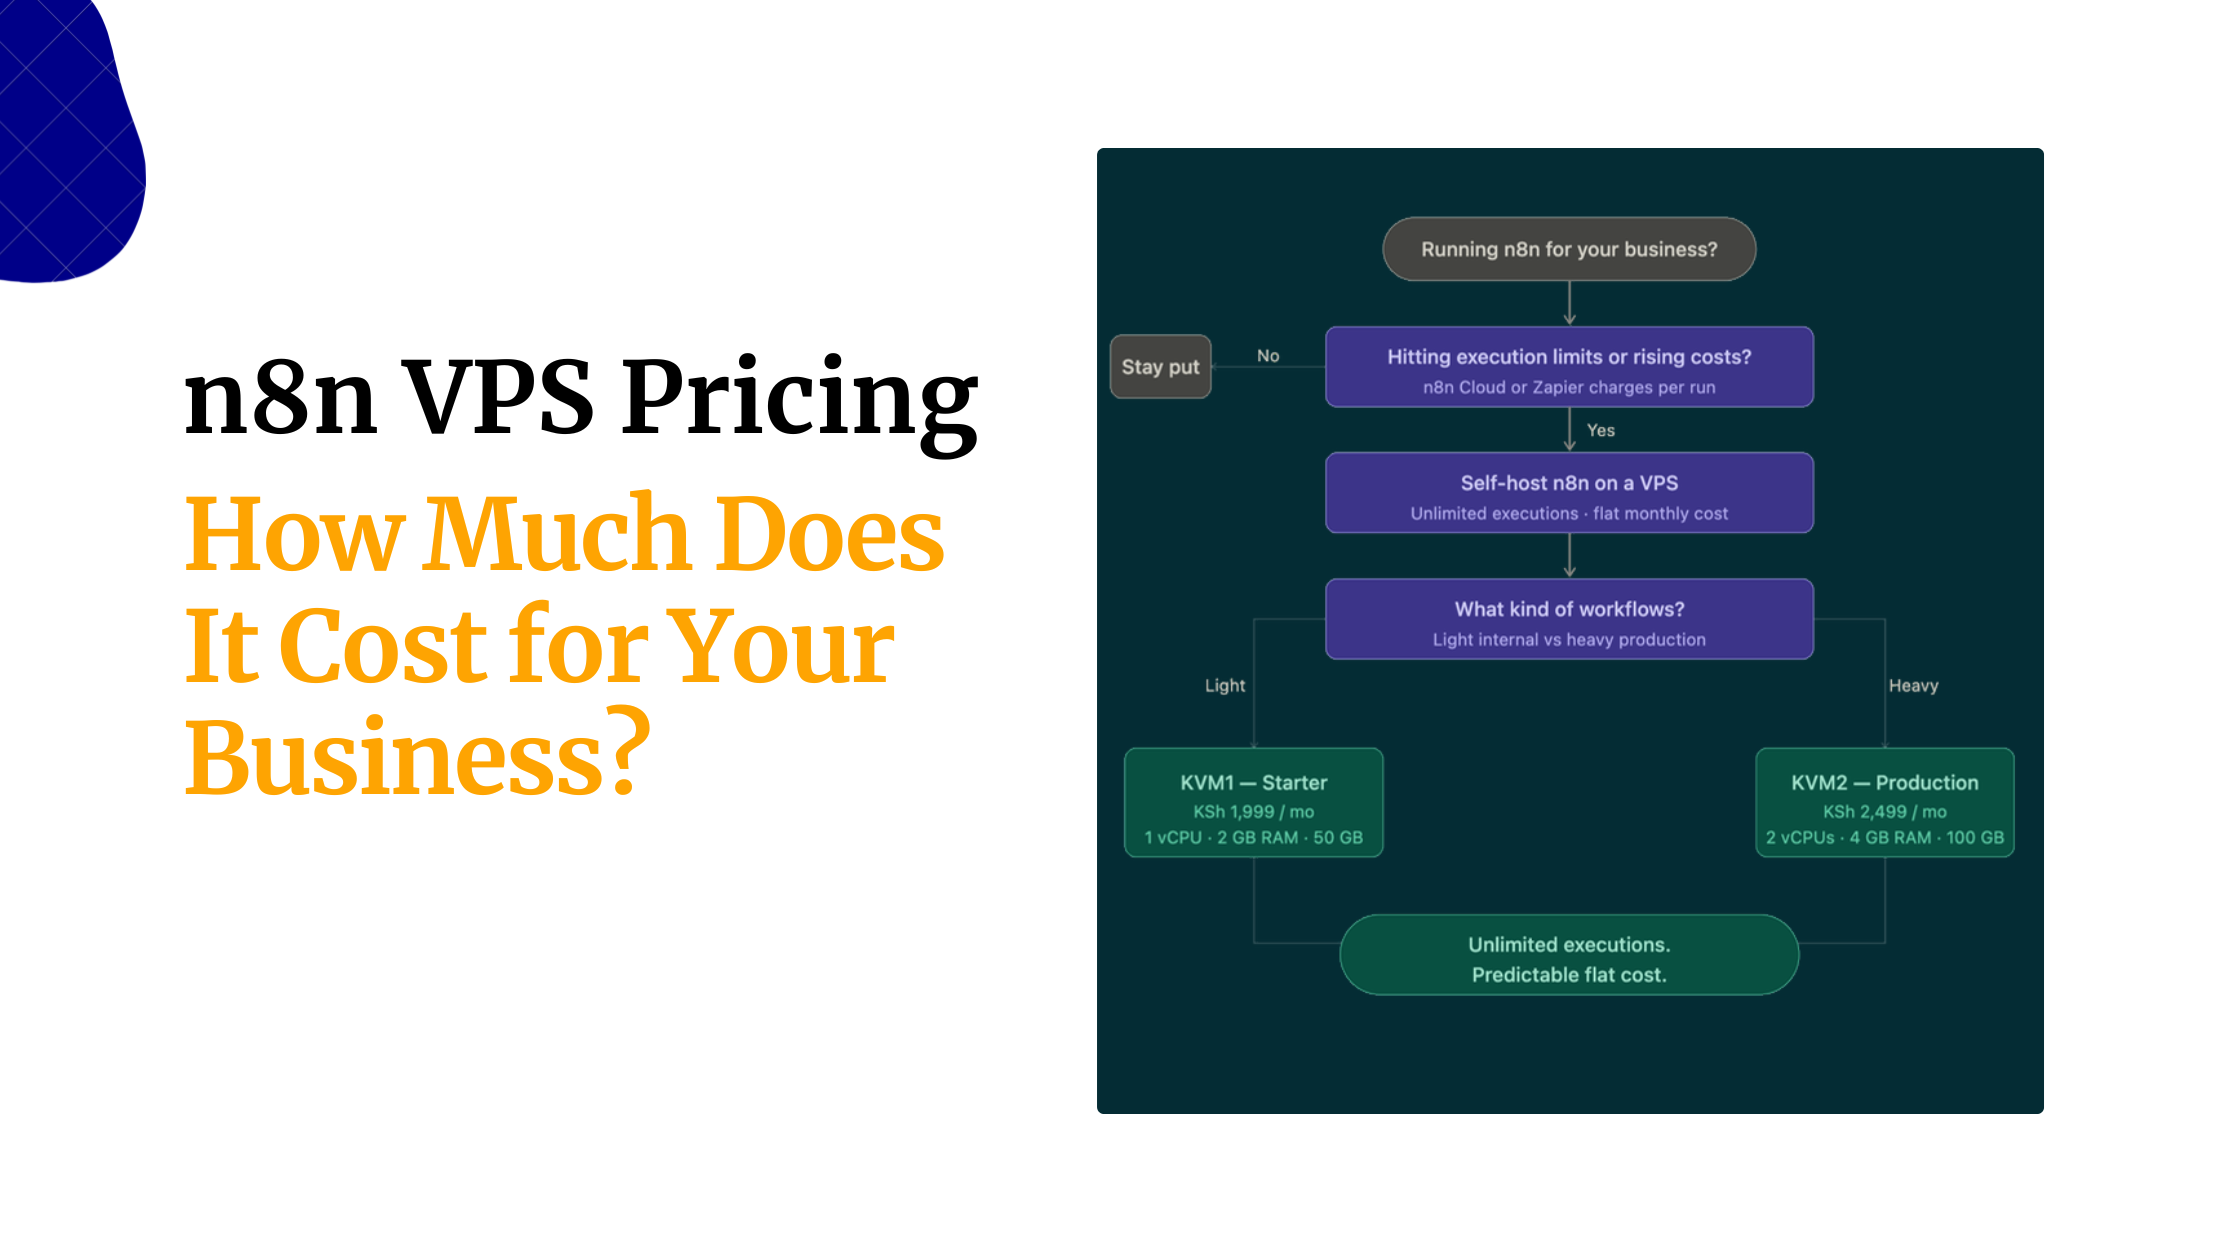
Now, if you own a business or are a freelancer or developer in Kenya who is tired of routing sensitive data through foreign SaaS platforms or who simply wants predictable billing in KSh, self-hosting is a genuinely practical move.
At Truehost we offer solid options here.
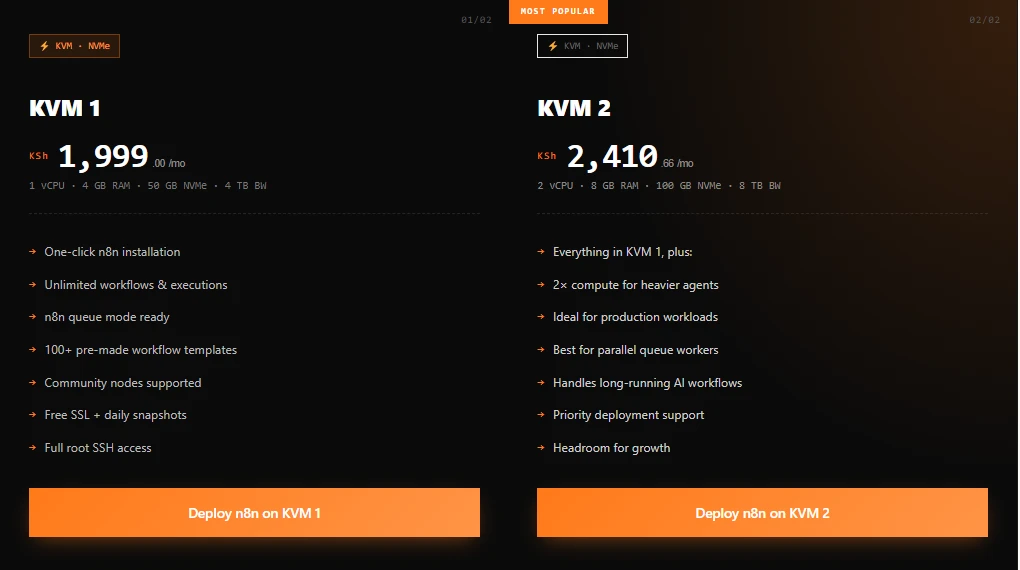
Our pre-configured n8n KVM plans begin at KSh 1,999/month with reliable uptime, scalable resources, and local-friendly payment options like M-PESA.
Before you begin, make sure you have:
- A VPS with Ubuntu 22.04 or 24.04 LTS
- Minimum 2GB RAM (4GB or more recommended for comfortable use)
- Root access
- A domain name (optional but recommended for production use)
- Basic comfort working in the terminal
Now, this is how to run n8n on a VPS.
Step-by-Step Guide on How to Run n8n on a VPS
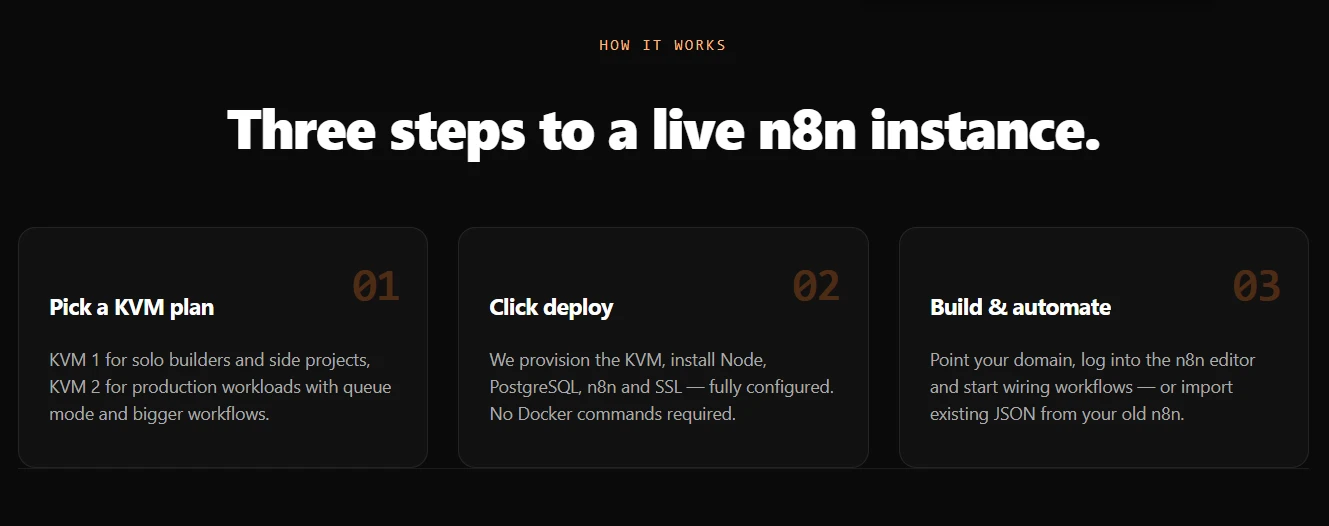
Step 1: Provision Your VPS
Head over to Truehost’s n8n hosting plans and pick the plan that fits your needs.
KVM 1 works well for solo builders and side projects, while KVM 2 is the better call if you’re running production workloads or expect high execution volumes.
During checkout, select Ubuntu 22.04 or 24.04 LTS as your operating system. Both are stable and widely supported and are what I’ve built this guide around.
Once the VPS is ready, you’ll receive your server login details, including:
- Server IP address
- Root username
- Root password
These details are usually sent to your email immediately after deployment.
Step 2: Connect to Your Server
With your VPS live, the next step is getting into it.
Open your terminal if you’re on Linux or macOS. On Windows, you can use either the built-in Command Prompt or a tool like PuTTY, Windows Terminal, or PowerShell.
Then run:
ssh root@your_server_ipReplace your_server_ip with the actual IP address from your Truehost welcome email.
For example, if your IP is 196.201.214.10, the command becomes:
ssh [email protected]The first time you connect, your terminal will show a prompt asking you to confirm the server’s fingerprint; just type “yes” and hit Enter.
You’ll then be asked for your root password, which is also in the welcome email.
Step 3: Update Your System and Install Docker and Docker Compose
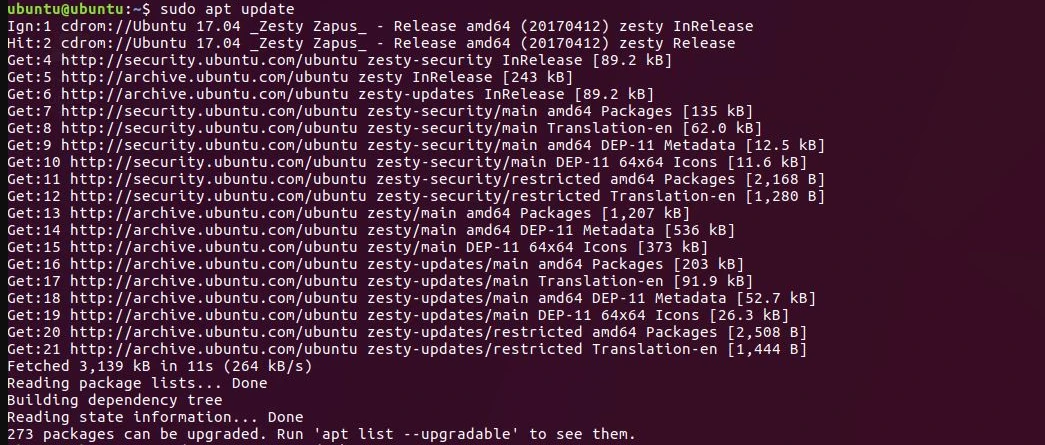
Before installing n8n, update your VPS packages to make sure everything is running on the latest versions.
This avoids dependency conflicts down the line:
sudo apt update && sudo apt upgrade -yThis might take a minute or two depending on how many packages need updating.
Once it’s done, install Docker using the official installation script. This is the recommended approach as it pulls the latest stable release directly from Docker:
curl -fsSL https://get.docker.com -o get-docker.sh

sudo sh get-docker.sh
After installation, confirm Docker is working correctly:
docker --versionYou should see something like Docker version 26.x.x, build xxxxxxx. If that shows up, Docker is good to go. Now enable it so it starts automatically whenever your server reboots:
sudo systemctl enable docker

sudo systemctl start docker
Next, check if Docker Compose is available:
docker-compose versionSome Ubuntu installations may not include Docker Compose by default. If it is missing, install it using:
sudo apt install docker-compose -y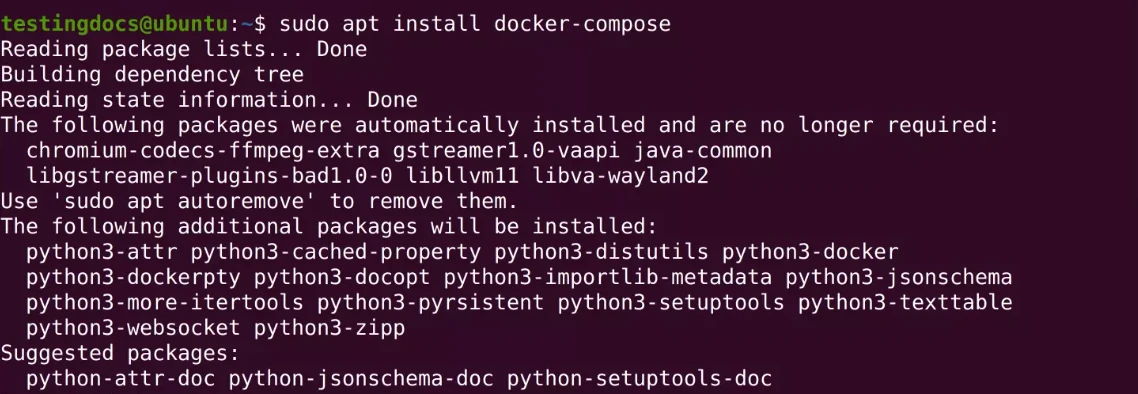
At this point, your VPS is ready to run Docker containers, including n8n.
Step 4: Set Up the n8n Directory
Before spinning up the n8n container, create a dedicated directory for it.
This directory is where n8n stores your workflows, credentials, and settings, so even if the container restarts or gets recreated, your data stays intact.
Run:
mkdir -p ~/.n8n

cd ~/.n8n
With that folder in place, you’re ready to configure and launch n8n.
Step 5: Create the Docker Compose File
Now it’s time to create the configuration file that will run your n8n container.
Still inside your ~/.n8n directory, open a new file called docker-compose.yml:
nano docker-compose.ymlPaste the following configuration into the file:
version: '3.8'

services:

  N8n:

    container_name: n8n

    image: n8nio/n8n:latest

    restart: always

    ports:

      - "5678:5678"

    environment:

      - N8N_BASIC_AUTH_ACTIVE=true

      - N8N_BASIC_AUTH_USER=admin

      - N8N_BASIC_AUTH_PASSWORD=YOUR_STRONG_PASSWORD

      - GENERIC_TIMEZONE=Africa/Nairobi

      - N8N_HOST=yourdomain.com

      - N8N_PROTOCOL=http

      - WEBHOOK_URL=http://yourdomain.com/

    volumes:

      - ~/.n8n:/home/node/.n8n

networks:

      - n8n-network

    depends_on:

      postgres:

        condition: service_healthy

networks:

  n8n-network:

    driver: bridge
Before saving the file, replace “YOUR_STRONG_PASSWORD” with a secure password that combines:
- Uppercase letters
- Lowercase letters
- Numbers
- Special characters
This helps protect your n8n dashboard from unauthorized access.
Next, the “GENERIC_TIMEZONE=Africa/Nairobi” line keeps your workflow timestamps accurate for the East Africa timezone.
When done, save and exit: press Ctrl + O, hit “Enter” to confirm, then Ctrl + X to close the editor.
Step 6: Launch n8n
With the configuration file ready, start the n8n container:
docker-compose up -dThe -d flag runs it in the background, so it keeps going even after you close your terminal session. Give it a few seconds, then confirm the container is running.
To confirm that everything is running correctly, check active containers using:
docker psYou should see n8n listed with a status of Up. If you want to view startup logs or troubleshoot issues later, run the following:
docker-compose logs -fIf you want a closer look at what’s happening inside, pull up the n8n logs:
docker logs -f n8nOnce everything looks clean, n8n is live on port 5678. You can access it at http://your_server_ip:5678 in your browser.
Step 7: Access Your n8n Instance
At this point, n8n is already running on your VPS. The next step is opening it in your browser.
Go to:
http://your_server_ip:5678
Replace your_server_ip with the actual IP address you received from your VPS setup email.
You’ll see the login page. Use the credentials you set in your Docker Compose file:
- Username:
admin - Password: the secure password you created earlier
Once you log in, the n8n dashboard opens, and you can start building workflows right away.
Step 8: Secure Your n8n Deployment
Running n8n on port 5678 is fine for testing, but for anything serious or production use, a bit more security work is needed.
1) Set up a firewall with UFW
Start with a firewall to control which ports are open on your server.
Install and configure the firewall:
apt install ufw -y

ufw allow OpenSSH

ufw allow 5678

ufw --force enable
Check the status with ufw status. This blocks unwanted traffic while keeping SSH and n8n accessible.
You can allow only the ports your server actually needs, then enable the firewall:
sudo ufw allow 22

sudo ufw allow 80

sudo ufw allow 443

sudo ufw enable
This setup allows SSH, HTTP, and HTTPS while blocking unnecessary access.
Port 22 keeps SSH access open, while 80 and 443 handle standard web traffic. Everything else gets blocked.
2) Point a domain to your VPS
Next, point a domain or subdomain to your VPS server. This makes your setup easier to access and more professional, for example:
automation.yourdomain.com
Log into your domain registrar and create an A record pointing your domain or subdomain (e.g., n8n.yourdomain.com) to your VPS IP address.
DNS changes can take anywhere from a few minutes to a couple of hours to propagate.
3) Set up Nginx as a reverse proxy
After that, set up Nginx as a reverse proxy.
This routes traffic from your domain to your n8n instance running on port 5678.
Install Nginx:
sudo apt install nginx -yCreate a config file for your n8n domain:
sudo nano /etc/nginx/sites-available/n8nPaste in the following, replacing n8n.yourdomain.com with your actual domain:
server {

    listen 80;

    server_name n8n.yourdomain.com;

   location / {

        proxy_pass http://127.0.0.1:5678;

        proxy_http_version 1.1;

        proxy_set_header Upgrade $http_upgrade;

        proxy_set_header Connection 'upgrade';

        proxy_set_header Host $host;

        proxy_set_header X-Real-IP $remote_addr;

        proxy_set_header X-Forwarded-For $proxy_add_x_forwarded_for;

        proxy_set_header X-Forwarded-Proto $scheme;

        proxy_cache_bypass $http_upgrade;

    }

}
Enable the config and restart Nginx:
sudo ln -s /etc/nginx/sites-available/n8n /etc/nginx/sites-enabled/

sudo nginx -t

sudo systemctl restart nginx
4) Add a free SSL certificate with Certbot
sudo apt install certbot python3-certbot-nginx -y

sudo certbot --nginx -d n8n.yourdomain.com
Certbot handles the certificate and automatically updates your Nginx config for HTTPS. It also sets up auto-renewal, so you won’t need to think about expiring certificates.
5) Update n8n Settings
Edit your docker-compose.yml file and change these lines:
- N8N_HOST=yourdomain.com

- N8N_PROTOCOL=https

- WEBHOOK_URL=https://yourdomain.com/
Then restart n8n:
docker-compose down

docker-compose up -d
Once done, your n8n instance is accessible at https://n8n.yourdomain.com, encrypted, clean, and production-ready.
6) Extra Security Tips
- Change your basic auth password regularly.
- Consider adding fail2ban for extra protection against brute force attacks.
- For larger setups, move to queue mode with Redis and PostgreSQL (Truehost’s n8n plans already include this).
Troubleshooting Common Issues
Even with a clean setup, things occasionally go sideways. Most of them are easy to fix once you know where to look.
1. Container not starting
Pull up the logs; they’ll usually tell you exactly what went wrong:
docker logs n8nLook for error messages near the bottom of the output. Missing environment variables and volume permission issues are the usual culprits.
2. Port already in use
If something else on your server is already occupying port 5678, Docker won’t be able to bind to it. Check what’s using it:
sudo netstat -tuln | grep 5678If there’s a conflict, either stop the competing process or change the port mapping in your docker-compose.yml (e.g., 5679:5678) and restart the container.
3. Permission errors on the n8n directory
If n8n can’t write to its data folder, fix the ownership:
sudo chown -R 1000:1000 ~/.n8n4. Memory issues or sluggish performance
n8n can get memory-hungry as your workflows grow, especially with parallel executions.
If your container keeps crashing or feels slow, it’s a sign your current plan is running low on resources. Upgrading on Truehost takes a few clicks from your client area, with no migration and no downtime.
5. Webhook not receiving data
First confirm your firewall allows port 443 (or 80). Then check that your domain is correctly pointing to the VPS and that Nginx is running:
sudo systemctl status nginxAlso verify the WEBHOOK_URL environment variable in your docker-compose.yml matches your actual domain.
6. Dashboard not loading
If the dashboard doesn’t load at all, confirm two things:
- The container is running (
docker ps) - The firewall allows the required ports (
22,80,443,5678if still exposed)
Maintaining and Scaling Your n8n Setup
1. Keeping n8n up to date
Keeping n8n running smoothly over time is mostly about updates and backups.
To update your setup, pull the latest image and restart the container:
docker-compose pull

docker-compose up -d
Docker will grab the newest n8n release while keeping your data intact in the ~/.n8n volume.
2. Backing up your data
Your workflows, credentials, and settings all live in ~/.n8n. Back it up regularly by copying it to a safe location:
cp -r ~/.n8n ~/n8n-backup-$(date +%Y%m%d)For automated backups, Truehost’s Cloudoon Vault handles off-site snapshot scheduling without any manual setup.
3. Scaling for larger workloads
As your automations grow, a few things are worth adding to your setup.
a. Switching from SQLite to PostgreSQL gives n8n a more robust database backend for high-volume workflows.
b. Enabling queue mode with Redis lets you run multiple worker processes in parallel, which dramatically improves throughput for concurrent executions.
c. Truehost’s KVM 2 plan is built with exactly this kind of setup in mind, the extra RAM and vCPU give queue workers the room they need.
4. Monitoring
Keep an eye on resource usage with:
docker stats n8nThis shows live CPU and memory consumption. If you’re consistently hitting the ceiling, that’s your cue to upgrade.
Ready to Run n8n on Your Own VPS?
You now have everything you need to get n8n running on a VPS, from provisioning and installation through to securing, maintaining, and scaling your setup.
It’s a direct path to automation infrastructure that you fully own, at a cost that stays predictable no matter how many workflows you run.
Truehost’s n8n hosting gives you a Kenya-optimized, pre-configured environment to hit the ground running, with local support available 24/7 via live chat or ticket.
If you run into anything during setup, the team is one message away. Share your server details and they’ll help you sort it out.