Domain SearchInstantly check and register your preferred domain name
 Web Hosting
 cPanel HostingHosting powered by cPanel (Most user friendly)
 KE Domains
 Reseller HostingStart your own hosting business without tech hustles
 Windows HostingOptimized for Windows-based applications and sites.
 Free Domain
 Affiliate ProgramEarn commissions by referring customers to our platforms
 Free HostingTest our SSD Hosting for free, for life (1GB storage)
 All DomainsBrowse and register domain extensions from around the world
 .Com Domain
 WhoisLook up domain ownership, expiry dates, and registrar information
 VPS Hosting
 Managed VPSNon techy? Opt for fully managed VPS server
 Dedicated ServersEnjoy unmatched power and control with your own physical server.
 SupportOur support guides cover everything you need to know about our services
So you’ve just bought your first VPS. The confirmation email landed in your inbox, and somewhere inside it are three pieces of information that probably look a little intimidating right now: an IP address, a username (root), and a password. Maybe a port number too.
If you’re wondering what you’re supposed to do with all of that, you’re not alone. Unlike shared hosting, where everything is managed through a visual dashboard like cPanel, a VPS gives you direct access to the server itself. That also means you’re responsible for managing it, installing software, configuring settings, securing the server, and running commands.
To access your VPS, you’ll use something called SSH (Secure Shell). SSH creates a secure connection between your computer and the server, allowing you to control the VPS remotely through a terminal window. It might look technical at first, especially if you’ve never used the command line before, but the process is actually much simpler than most beginners expect.
In this guide, you’ll learn exactly how to log in to your VPS as root, the main administrator account with full control over the server. We’ll walk through every step for both Windows and Mac/Linux users, and show you how to fix common login problems if they happen along the way. By the end, you’ll be connected to your VPS and ready to start managing it with confidence.
Before You Start: What You’ll Need
Before opening any application, make sure you have the following on hand, usually all sent in your VPS welcome email:
- Your VPS IP address: looks something like 192.168.1.100 or a longer IPv6 string
- Root username: this will literally be root
- Root password: set during VPS creation, or emailed to you by your provider
- SSH port: default is 22, though some providers use a different one
You’ll also need an SSH client, the application that actually makes the connection. Which one you need depends on your operating system.
Method 1: Windows (Using PuTTY)
Windows doesn’t come with a built-in SSH terminal the way Mac and Linux do (though newer versions of Windows 10 and 11 do have one hidden in PowerShell). For most Windows users, PuTTY is the go-to tool. It’s free, lightweight, and widely used.
Step 1: Install PuTTY
Head to the official PuTTY website at putty.org and download the Windows installer.
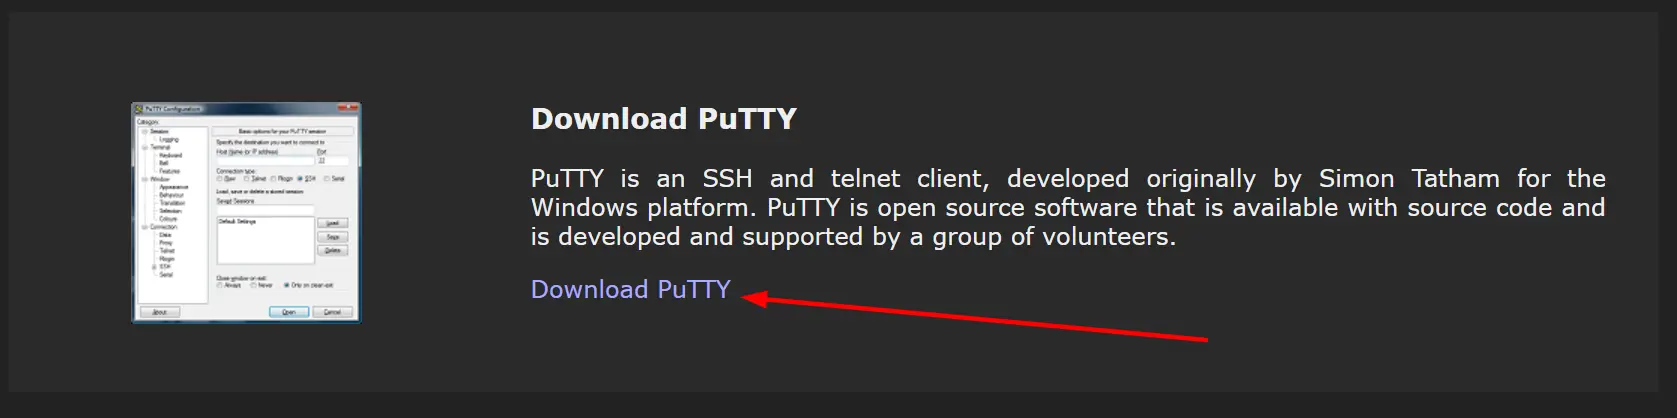
Run it, follow the prompts, and open PuTTY when it’s done. You’ll see a configuration window; this is where every SSH connection starts.
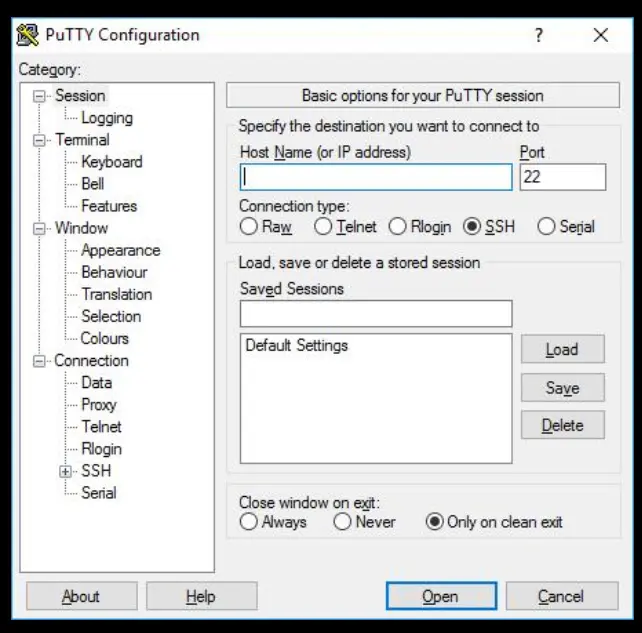
Step 2: Configure the Connection
In the PuTTY configuration window, you’ll see a few fields to fill in:
- Host Name (or IP address): Paste your VPS IP address here
- Port: Enter 22 (or whatever port your provider specified)
- Connection type: Make sure SSH is selected; it usually is by default
Once those are filled in, click Open to start the connection.
Step 3: Accept the Security Alert
The very first time you connect to any server, PuTTY will pop up a warning about the server’s host key, something like “The server’s host key is not cached.” This is completely normal. It’s just PuTTY saying it hasn’t seen this server before and wants to make sure you trust it.
Click Yes (or Accept, depending on your PuTTY version) to continue. PuTTY will remember this server’s fingerprint so that you won’t see this warning again for the same server.
Step 4: Log in as Root
A black terminal window will open, and you’ll be prompted to log in:
- Log in as: Type root and press Enter
- Password: Type your root password and press Enter
Here’s something that trips up almost every first-timer: PuTTY does not show your password as you type it. The cursor doesn’t move, nothing appears on screen; that’s intentional, not a bug. Just type your password carefully and press Enter.
Step 5: Password Paste Tip
If your root password is long or complex (and it should be), typing it manually is frustrating and error-prone. Here’s the trick:
- Copy your password using Ctrl + C
- Click inside the PuTTY terminal window
- Right-click, and this instantly pastes the clipboard content into PuTTY
- Press Enter
Note that Ctrl + V does not work for pasting in PuTTY. Right-click is the shortcut.
Step 6: Successful Login
If everything went correctly, you’ll be greeted with some server information and a prompt that looks like this:
root@server:~#
That # at the end is your signal that you’re logged in as root. You’re in. The server is yours to work with.
Method 2: Mac or Linux (Using Terminal)
If you’re on a Mac or Linux machine, you already have everything you need. No downloads, no installation, just the built-in Terminal app and one command.
Step 1: Open Terminal
- Mac: Go to Applications → Utilities → Terminal. Alternatively, press Cmd + Space, type “Terminal,” and hit Enter.
- Linux: Search for “Terminal” in your application menu, or use the keyboard shortcut Ctrl + Alt + T on most distributions.
Step 2: Connect via SSH
In the Terminal window, type the following command and press Enter:
ssh root@your-server-ip
Replace your-server-ip with your actual VPS IP address. For example:
If your provider uses a non-standard SSH port (anything other than 22), add the -p flag:
ssh [email protected] -p 2222
Step 3: Accept the Host Key
On your first connection to a new server, you’ll see a message like this:
The authenticity of the host ‘203.0.113.42’ can’t be established.
ECDSA key fingerprint is SHA256:xxxxxxxxxxxxxxxxxxxxxxxxxxx.
Are you sure you want to continue connecting (yes/no/[fingerprint])?
This is the same kind of trust check PuTTY does, just presented differently.
Type yes and press Enter. Your computer will add the server’s fingerprint to a file called known_hosts and won’t ask again.
Step 4: Enter Your Password
You’ll be prompted for a password:
[email protected]'s password:
Type your root password and press Enter. Just like PuTTY, nothing will appear on screen as you type. This is normal and intentional; it’s a security feature, not a malfunction.
Step 5: Confirm Login
A successful login looks like this:
root@hostname:~#
You’ll likely also see some welcome text from your server, the Linux distribution name, last login time, and maybe some system stats. Scroll past all that to find your prompt. Once you see root@hostname:~#, you’re connected and in full control.
Common Issues and How to Fix Them
Things don’t always go smoothly the first time. Here are the errors you’re most likely to encounter and what’s actually causing them.
a) Connection refused
This means the SSH service isn’t accepting connections on the port you tried. First, double-check that you’re using the right port number; your provider may use something other than 22.
If the port is correct, the SSH service on your server may not be running. Some VPS providers give you a web-based console (usually called a VNC console or recovery console) that lets you access the server directly without SSH; use that to restart the SSH service, or contact your provider’s support team.
b) Permission denied (password)
Your username or password is wrong. It sounds obvious, but it’s usually one of two things: either you’re mistyping the password, or the password your provider sent was for a different user account.
Try copying and pasting the password directly from the email instead of typing it. If that still doesn’t work, use your provider’s dashboard to reset the root password.
c) Permission denied (publickey)
This one is a bit more specific. It means the server is set up to only accept SSH key authentication, not password logins.
Some providers configure this by default as a security measure. Check your provider’s documentation to see if they set up an SSH key during provisioning. If so, you’ll need to provide that key file when connecting. On Mac/Linux: ssh -i /path/to/your-key root@your-server-ip. On PuTTY: go to Connection → SSH → Auth → Credentials and browse to your .ppk key file.
d) Wrong IP address
It sounds basic, but transposing two digits in an IP address is easy to do. Go back to your welcome email or provider dashboard and copy-paste the IP rather than typing it manually.
If you’ve just created the server, also wait a few minutes before trying; the server may show as active before it’s actually ready to accept connections.
e) “REMOTE HOST IDENTIFICATION HAS CHANGED” warning
This appears when the server’s fingerprint doesn’t match what your computer has stored. It happens most often when you rebuild or reinstall your VPS; the server gets a new fingerprint, but your computer still remembers the old one.
To fix it on Mac/Linux, run:
ssh-keygen -R your-server-ip
Then try connecting again. In PuTTY, you’ll see a different warning dialog with an option to update the stored key.
f) Root login disabled
Some providers, particularly those offering managed VPS plans, disable direct root login over SSH by default and instead create a different admin user.
Check your welcome email for the username they’ve set up for you. If you need root access and it’s disabled, your provider’s VNC console is usually the way in to re-enable it.
Getting Comfortable With VPS Root Access
Your first SSH login can feel intimidating, but it gets easier very quickly. After a few sessions, using the terminal starts to feel natural.
Root access gives you full control over your VPS, allowing you to install software, manage websites, configure security settings, and run your server exactly the way you want. The key is to start small and learn one command at a time.
As you gain confidence, you can move on to more advanced tasks like creating users, setting up SSH keys, and securing your server properly.
If you’re looking for an affordable beginner-friendly VPS to practice with, Truehost VPS Hosting offers scalable VPS plans with full root access, SSD storage, and both managed and unmanaged options.
SSH Root Login FAQs
How do I access my VPS root?
Connect via SSH using the command ssh root@your-server-ip on Mac/Linux, or use PuTTY on Windows. Enter your root password when prompted. Full steps are covered above.
What is the default username for a VPS?
On most Linux VPS setups, the default username is root. When Truehost provisions a VPS to you, your username will be root, and your login credentials will be sent to your email once the server is active. Other providers sometimes use different defaults.
DigitalOcean’s Ubuntu droplets use ubuntu, and Amazon EC2 instances typically use ec2-user or ec2-user depending on the distribution. If root isn’t working, the first place to check is your welcome email or your provider’s dashboard before assuming something is broken.
What if I forgot my root password?
Log in to your VPS provider’s control panel and look for a “Reset Password” or “Rescue Mode” option. Most providers let you reset the root password from their dashboard without needing SSH access. Some providers will email you a new temporary password.
Is logging in as root dangerous?
Not for initial setup, but it’s not ideal for ongoing use. Root has unrestricted access to everything on the server; a typo in a command can delete critical files with no confirmation. The standard practice is to log in as root once, create a regular user with sudo privileges, and then use that account for everyday tasks.
Can I log in as root if my provider sent me a different username?
Yes, in most cases. Log in with whatever username your provider gave you, then run sudo su – or sudo -i to switch to the root user (you’ll be prompted for your sudo password). Alternatively, use sudo before individual commands that need root privileges.
What’s the difference between su and sudo?
su (switch user) switches your entire session to another user, most commonly root. sudo (superuser do) runs a single command with elevated privileges without switching your full session. sudo is generally preferred because it’s more controlled, leaves an audit trail, and doesn’t require knowing the root password.
How do I know SSH is running on my VPS?
If you can connect, it’s running. If you can’t connect and suspect SSH may be stopped, use your provider’s web-based console (VNC/recovery console) to access the server directly and run systemctl status ssh (Debian/Ubuntu) or systemctl status sshd (CentOS/AlmaLinux) to check its status.
Can I use root SSH on Windows without PuTTY?
Yes. Windows 10 and Windows 11 both include OpenSSH, the same client used on Mac and Linux. Open PowerShell or Command Prompt and run ssh root@your-server-ip; it works the same way as on Mac or Linux. Windows Terminal (available from the Microsoft Store) is a nicer interface for this if you plan to use SSH regularly.