 Domain SearchInstantly check and register your preferred domain name
 Web Hosting
 cPanel HostingHosting powered by cPanel (Most user friendly)
 KE Domains
 Reseller HostingStart your own hosting business without tech hustles
 Windows HostingOptimized for Windows-based applications and sites.
 Free Domain
 Affiliate ProgramEarn commissions by referring customers to our platforms
 Free HostingTest our SSD Hosting for free, for life (1GB storage)
 Domain TransferMove your domain to us with zero downtime and full control
 All DomainsBrowse and register domain extensions from around the world
 .Com Domain
 WhoisLook up domain ownership, expiry dates, and registrar information
 VPS Hosting
 Managed VPSNon techy? Opt for fully managed VPS server
 Dedicated ServersEnjoy unmatched power and control with your own physical server.
 Website Builder
 Online Store BuilderLaunch a professional e-commerce store without writing code.
 Web Design ServiceGet a custom-designed website tailored to your brand and goals. From just KES 15,600
 BlogRead our guides on web hosting, online business, digital marketing, and more
 SupportOur support guides cover everything you need to know about our services
 ContactContact us via chat or email
You just spun up a fresh VPS. The terminal is open, the cursor is blinking, and you have not touched Docker yet.
You can run a few isolated apps on one server. Maybe you are tired of dependency conflicts breaking your last deploy. Either way, the plan is the same: get Docker installed, get it running safely, and avoid the mistakes that trip up most first-time setups.
This guide walks through the full install, the group permission step everyone forgets, and a firewall issue that catches even experienced admins off guard. By the end, your containers will actually be protected, not just installed.
What You Need Before You Start
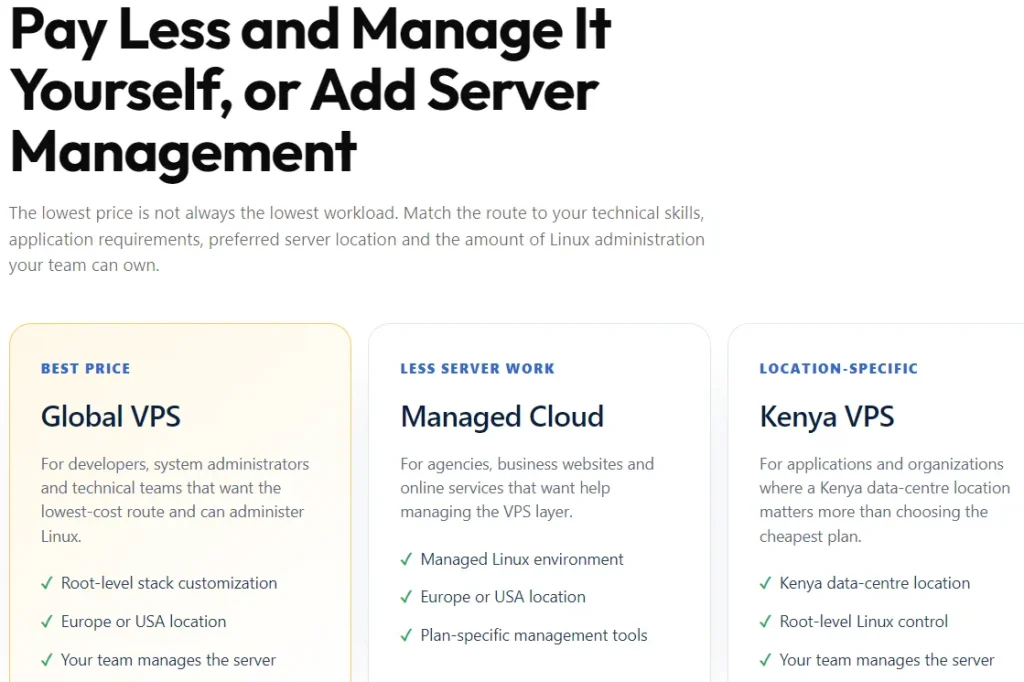
Before you touch a single command, check these boxes first.
- A VPS running Ubuntu 24.04 or Debian 12. Docker’s official repository supports both.
- At least 1GB of RAM. If you plan to run more than one container at a time, aim for 2GB or higher.
- SSH access with a non-root user that has
sudoprivileges already set up. - Basic comfort typing commands in a terminal. No prior Docker knowledge is assumed here.
One quick note before moving on. If your VPS runs on OpenVZ virtualization, Docker will not install correctly. Check with your hosting provider first if you are not sure which virtualization type your plan uses.
Step 1: Remove Conflicting Packages and Update Your VPS
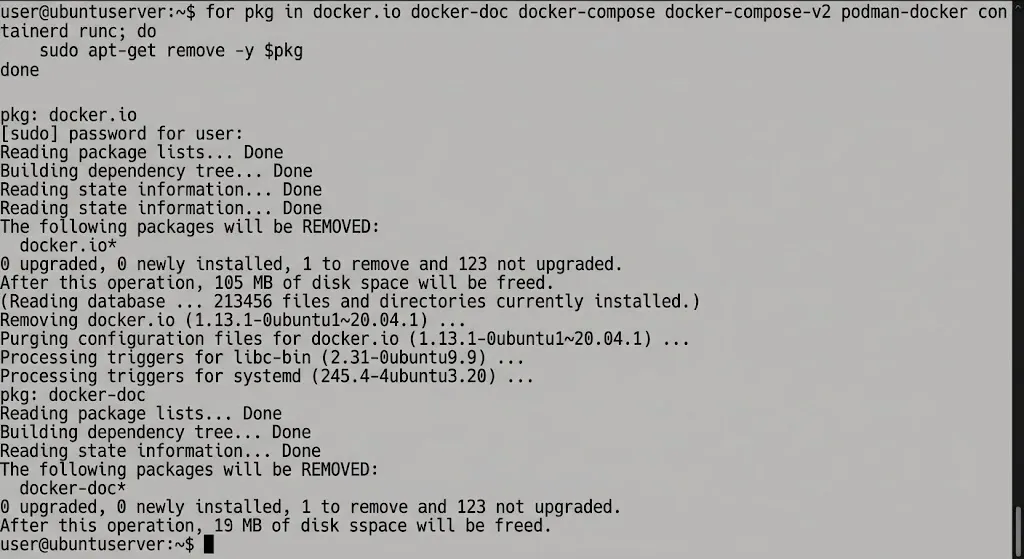
Fresh VPS images sometimes ship with an older Docker package already installed, or with leftover files from a previous attempt. Clearing these out first saves you from confusing errors later.
Run this to remove anything that might conflict with the official install:
for pkg in docker.io docker-doc docker-compose docker-compose-v2 podman-docker containerd runc; do

  sudo apt-get remove -y $pkg

done
Do not worry if some of these packages are not installed. The command simply skips them and moves on.
Next, update your package list and upgrade existing packages:
sudo apt-get update

sudo apt-get upgrade -y
Now install two small prerequisites that Docker’s installer relies on:
sudo apt-get install -y ca-certificates curlThis step feels small, yet skipping it is one of the most common reasons installs go sideways later. A clean starting point avoids version mismatches between old and new Docker files.
Step 2: Add the Official Docker Repository
Ubuntu and Debian both include a Docker package in their default repositories. Skip it anyway. That version usually lags several releases behind, and it can cause odd behavior with Docker Compose.
Instead, add Docker’s own repository so you always get the current stable release.
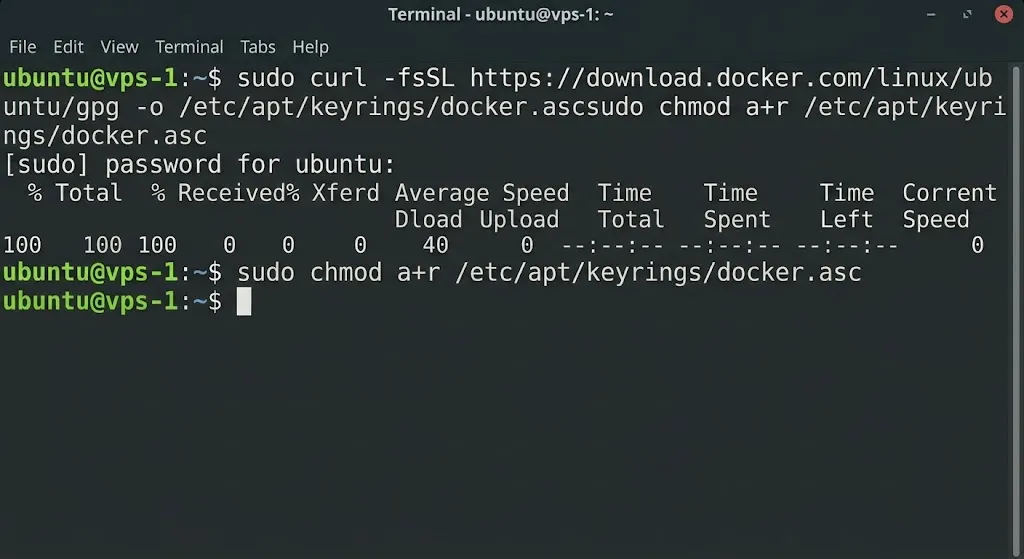
First, create a directory to hold the GPG key:
sudo install -m 0755 -d /etc/apt/keyringsDownload the key into that directory:
sudo curl -fsSL https://download.docker.com/linux/ubuntu/gpg -o /etc/apt/keyrings/docker.asc

sudo chmod a+r /etc/apt/keyrings/docker.asc
If you are running Debian instead of Ubuntu, swap the URL to https://download.docker.com/linux/debian/gpg.
Now add the repository itself:
echo \

  "deb [arch=$(dpkg --print-architecture) signed-by=/etc/apt/keyrings/docker.asc] https://download.docker.com/linux/ubuntu \

  $(. /etc/os-release && echo "$VERSION_CODENAME") stable" | \

  sudo tee /etc/apt/sources.list.d/docker.list > /dev/null
Refresh your package list so apt picks up the new source:
sudo apt-get updateIf this command runs without errors, your repository is set up correctly, and you are ready to install.
Step 3: Install Docker Engine and Docker Compose
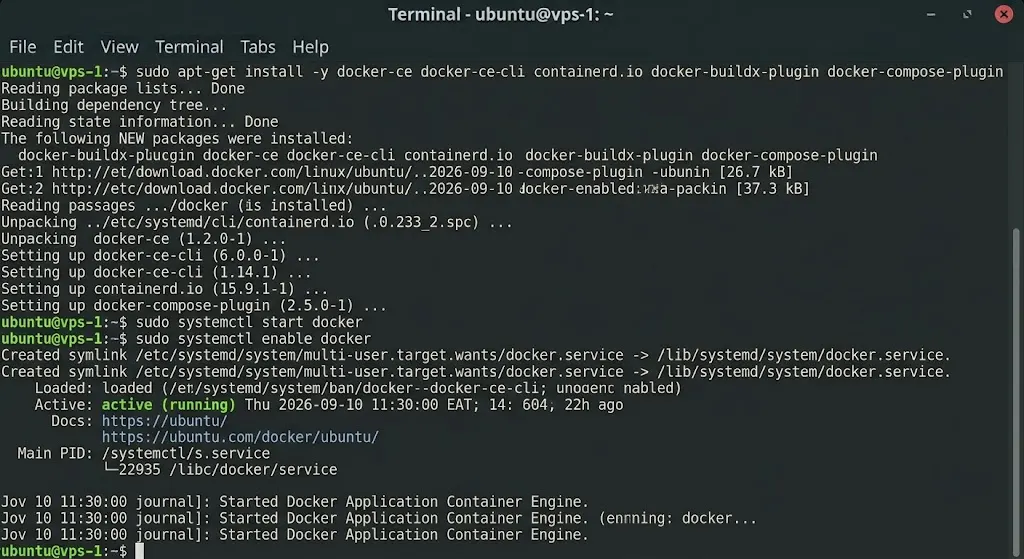
With the repository in place, installing Docker takes one command:
sudo apt-get install -y docker-ce docker-ce-cli containerd.io docker-buildx-plugin docker-compose-pluginThis pulls in the Docker engine, the command line tool, the container runtime, and the Compose plugin together. You get everything you need in a single pass.
Start the Docker service and set it to launch automatically on reboot:
sudo systemctl start docker

sudo systemctl enable docker
Confirm the service is active:
sudo systemctl status dockerYou should see “active (running)” in green. If you do, Docker is live on your VPS.
Now run a quick test to confirm everything actually works:
sudo docker run hello-worldDocker will pull a small test image and print a confirmation message. Seeing “Hello from Docker!” means your install is working end to end.
Last, check your versions:
docker version

docker compose version
Keep these version numbers handy. They come in useful later when troubleshooting compatibility issues with specific images.
Step 4: Run Docker Without Typing Sudo Every Time
Right now, every Docker command needs sudo in front of it. That gets old fast, and there is a cleaner way to work.
Add your user to the Docker group:
sudo usermod -aG docker $USERLog out and back in for the change to apply, or run this to load the new group into your current session:
newgrp dockerTest it by running a container without sudo:
docker run hello-worldHere is the tradeoff worth knowing about. Docker group membership grants access equal to root on the host. Anyone in that group can mount the host filesystem inside a container and read almost anything on the server.
On a personal VPS running your own projects, this risk is usually acceptable. On a shared server with multiple users, think twice before adding every account to the Docker group.
Step 5: Fix the Docker and UFW Firewall Gap
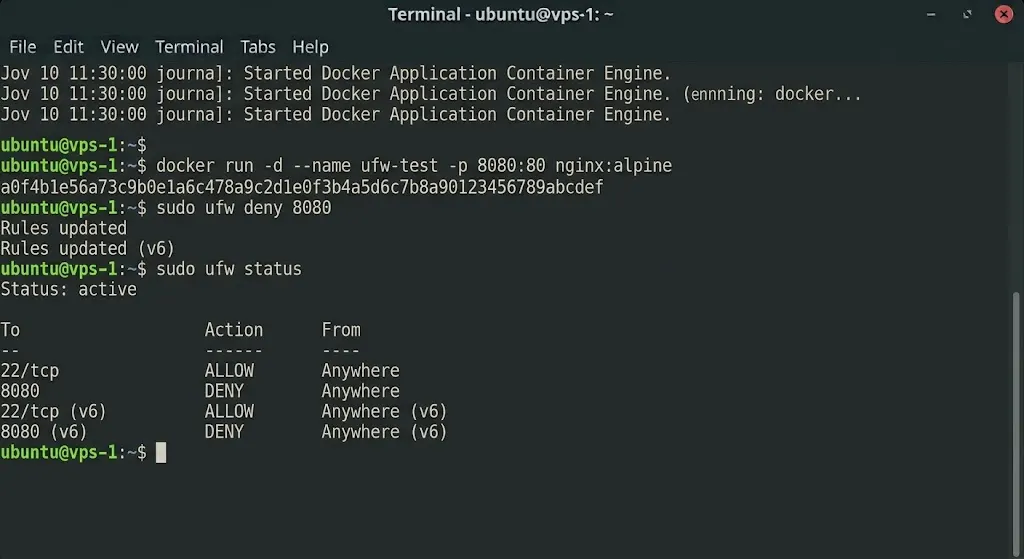
This is the step most tutorials skip, and it causes real problems once your setup goes live.
If you run Docker on a VPS with UFW enabled, published container ports stay open to the internet no matter what UFW says. Docker edits iptables rules directly, and UFW never sees those changes.
Here is how to see it happen. Start a test container and publish a port:
docker run -d --name ufw-test -p 8080:80 nginx:alpineNow try to block that port with UFW:
sudo ufw deny 8080

sudo ufw status
UFW will report the port as denied. Test it from another machine anyway, using a browser or a tool like curl against your VPS IP on port 8080. The page still loads. That confirms the gap.
Two fixes handle this cleanly.
Fix 1: Bind ports to localhost. If a service only needs to be reached by other containers or by a reverse proxy on the same VPS, bind it to 127.0.0.1 instead of exposing it publicly:
ports:
- "127.0.0.1:8080:80"This keeps the port off the public network interface entirely, so UFW rules become irrelevant for that service.
Fix 2: add rules to the DOCKER-USER chain. For ports that genuinely need to stay public, add rules directly to the chain Docker respects:
sudo iptables -I DOCKER-USER -p tcp --dport 8080 -j DROPThese rules survive container restarts, though not a full server reboot, unless you persist them with a tool like iptables-persistent.
After applying either fix, verify the result with a real external scan rather than trusting ufw status alone. A tool like nmap run from another machine will tell you what is actually reachable.
Step 6: Harden Docker for Production Use
Once Docker is running and your firewall gap is closed, a few more steps keep things tight before real traffic hits your containers.
Run containers as a non-root user whenever the image supports it:
services:

  app:

    image: myapp:latest

    user: "1000:1000"
This limits what an attacker can do if they manage to break out of the application layer inside the container.
Drop capabilities the container does not need, and block privilege escalation:
security_opt:

      - no-new-privileges:true

    cap_drop:

      - ALL
Only add back specific capabilities if a service genuinely requires them, such as binding to a low-numbered port.
For higher-risk workloads, consider rootless Docker. It runs the daemon itself under a regular user account instead of root, so a container escape does not hand over full control of the host.
The setup takes more effort and comes with tradeoffs, since privileged ports below 1024 need extra configuration to work.
Last, keep Docker Engine and your images updated on a set schedule. Security patches land often, and outdated images are a common entry point for attacks.
Troubleshooting Common Docker on VPS Issues
Even a careful install runs into a few recurring issues. Here is what causes them and how to fix each one.
I) Permission denied while trying to connect to the Docker daemon socket. This means your user is not part of the Docker group yet, or the group change has not taken effect. Add your user to the group and start a fresh SSH session, since group membership only loads at login:
sudo usermod -aG docker $USER

newgrp docker
II) Cannot connect to the Docker daemon. Is the Docker daemon running? Check whether the service is active:
systemctl status dockerIf it is stopped, start it with sudo systemctl start docker. If it refuses to start, run the daemon directly to see the real error in your terminal instead of guessing:
sudo dockerdWatch the output for clues like a storage driver failure or a port conflict.
III) GPG key or repository errors during apt update. This usually points to a leftover Docker source file from an earlier attempt, or incorrect permissions on the keyrings directory. Delete the old source file at /etc/apt/sources.list.d/docker.list and repeat Step 2 carefully.
IV) No space left on device, even though df -h shows free space. On smaller VPS disks, this is often inode exhaustion rather than actual disk space running out. Docker’s overlay2 storage layers create large numbers of small files, and each file uses one inode regardless of size. Check inode usage with:
df -i

If inodes are near full, clean up unused Docker data:

docker system prune -a
V) Containers are getting killed unexpectedly, or the whole VPS is slowing to a crawl. This is a strong sign of the Linux OOM killer stepping in on a low-memory plan. Check available memory:
free -mIf available memory sits below 500MB regularly, add swap space as a quick buffer, and consider limiting memory per container with the -m flag on future deployments.
VI) Firewall rules look correct, but a port is still reachable from outside. This is the Docker-UFW bypass covered in Step 5, not a misconfiguration on your part. Revisit that section and apply either the localhost binding fix or the DOCKER-USER chain rule.
FAQs
Do I need a VPS to run Docker?
No, Docker also runs on local machines and dedicated servers. A VPS is popular for Docker because it gives you a consistent Linux environment that you can access remotely at any time, without keeping a personal machine running around the clock.
What are the minimum VPS specs for Docker?
Docker itself runs fine on 512MB of RAM for light testing, though 1GB is a safer floor for anything beyond a single small container. If you plan to run several services together, 2GB or more avoids the memory pressure issues covered in the troubleshooting section.
Can I run multiple apps with Docker on one VPS?
Yes, and this is one of the main reasons people choose Docker for a VPS. Each app runs in its own isolated container, so one crashing does not take down the others sharing the same server.
How do I update Docker on a VPS without breaking containers?
Update the packages the same way you installed them, then restart the service:
sudo apt-get update

sudo apt-get upgrade docker-ce docker-ce-cli containerd.io

sudo systemctl restart docker
Running containers typically resume automatically once the daemon restarts, though it is good practice to check their status afterward with docker ps.
Get Started With Docker Containers on VPS
Your VPS now runs Docker, handles commands without sudo, and closes the firewall gap that catches so many setups off guard. That last part alone puts you ahead of a lot of tutorials that stop at “installation complete.”
From here, a natural next move is putting that setup to work. Try deploying a small Docker Compose stack with a reverse proxy in front of your first app.
It is a practical way to see the pieces from this guide, from port binding to non-root users, working together on a real deployment.