 Domain SearchInstantly check and register your preferred domain name
 Web Hosting
 cPanel HostingHosting powered by cPanel (Most user friendly)
 WordPress HostingHost your WordPress website with fast, secure, and affordable WordPress hosting in Kenya.
 KE Domains
 Reseller HostingStart your own hosting business without tech hustles
 Windows HostingOptimized for Windows-based applications and sites.
 Free Domain
 Affiliate ProgramEarn commissions by referring customers to our platforms
 Free HostingTest our SSD Hosting for free, for life (1GB storage)
 Domain TransferMove your domain to us with zero downtime and full control
 All DomainsBrowse and register domain extensions from around the world
 .Com Domain
 WhoisLook up domain ownership, expiry dates, and registrar information
 VPS Hosting
 Managed VPSNon techy? Opt for fully managed VPS server
 Dedicated ServersEnjoy unmatched power and control with your own physical server.
 Website Builder
 Online Store BuilderLaunch a professional e-commerce store without writing code.
 Web Design ServiceGet a custom-designed website tailored to your brand and goals. From just KES 15,600
 BlogRead our guides on web hosting, online business, digital marketing, and more
 SupportOur support guides cover everything you need to know about our services
 ContactContact us via chat or email
WordPress lets administrators remove individual user accounts directly from the dashboard, without needing any technical workarounds for the standard case.
The part that actually trips people up isn’t the deletion itself though.
It’s what happens to that user’s posts, pages, comments and other content once the account is gone.
Here’s the direct answer first, since that’s probably what brought you here.
How to delete a user account on WordPress comes down to heading to Users, then All Users, then Delete, then choosing what happens to their content before confirming.
The rest of this guide walks through that process properly, along with the content handling decision that counts for the most, and a few related situations worth knowing about.
What to Do Before Deleting a WordPress User
A short checklist before you actually hit delete:
- Confirm you’ve got the correct username or email, especially if several accounts have similar names
- Check their role, since deleting an editor is a different situation from deleting the site’s only administrator
- Review what posts or content they’ve actually published
- Decide who should own that content going forward if you want to keep it
- Back up the site if the account or its content is genuinely important to you
- Check whether any plugins depend on that specific user account, since some plugins tie settings or data to a particular user ID
Working through this list takes a few minutes and avoids the more common regrets people run into after deleting an account too quickly.
Deletion isn’t reversible from inside WordPress itself, so this short pause before acting is genuinely worth the time, especially on a site with more than a handful of registered users.
How to Delete a User Account on WordPress
Here’s the full step by step process.
1) Log in to Your WordPress Dashboard
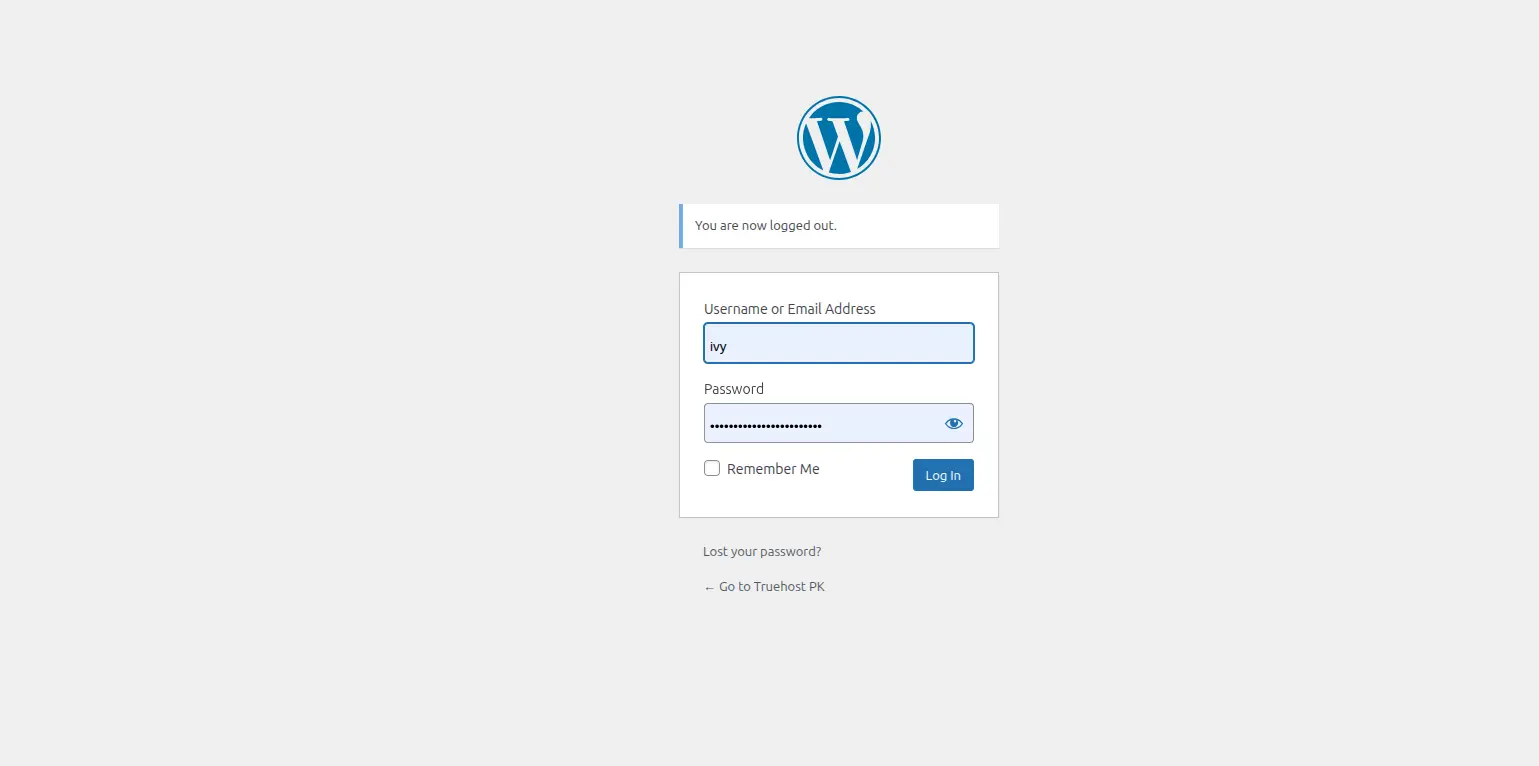
Access your site’s wp-admin login and sign in with an account that has administrator privileges.
Since deleting users isn’t something lower level roles can do.
If you’re not sure whether your account has this access, checking your own role under Users → All Users before attempting any of this saves a confusing dead end later.
2) Go to Users → All Users
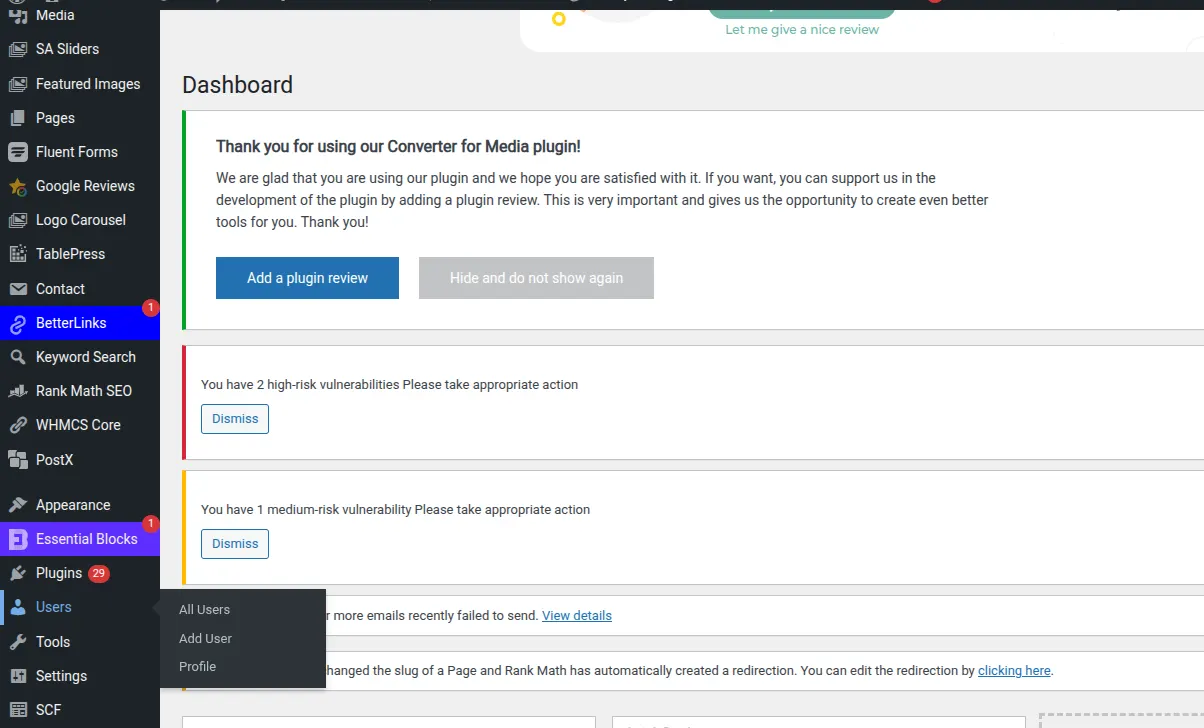
From the dashboard’s left hand menu, head to Users, then All Users. This brings up a list of every account currently registered on your site.
3) Find the User Account You Want to Remove
Locate the specific account from the list.
For sites with a lot of registered users, the search box at the top of this screen makes finding a specific account considerably faster than scrolling.
4) Click Delete
Hover over the user’s name and a Delete link appears among the row’s available actions. Clicking this takes you to a confirmation screen rather than deleting the account immediately.
5) Choose What to Do With the User’s Content
This is the step that counts for the most.
WordPress gives you two options here: delete all content belonging to that user, or attribute all of their content to another user account instead.
We’ll cover exactly what each option does in the next section, since it’s worth knowing properly before confirming anything.
6) Confirm the Deletion
Once you’ve made your choice, confirm the deletion.
The account is removed immediately, and the content handling you selected takes effect right away too.
It’s worth noting that the exact options presented can vary slightly depending on the user’s role and how much content is actually associated with their account.
A brand new account with no published content skips the content decision screen entirely, since there’s nothing to reassign.
What Happens to a User’s Content When You Delete Their Account?
WordPress gives you two main choices when deleting a user who has created content on the site.
| Option | What Happens |
|---|---|
| Delete all content | Posts and other content belonging to the user are permanently deleted |
| Attribute all content to another user | Content remains on the site but is reassigned to the account you choose |
This covers posts, pages, comments, media uploads, and any other content type created by that user, depending on what’s actually registered to their account.
Choosing to delete everything removes it permanently.
So it’s genuinely worth being certain before picking that option, particularly for an account with a lot of published work attached.
Attributing content to another user, meanwhile, keeps everything intact and simply changes who it’s credited to.
Visitors browsing the site generally won’t notice anything different beyond the byline changing on older posts.
Which makes this the safer default for most situations involving a departing team member.
It’s also worth thinking about comments the deleted user may have left on other people’s posts, not just content they authored themselves.
Depending on the exact setup, these can sometimes be handled separately from a user’s own published content.
So checking the confirmation screen carefully before proceeding helps avoid any surprises about what’s actually being removed versus reassigned.
How to Delete a WordPress User Without Losing Their Posts
This is one of the most common reasons people hesitate to delete an account in the first place, worried that doing so will wipe out published work along with it.
- Open Users → All Users.
- Click Delete on the account you want to remove.
- On the confirmation screen, select “Attribute all content to.”
- Choose the replacement user from the dropdown.
- Confirm the deletion.
This approach is particularly useful when removing an employee, writer, contributor, or former administrator who’s leaving, while still wanting to keep their published articles, pages or comments visible on the site.
The content stays exactly where it was, just reassigned to an account that’s actually still active.
How to Delete Multiple Users in WordPress
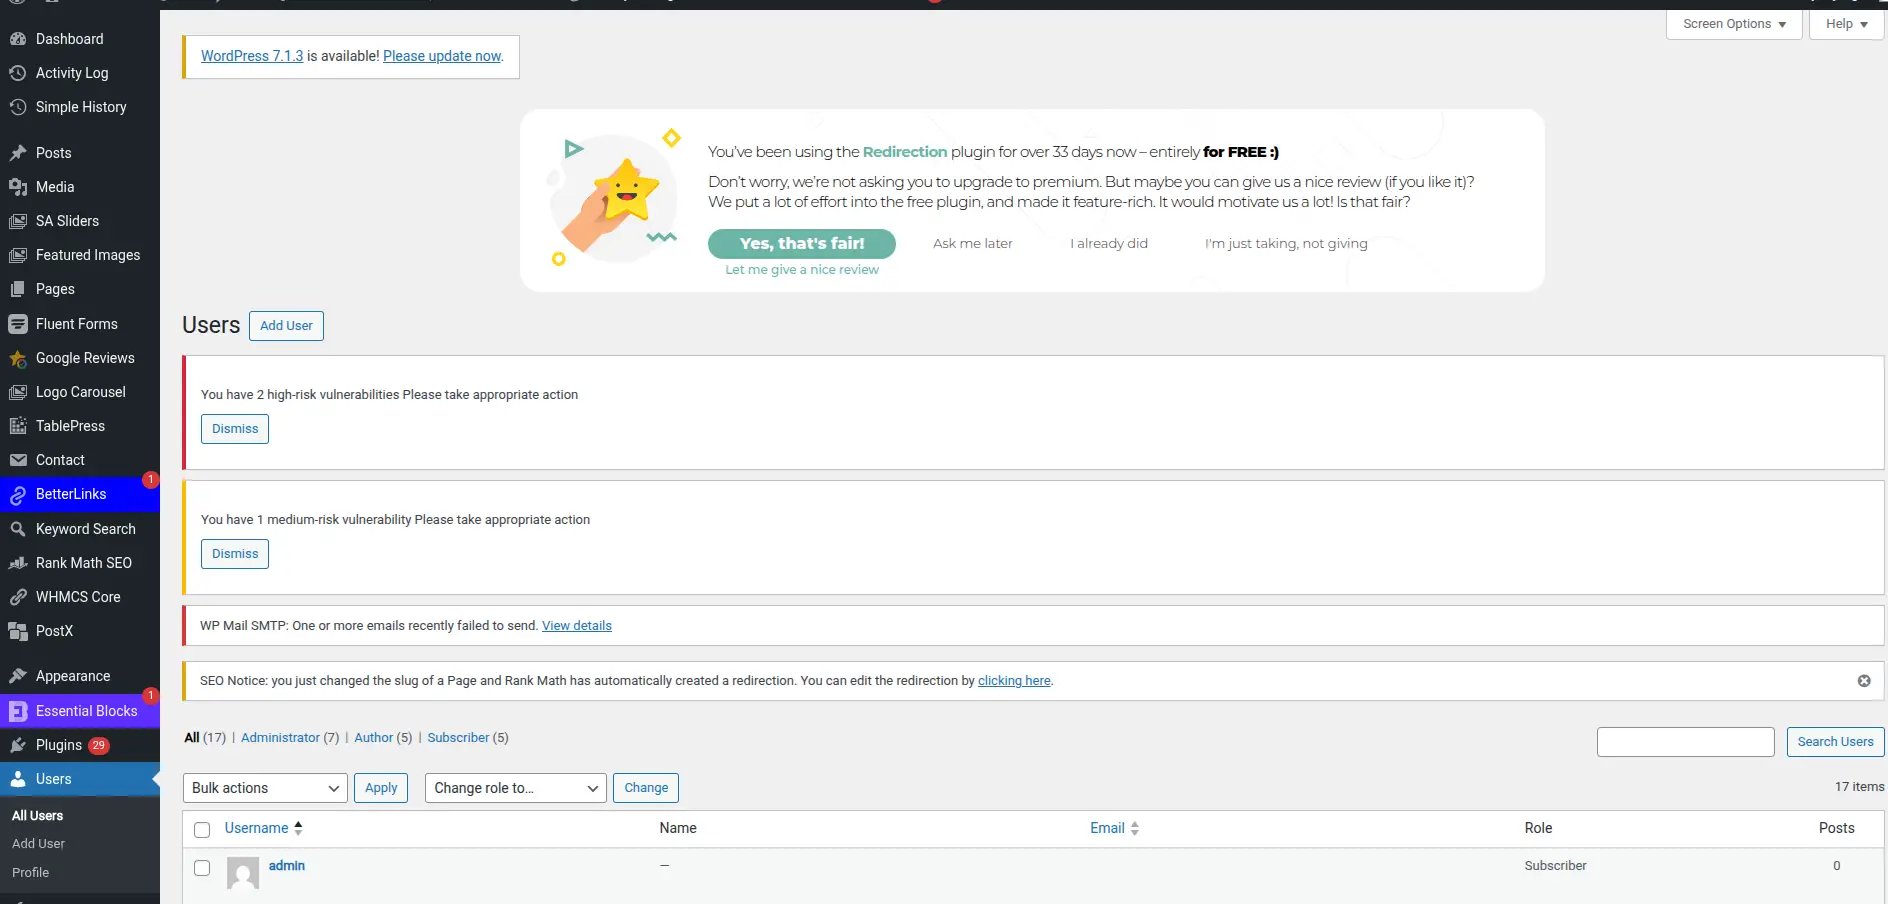
If you need to remove several accounts at once, WordPress’s bulk actions handle this without needing to repeat the process individually for each one.
From the Users → All Users screen, select the checkbox next to each account you want to remove.
Choose Delete from the Bulk actions dropdown menu near the top of the list, then click Apply.
WordPress will prompt you for content attribution, letting you either delete all content across the selected accounts or reassign it to a single chosen user.
It’s worth double checking the selected accounts carefully before confirming a bulk deletion, since there’s no easy way to selectively undo part of a bulk action once it’s been applied.
A quick second look at the checked boxes before clicking Apply is a small habit that prevents a genuinely frustrating mistake.
Bulk content attribution works a little differently from single deletions too.
Since WordPress asks you to pick one replacement account to receive all the reassigned content from every selected user, rather than letting you assign different users to different accounts in the same action.
For situations needing more granular control, deleting accounts individually rather than in bulk gives you that flexibility, even though it takes a bit longer.
Can You Delete the WordPress Administrator Account?
You generally shouldn’t remove the only administrator account on a site, since doing so would leave nobody with full access to manage it properly.
If you need to remove an existing administrator account.
Whether that’s a departing team member or simply cleaning up old accounts, the safer process looks like this: first, create a new administrator account, or verify that another one already exists and is actively usable.
Next, transfer any relevant content from the old account to the new one, or to whichever account should own it going forward.
Only once that’s done should you actually remove the old administrator account.
Skipping ahead and deleting the only administrator account first, before setting up a replacement, can leave a site in a genuinely difficult position to recover from.
If this does happen and nobody has administrator access anymore, recovery usually means working with your hosting provider or editing the database directly to restore access.
Which is considerably more hassle than simply following the correct order in the first place.
What If You Don’t See the Delete Option?
A handful of common reasons explain why the Delete option might not appear where you expect it.
The account you’re logged in as may not have sufficient permissions, since only administrators can delete users on a standard WordPress install.
You might be logged in as a role without user management access at all, such as an editor or author account, neither of which can manage other users.
On WordPress Multisite installations, user management rules work differently, with network level permissions controlling deletion rather than individual site administrators.
A security or user management plugin installed on the site may have changed how the dashboard looks or restricted certain actions.
And finally, the account in question might be the site’s only administrator, or have some other special restriction attached, both of which WordPress protects against deleting by default.
Working through this list usually explains why the option isn’t showing, and points toward exactly what needs to change before it will.
How to Delete a WordPress User From the Database
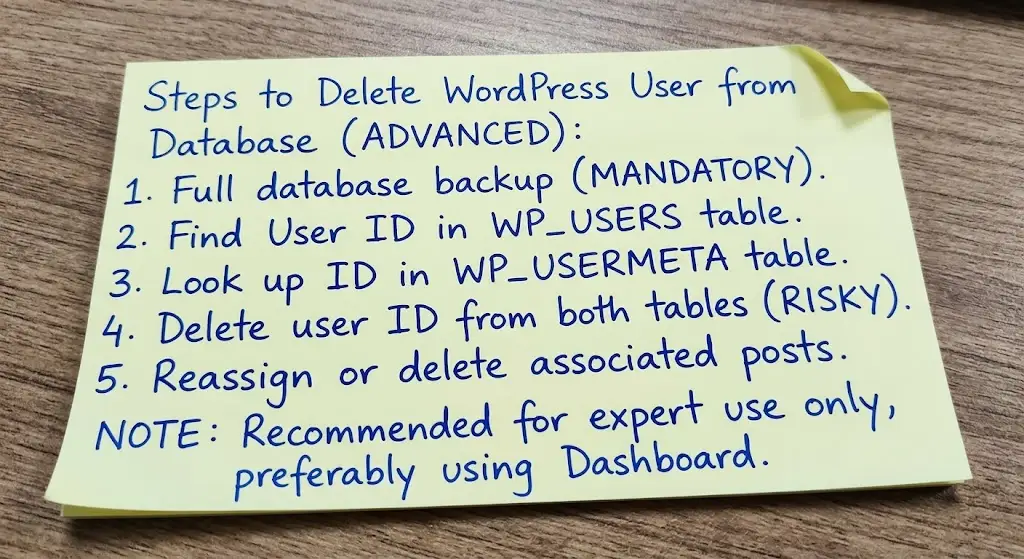
This is worth covering as an advanced option, not as the recommended method for most people.
WordPress users are stored directly in the site’s database, specifically in tables that hold user accounts and their associated metadata.
Deleting a user at the database level, rather than through the WordPress dashboard, can affect related user data in ways that aren’t always obvious.
Since posts, comments and other content reference user accounts by their ID behind the scenes.
If you do need to go this route for a specific technical reason, take a full backup of your database before making any changes.
Since a mistake here is considerably harder to undo than a standard dashboard deletion.
For the vast majority of situations, deleting a user through WordPress’s own interface is the safer and genuinely preferable approach.
Since it handles the related content properly without requiring any manual database work at all.
Database level deletion is really only worth considering for edge cases where the WordPress dashboard itself is inaccessible.
Or where a specific technical issue genuinely requires working directly with the underlying tables.
For everyday account management, there’s rarely a good reason to reach for this method when the dashboard option exists and handles everything more safely.
How to Remove a User Without Deleting Their Account
Deleting an account isn’t always the right move.
Sometimes what you actually need is to change what a user can access, rather than removing them from the site entirely.
Changing their role is often enough on its own, moving someone from an administrator or editor down to a subscriber.
For instance, strips away their access without touching their account or content at all.
Removing administrator privileges specifically works the same way for anyone who no longer needs that level of control but should still have some access to the site.
A security plugin can also block access for a specific account without deleting it, useful if you want to pause someone’s access temporarily rather than making a permanent decision.
And for accounts that simply don’t need active deletion right now, deactivating or otherwise managing them through these methods keeps your options open without committing to something you might want to reverse later.
Manage Your WordPress Site With WordPress Hosting
Managing users is just one part of running a WordPress site day to day, and having hosting built around WordPress specifically makes the rest of that management noticeably easier.
Truehost’s WordPress hosting is built with this kind of everyday site management in mind, alongside a hosting environment suited to WordPress’s own requirements.
Depending on the specific plan, this can include features like automatic backups, security tools, and performance optimizations that keep a WordPress site running smoothly as it grows.
Which counts for just as much as knowing how to manage individual settings like user accounts.
If you’re looking for hosting that’s genuinely built around WordPress rather than treating it as just another website type, Truehost’s WordPress hosting plans are worth exploring as a solid foundation for everything else covered in this guide.