Domain SearchInstantly check and register your preferred domain name
 Web Hosting
 cPanel HostingHosting powered by cPanel (Most user friendly)
 KE Domains
 Reseller HostingStart your own hosting business without tech hustles
 Windows HostingOptimized for Windows-based applications and sites.
 Free Domain
 Affiliate ProgramEarn commissions by referring customers to our platforms
 Free HostingTest our SSD Hosting for free, for life (1GB storage)
 All DomainsBrowse and register domain extensions from around the world
 .Com Domain
 WhoisLook up domain ownership, expiry dates, and registrar information
 VPS Hosting
 Managed VPSNon techy? Opt for fully managed VPS server
 Dedicated ServersEnjoy unmatched power and control with your own physical server.
 SupportOur support guides cover everything you need to know about our services
Once you register your new domain through your registrar, it doesn’t end there. You have to set up DNS for the domain to go live. And that brings us to this guide, showing you step by step how to set up DNS.
So, what is this “DNS”?
DNS, short for Domain Name System, works like a translator for the internet.
When someone types your domain name (like yourbusiness.co.ke), DNS directs them to the correct server where your website is stored. Without it, your domain and hosting exist… but they don’t “talk” to each other.
And DNS setup is now the step that actually connects your domain name to your hosting server.
It’s what makes your website accessible to visitors, allows your emails to function properly, and ensures everything works as expected once your domain is registered.
If you’re building a business, blog, or online store, getting this right helps you show up online reliably and builds trust with your audience.
In this guide, I’ll help you learn exactly how DNS works, how it connects to your website, and the step-by-step process to set it up correctly using a simple approach.
Soon, you’ll have your website and email up and running smoothly.
The Basics of DNS
Before getting into how to set up DNS, it’d be useful to know the main parts of DNS first. These components are what make your domain and website work together effortlessly.
- A Record: This connects your domain to the exact server where your website lives. It’s like giving your domain the address of your website’s home. Without it, the browser won’t know where to find your site.
- CNAME Record: This links one domain or subdomain to another domain. It’s helpful if you want multiple names to lead to the same website or service without managing separate servers for each.
- MX Record: If you plan to use email with your domain, MX records direct messages to the correct email server. This ensures emails sent to your domain reach your inbox.
- TXT Record: These are used for verification and security purposes. For example, they can confirm ownership of your domain for Google services or help prevent email spoofing with SPF records.
Knowing these four types of records makes the setup process much smoother and gives you confidence in managing your domain.
They are the building blocks that make your website and emails function properly.
Setting Up DNS
To set up DNS, let’s start with accessing the right tools in your domain account.
Step 1: Log In and Find the DNS Management Dashboard
Go to your domain registrar’s website and log into your account. Most registrars have a client area or a control panel similar to cPanel.
Once you’re logged in:
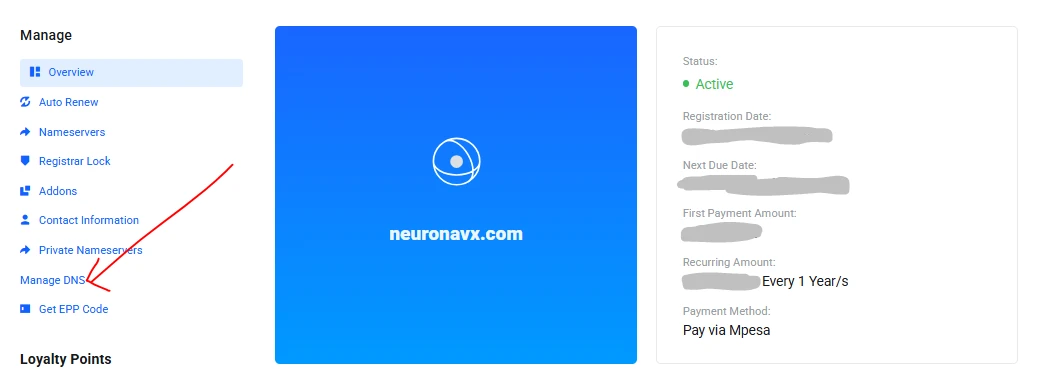
- Click on My Domains.
- Locate the domain you want to set up and select Manage.
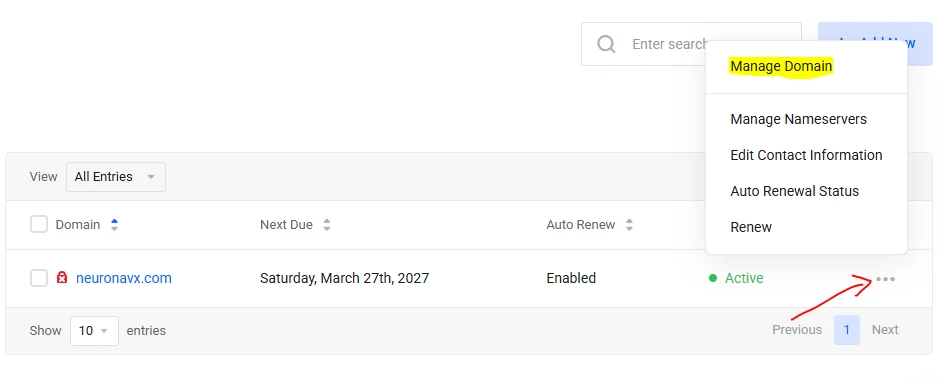
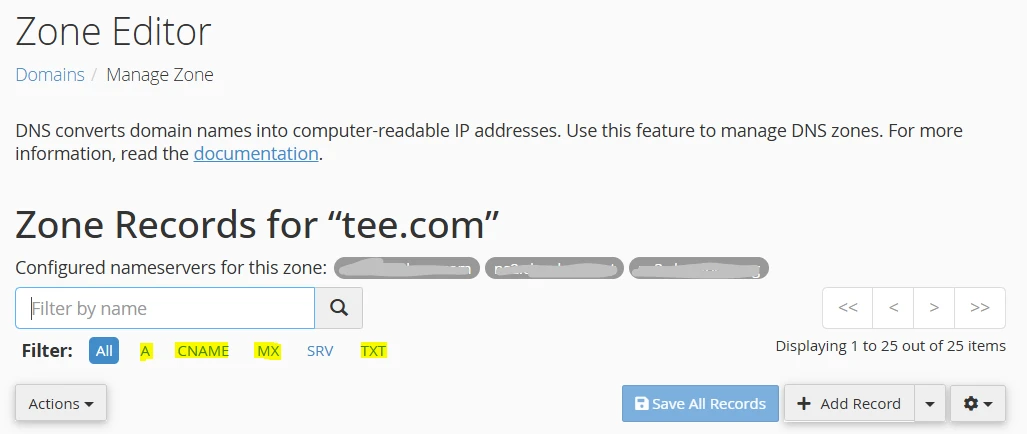
- Look for DNS Management or Zone Editor, this is where you’ll make all the changes needed to connect your domain to your website and email.
This dashboard is where the technical part of DNS happens, but I have organized it to guide you step by step, even if it’s your first time.
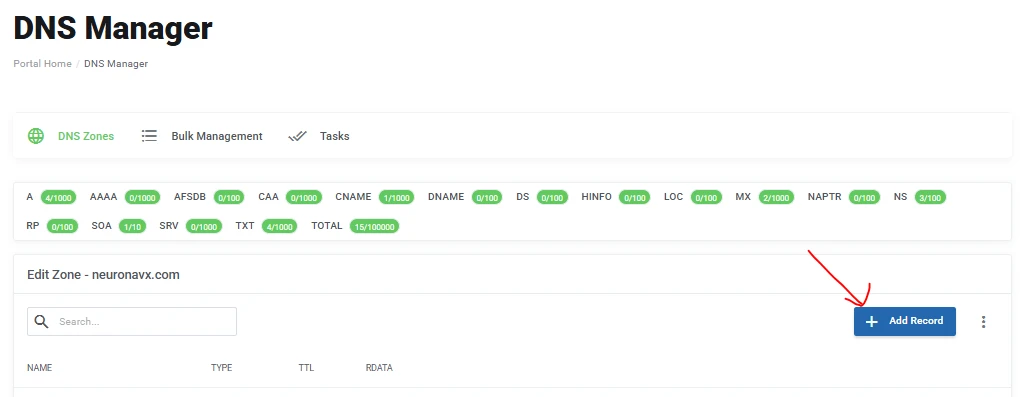
Step 2: Add the Essential DNS Records
Now let’s get practical. Inside your DNS dashboard, you’ll usually see an option like “Add Record”. When you click it, a form appears with fields such as Type, Name/Host, Value/Points To, and TTL.
Here’s exactly how to fill each one for the key records:
a) A Record
This is the one that connects your domain to your website.
When adding it, you’ll fill in:
- Type: Select A
- Name/Host: Enter @ (this represents your main domain, in my case,
neuronavx.com) - Value / Points To: Paste your server’s IP address (something like
192.0.2.1). You’ll get this from your hosting provider - TTL: Leave the default (e.g., 300 or 3600 seconds)
After saving, your main domain will start pointing to your hosting server.
If you also want your site to work without “www,” this single record usually handles it.
b) CNAME Record
This ensures that “www” (and other subdomains, if needed) lead to your main domain.
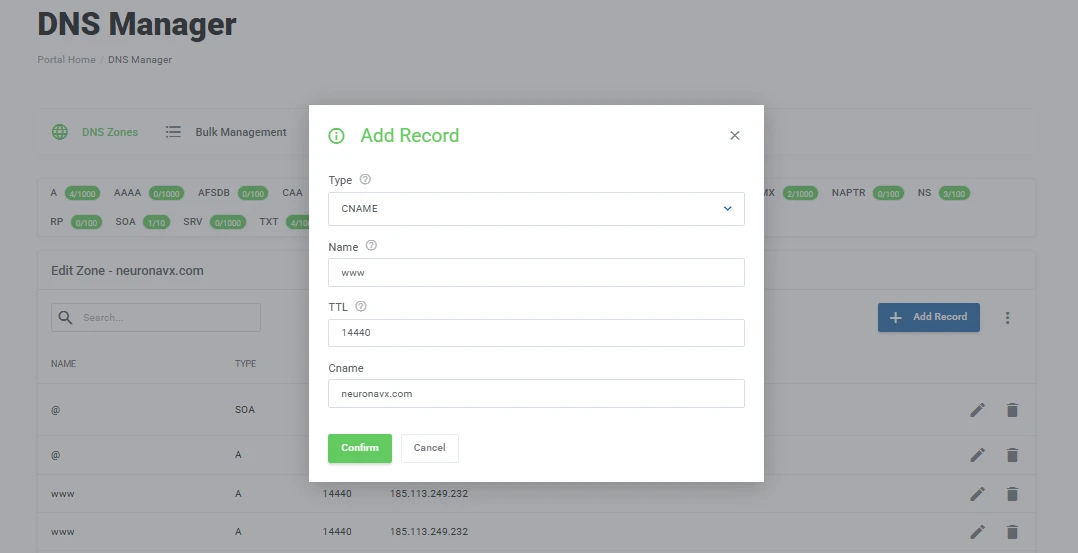
Here’s what to enter:
- Type: Select CNAME
- Name/Host: Enter www
- Value / Points To: Enter your main domain
- TTL: Leave the default
This makes sure that when someone types www.yourdomain.com, they still land on your main website.
You can also use CNAME records for other subdomains like blog.yourdomain.com, depending on your setup.
c) MX Records
These are required if you want to send and receive emails using your domain.
You’ll typically get the exact values from your email provider, but here’s how to enter them:
- Type: Select MX
- Name/Host: Enter @
- Value / Points To: Enter your mail server (e.g.,
mail.yourdomain.comor something likeaspmx.l.google.com) - Priority: Enter a number (lower numbers = higher priority, e.g., 10)
- TTL: Leave the default
Most providers will give you multiple MX records. Add each one exactly as provided, including their priority values.
Once saved, emails sent to your domain will be routed correctly.
d) TXT Records
These are mainly used for verification and email security. You’ll often copy these values from services like Google or your email provider.

To add one:
- Type: Select TXT
- Name/Host: Usually @ (or sometimes a specific name like
google-site-verification) - Value / Points To: Paste the full verification or SPF string (e.g.,
v=spf1 include:_spf.google.com ~all) - TTL: Leave the default
Make sure you copy the value exactly as given, without extra spaces.
Once you’ve added all these records, double-check for typos, then save your changes.
After that, it’s just a waiting game while DNS updates spread across the internet, which usually takes a few minutes to a few hours.
Step 3: Update Nameservers (If You’re Using External Hosting)
If your domain and hosting are with different providers, there’s one more step to connect them properly, and that is updating your nameservers.
This tells your domain where to look for DNS instructions.
Now, head back to your DNS or domain management area and look for a section labeled Nameservers.
You’ll usually see an option to switch from default settings to something like “Custom” or “Use custom nameservers.”
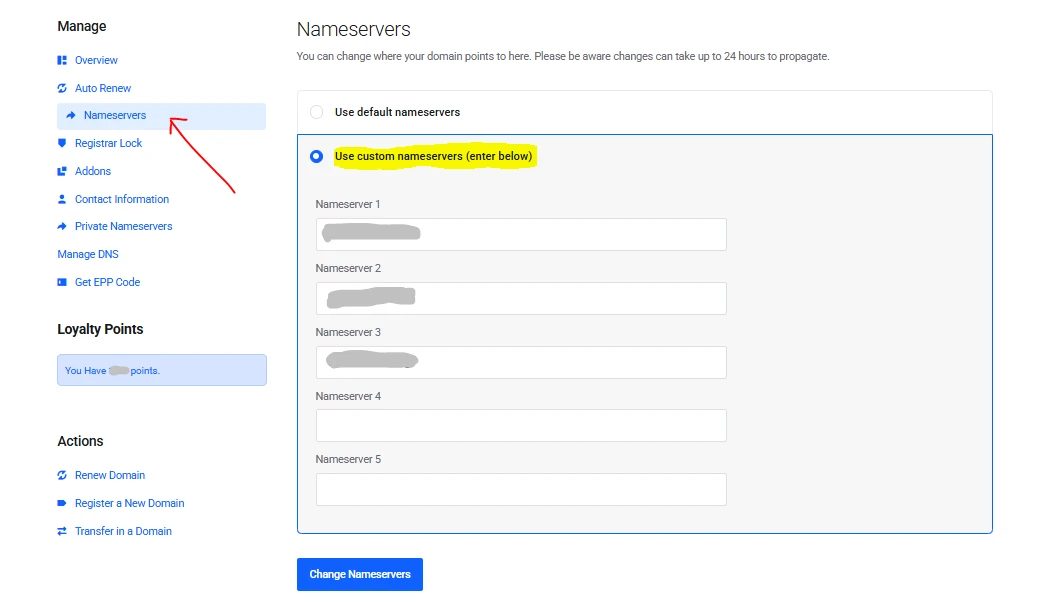
Once you select that option, enter the nameservers provided by your hosting company.
These are typically two or four entries that look something like ns1.yourhost.com and ns2.yourhost.com. Enter each one in its own field exactly as given.
After that, click on “Change Nameservers.”
If your domain and hosting are already with Truehost, you can skip this step entirely. The connection is handled automatically on our end, so there’s nothing extra for you to configure here.
Step 4: DNS Propagation
Once you’ve added your records or updated your nameservers, go ahead and confirm everything is saved correctly in your dashboard.
That’s all you need to do on your end, and now the changes need time to spread across the internet.
This process is called DNS propagation.
It simply means that servers around the world are updating their records so that your domain points to the new destination everywhere, not just in one location.
In most cases, updates start working within 30 minutes to a few hours. However, it can take up to 24–48 hours for the changes to fully reflect globally due to caching by different networks.
During this time, your website might load for some people but not others, and that’s completely normal.
If you want to check the progress, you can use tools like WhatsMyDNS. Just enter your domain, and it will show you how the updates are spreading across different locations.
While you wait, there’s nothing else you need to fix or adjust. It’s simply a matter of giving the system time to update everywhere.
Step 5: Test That Your DNS Setup Actually Works
After giving it a little time (around 30 minutes is a good start) you can check if everything is working as expected.
This step helps you confirm that your domain is pointing to the correct place and that nothing was missed.
There are a few free tools you can use for this:
- WhatsMyDNS
- DNS Checker
- MXToolbox (especially useful for email records)
Open any of these tools, enter your domain name, and select the record type you want to check, starting with the A record. Run the search, and you’ll see results from different locations around the world.
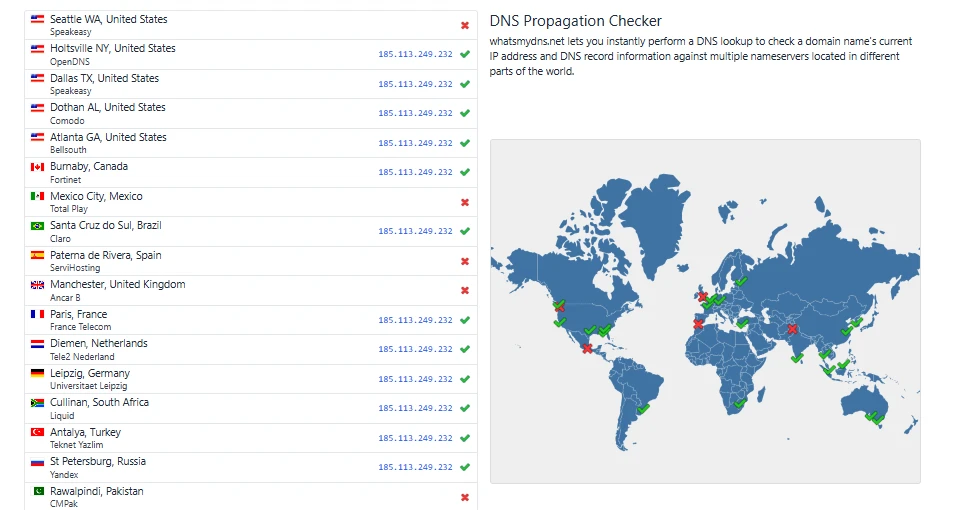
If the IP address shown matches your hosting server in most or all locations, your setup is working correctly. If some locations haven’t updated yet, give it a bit more time and check again later.
Once everything looks right, open your domain in a new browser tab. Your website should load, confirming that your DNS setup is complete.
You Now Know Exactly How to Set Up DNS
At this point, everything is in place.
You’ve logged into your dashboard, added the right records, updated nameservers where needed, and confirmed that your domain is pointing correctly.
Your website is live, and your setup is working the way it should.
If you ever need to revisit your DNS settings, you now know exactly where to go and what each record does.
All I can hope for now is that you have the confidence to manage your website much easier moving forward.
If you haven’t registered your domain name yet, it’s due time.
At Truehost, we make it quick to register any domain, with local payment options and support backed by KeNIC. Getting the right name early helps you build a strong and consistent online presence.
Take the next step and secure your domain, connect it, and get your site fully online.
You’ve done the technical part, and now your space on the web is ready.