Domain SearchInstantly check and register your preferred domain name
 Web Hosting
 cPanel HostingHosting powered by cPanel (Most user friendly)
 KE Domains
 Reseller HostingStart your own hosting business without tech hustles
 Windows HostingOptimized for Windows-based applications and sites.
 Free Domain
 Affiliate ProgramEarn commissions by referring customers to our platforms
 Free HostingTest our SSD Hosting for free, for life (1GB storage)
 All DomainsBrowse and register domain extensions from around the world
 .Com Domain
 WhoisLook up domain ownership, expiry dates, and registrar information
 VPS Hosting
 Managed VPSNon techy? Opt for fully managed VPS server
 Dedicated ServersEnjoy unmatched power and control with your own physical server.
 SupportOur support guides cover everything you need to know about our services
Did you just set up your website, and now you need to upload some files, fix something inside your website folder, or maybe you want to edit a page? The good news is, you do not need any special software to do that. You just need to know how to access the file manager in CyberPanel, and everything becomes a lot easier.
CyberPanel is a web hosting control panel. It is the dashboard where you manage everything:
- Your files
- Your emails
- Your security settings
- And more.
Think of it like the settings app on your phone, but for your website and server. It lets you do things like create websites, set up email addresses, manage security certificates, and yes, manage your website files.
Now, not every hosting provider uses CyberPanel. Some use cPanel, some use Plesk. But if your hosting runs on CyberPanel, then this guide is exactly what you need.
Think of CyberPanel as the control room for your website. And inside that control room, there is one very important tool called the File Manager. That is what we are focusing on today.
The File Manager is basically a folder viewer built right into CyberPanel. Instead of needing to use a separate program like FileZilla (which is an FTP client — a tool that lets you connect to your server remotely), you can just log in to CyberPanel and manage everything from your browser.
We will walk you through how to access the file manager in CyberPanel step by step.
So let us get started.
Step 1: Log In to Your CyberPanel Dashboard
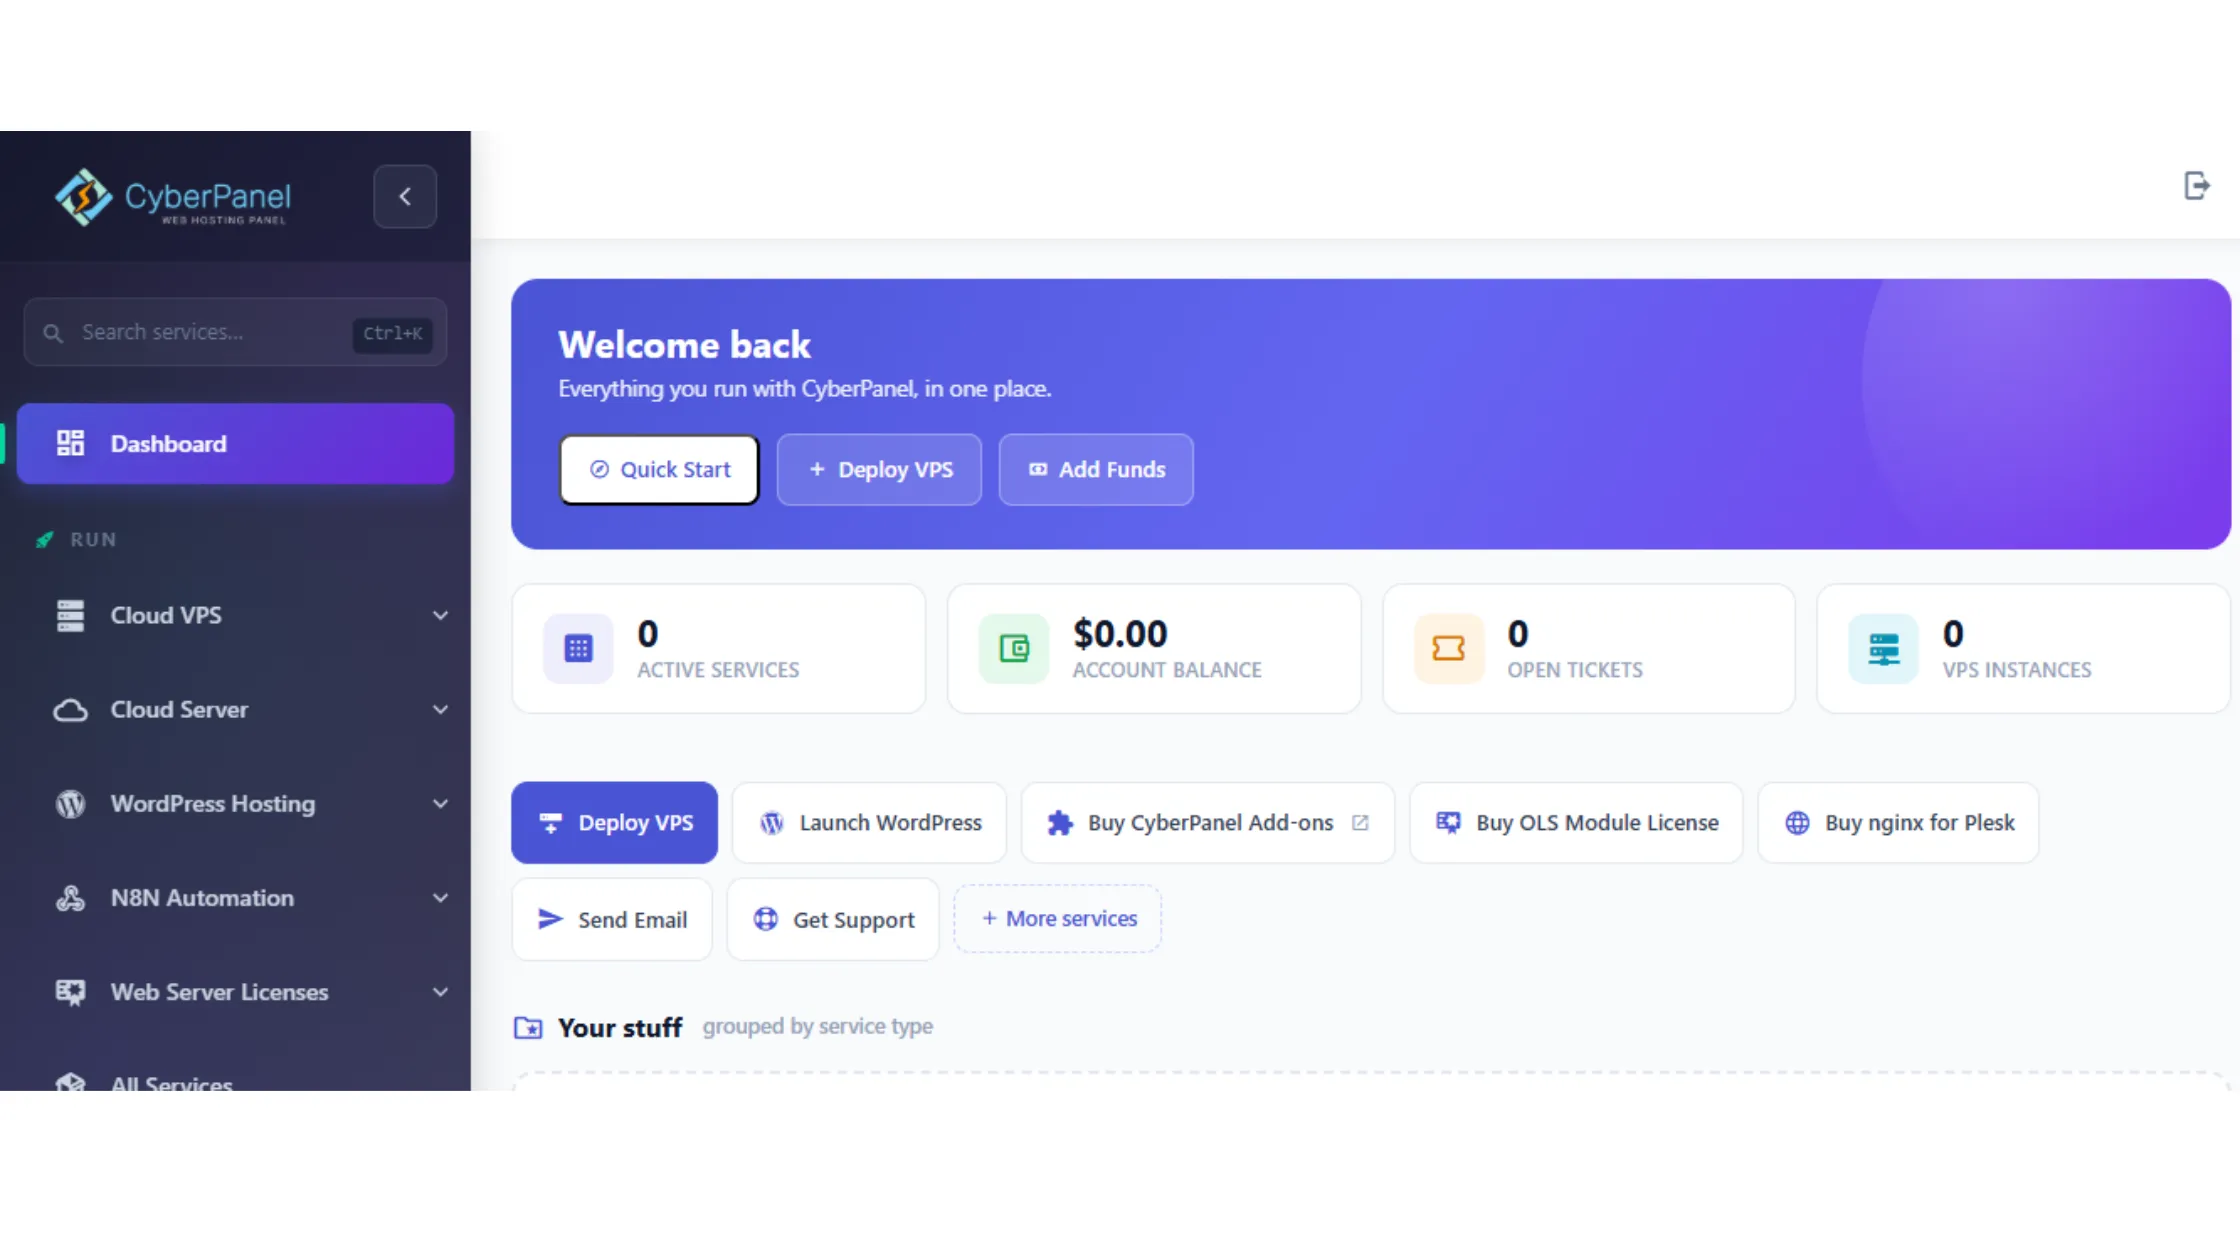
Alright, the first thing you need to do before you can access File Manager in CyberPanel is log in. You cannot do anything without being logged in, so let us start there.
Open your web browser, Chrome, Firefox, Edge, whatever you normally use, and type in your server’s IP address followed by:8090. It looks something like this:
https://your-server-ip:8090
Now, if you are not sure what your server IP address is, check the welcome email you got from your hosting company when you first signed up. It is usually in there. Alternatively, if your domain is already pointing to the server, you can also type:
https://yourdomain.com:8090
Either way, you will land on the CyberPanel login page. Go ahead and type in your username and password, then click Sign In.
Once you are in, you will see the CyberPanel dashboard. On the left side of the screen, there is a sidebar with different menu options. You will see things like Websites, DNS, Email, SSL, and more.
That sidebar is your best friend; it is how you navigate to everything, including the File Manager.
Step 2: Open the Websites Section
Now that you are logged in, the next step is to find the right section. Because here is the thing, in CyberPanel, the File Manager is not just floating around by itself. It is connected to each website you have hosted on your server.
So you need to go to the Websites section first.
Look at the left sidebar and find the Websites option. Click on it, and then click List Websites from the dropdown that appears underneath it.
This is going to open a new page that shows all the domains (that is, website addresses like yourdomain.com) that are currently hosted on your server. If you only have one website, you will just see one. If you have multiple websites, you will see all of them listed here.
This step is important because CyberPanel keeps each website’s files separate from the others. So you need to go into the correct domain before you can access file manager in CyberPanel for that specific site.
Step 3: Select the Website You Want to Manage
Okay, so now you are looking at a list of your websites. This part is straightforward; you just need to find the domain you want to work with.
Scroll through the list and locate your domain name. It could be something like:
- yourdomain.com
- blog.yourdomain.com
- shop.yourdomain.com
Once you find it, look to the right side of that domain row. You will see a button that says Manage. Click on that.
Clicking Manage takes you into the website management area for that specific domain. Think of it like opening the folder for that particular website. From here, you can see all kinds of tools and settings related to that one site, things like SSL certificates, backups, PHP settings, and of course, the File Manager.
You are getting closer! Just one more step before you are inside your files.
Step 4: Access the File Manager
Here is the moment you have been waiting for. You are now inside the website management area for your chosen domain, and this is where you can finally access file manager in CyberPanel.
Scroll through the options you see on this page until you find the one that says File Manager. It is usually clearly labeled, so it should not be hard to spot.
Click on File Manager.
CyberPanel will then open up your website’s main directory. A directory is just another word for a folder, specifically, the main folder that holds all your website’s files. And from this point, you have full control to upload files, edit files, delete folders, and organize your website content however you need to.
Pretty cool, right? No extra software needed. No complicated setups. Just a few clicks and you are in.
Step 5: Navigate Website Folders
Now that you know how to access file manager in CyberPanel, let us talk about what you will actually see when you get inside. Because opening the File Manager and then having no idea what any of the folders mean can be a little confusing.
The first and most important folder you need to know about is called public_html.
Think of public_html as the front door of your website. It is the folder where all your main website files live, the stuff that your visitors actually see when they visit your site. If you have a WordPress website (which is the most popular platform for building websites), most of your WordPress files will be inside public_html.
When you double-click on public_html to open it, you might see folders like:
- wp-admin: This is the backend control area for WordPress.
- wp-content: This is where your themes, plugins, and uploaded images are stored.
- wp-includes: This folder has core WordPress files that make everything run.
You will also see files like:
- Index.php: This is like the homepage blueprint of your website.
- wp-config.php: This file holds your database settings. It is very important, so be careful with it.
- .htaccess: This is a configuration file that controls how your website behaves. Also very important.
A quick word of warning here: please be careful when you are browsing through these folders. Deleting or editing the wrong file can break your website. If you are not sure what a file does, it is always better to leave it alone or ask someone who knows.
Step 6: Upload Files in CyberPanel File Manager
One of the best things about knowing how to access file manager in CyberPanel is that you can upload files directly from your computer without needing any extra tools.
This is really handy for situations like:
- You designed a new logo and need to upload it to your website
- You downloaded a WordPress theme as a ZIP file and want to install it manually
- You have a backup of your website and need to restore it
- You created a new HTML page and want to add it to your site
To upload a file, navigate to the folder where you want the file to go (for most things, that will be inside public_html). Then look for the Upload button at the top of the file manager screen and click it.
A file selector will open up, and you can browse your computer for the file you want to upload. Select it, and the upload will begin. Depending on the size of the file, it might take a few seconds or a few minutes.
Once the upload is done, you might need to refresh the file manager page to see the new file appear in the folder. But after that, it is there and ready to use.
Step 7: Edit Files in CyberPanel
Another really helpful feature when you access file manager in CyberPanel is the ability to edit files directly from your browser. No need to download them, make changes, and then re-upload.
To edit a file, simply right-click on it. A small menu will pop up with a few options. Click on Edit.
This will open a built-in text editor right inside CyberPanel. You can make your changes, and when you are done, click Save.
This is super useful for quick fixes.
For example, maybe you need to update a line in your wp-config.php file, or change something in your .htaccess file, or tweak a small piece of code in a theme file. Instead of going through the whole download-edit-reupload process, you can just do it right there in the browser.
Just one important reminder, though: always make a backup before you start editing any important files. A backup is a copy of your file saved somewhere safe, so that if you accidentally mess something up, you can restore the original version. You will be really glad you did this if something goes wrong.
Step 8: Delete or Move Files
Beyond uploading and editing, the file manager also lets you do general file organization.
To manage a file or folder, click on it to select it. You can select just one item, or select multiple items at the same time to move or delete several things at once.
Once you have selected what you want, right-click on it. You will see a menu with options like:
- Rename: Change the name of the file or folder
- Delete: Remove the file or folder permanently
- Move: Move it to a different folder
- Copy: Make a duplicate in another location
Now, a really important note about deleting: when you delete a file in CyberPanel’s file manager, it is usually gone for good. Unlike deleting something on your desktop computer, where it goes to the Recycle Bin first, deleting in File Manager can be permanent.
So please double-check before you hit that delete button. Make sure you are deleting the right thing.
Step 9: Log Out When You Are Done
This last step might seem obvious, but it is actually really important, especially if you are using a shared computer or a public network.
Once you are done managing your files, close out of the File Manager and then log out of CyberPanel completely. Before you log out, do a quick check:
- Are all your uploads complete?
- Did you save all your edits?
- Did you remove any files you wanted to delete?
Once everything looks good, find the logout option in the dashboard (usually near your profile name or in a dropdown menu at the top of the page) and click it. Logging out means that no one else can access your server through that session after you leave.
This is one of those small habits that can save you a lot of headaches in the long run.
Access File Manager in CyberPanel FAQs
If you are having trouble accessing the file manager in CyberPanel, the most likely reasons are a permission issue, incorrect login details, or a problem with how the website was set up inside CyberPanel. Double-check that your username and password are correct, and make sure the website actually exists in your Websites list. If your server services are not running properly, that can also block access.
When you access File Manager in CyberPanel and open it for your domain, you will see public_html right there in the main directory. Just double-click it to open it, and you will find all your main website files inside.
Yes, you can upload ZIP files. CyberPanel’s file manager lets you upload ZIP files directly. This is really helpful for uploading large website backups or compressed theme and plugin files all at once.
Yes, it is safe to use the file manager CyberPanel. But the safety really depends on how careful you are with the files you edit or delete. Accidentally removing or changing the wrong file can break your website. So always create backups before making big changes, and when in doubt, leave important files alone.
Absolutely, you can edit WordPress files from the file manager. Once you access file manager in CyberPanel, you can open any WordPress file inside your public_html folder and edit it directly. This includes theme files, plugin files, and configuration files.
Final Thoughts
And there you have it, a complete, simple, and friendly guide on how to access file manager in CyberPanel. Once you do it a couple of times, it honestly becomes second nature. The steps are always the same: log in, go to Websites, click List Websites, pick your domain, click Manage, and then open File Manager.
From there, you can do pretty much anything with your website files:
- Upload images
- Install themes
- Fix broken code
- Clean up old files
- Or just have a look around and understand how your website is structured.
The more comfortable you get with navigating CyberPanel, the easier website management becomes overall. And the File Manager is honestly one of the most useful tools in the whole dashboard.
If you are looking for a reliable and affordable VPS hosting solution that works great with CyberPanel, Truehost offers fast cloud servers and scalable infrastructure built for exactly this kind of setup, perfect for beginners and experienced website owners alike.