 Domain SearchInstantly check and register your preferred domain name
 Web Hosting
 cPanel HostingHosting powered by cPanel (Most user friendly)
 WordPress HostingHost your WordPress website with fast, secure, and affordable WordPress hosting in Kenya.
 KE Domains
 Reseller HostingStart your own hosting business without tech hustles
 Windows HostingOptimized for Windows-based applications and sites.
 Free Domain
 Affiliate ProgramEarn commissions by referring customers to our platforms
 Free HostingTest our SSD Hosting for free, for life (1GB storage)
 Domain TransferMove your domain to us with zero downtime and full control
 All DomainsBrowse and register domain extensions from around the world
 .Com Domain
 WhoisLook up domain ownership, expiry dates, and registrar information
 VPS Hosting
 Managed VPSNon techy? Opt for fully managed VPS server
 Dedicated ServersEnjoy unmatched power and control with your own physical server.
 Website Builder
 Online Store BuilderLaunch a professional e-commerce store without writing code.
 Web Design ServiceGet a custom-designed website tailored to your brand and goals. From just KES 15,600
 BlogRead our guides on web hosting, online business, digital marketing, and more
 SupportOur support guides cover everything you need to know about our services
 ContactContact us via chat or email
Your VPS provider just handed you a root login and nothing else. No dashboard. No one-click installer. No support desk waiting on the other end. Just a blinking cursor and an IP address.
An unmanaged VPS gives you root access and nothing else. There is no control panel. There is no team patching the server while you sleep.
Every command below runs through SSH. Nothing here uses a graphical interface. That is the deal with an unmanaged server. It is why the setup below counts more than it would on a managed plan.
If Nginx gets misconfigured or a port stays open by mistake, no one fixes that but you. Keep that in mind as you work through each step.
This guide walks through every step needed to get Nginx running on that server. It covers Debian, Ubuntu, and RHEL-based systems like AlmaLinux and Fedora. It also covers the parts most guides skip: firewalls, SSL, and what to do when something breaks.
Before You Install Nginx: Server Prerequisites

A few checks before touching Nginx save trouble later.
First, log in to the server through SSH as root and confirm which operating system is running:
lsb_release -aOr, on systems where that command is not available:
cat /etc/os-releaseNext, create a regular user with sudo rights. Running everything as root works, but one typo can cause real damage. A second user account limits that risk.
adduser yourusername

usermod -aG sudo yourusername
On Debian, Ubuntu, and similar systems, run a full package update before installing anything new.
sudo apt update && sudo apt upgrade -yOn AlmaLinux, Fedora, and other RHEL-based systems, the command looks like this instead:
sudo dnf update -yLast, write down the server’s public IP address. You will need it later in this guide to confirm the install worked.
1) Installing Nginx on Debian and Ubuntu
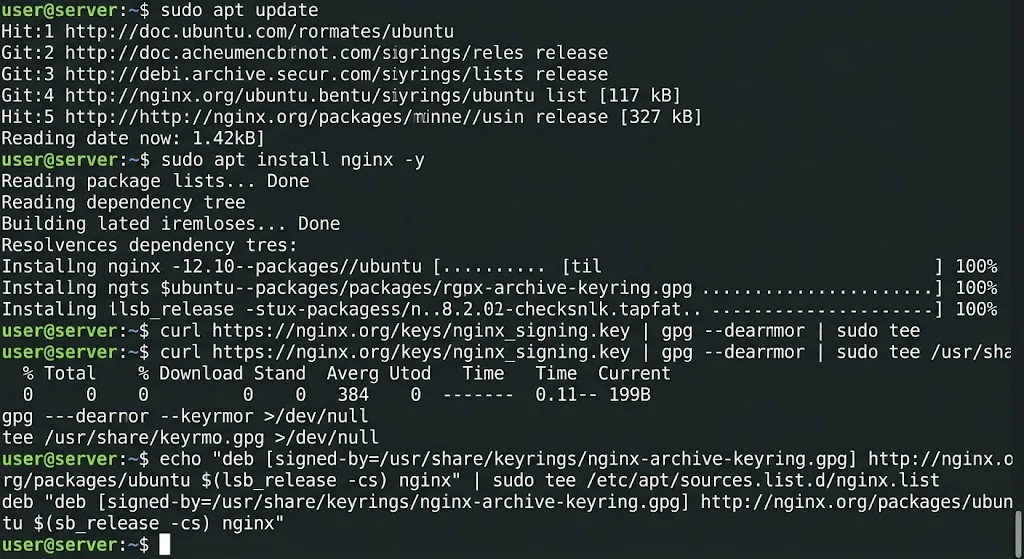
Nginx is available in the default Ubuntu and Debian repositories, so the standard installation takes two commands.
sudo apt update

sudo apt install nginx -y
That version comes from the distro’s own repository, and it can lag behind the version Nginx itself publishes. If a newer release helps with a specific feature, add the official nginx.org repository instead.
Start by importing the signing key:
curl https://nginx.org/keys/nginx_signing.key | gpg --dearmor | sudo tee /usr/share/keyrings/nginx-archive-keyring.gpg >/dev/nullThen add the repository for your Ubuntu or Debian codename:
echo "deb [signed-by=/usr/share/keyrings/nginx-archive-keyring.gpg] http://nginx.org/packages/ubuntu $(lsb_release -cs) nginx" | sudo tee /etc/apt/sources.list.d/nginx.listRun sudo apt update again, then install with sudo apt install nginx -y as before. This pulls the current release straight from Nginx, not from the distro’s cache.
Either way, check that the service is active:
sudo systemctl status nginx

nginx -v
Then open a browser and load the server’s IP address directly. A default “Welcome to nginx!” page confirms the install worked.
A few paths worth remembering from here:
- Main config file:
/etc/nginx/nginx.conf - Default web root:
/var/www/html - Log files:
/var/log/nginx/
2) Installing Nginx on AlmaLinux, Fedora, and RHEL-Based Systems
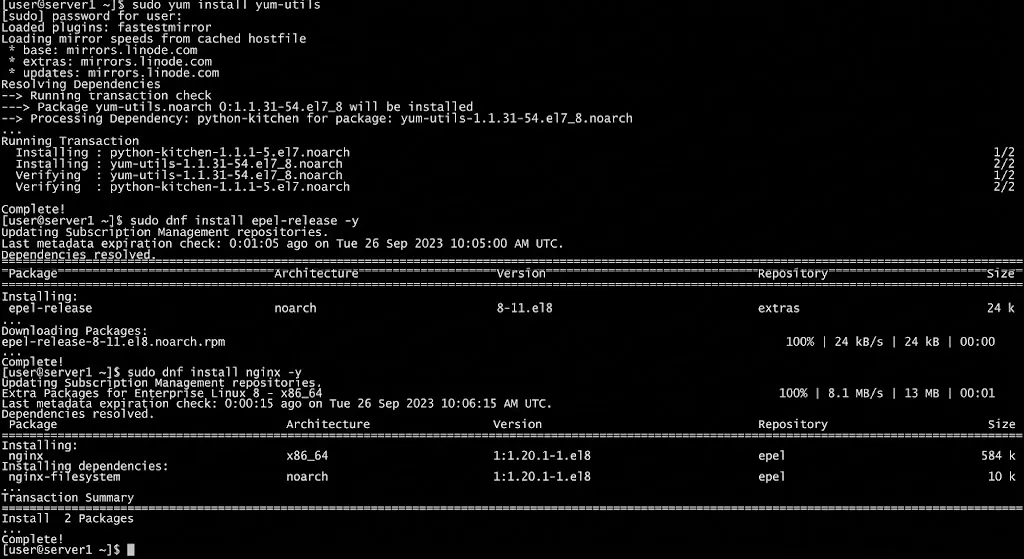
RHEL-based distributions handle this a bit differently. Start with the prerequisite package:
sudo yum install yum-utilsFor a current version straight from Nginx, create a repo file:
sudo nano /etc/yum.repos.d/nginx.repoPaste this content, then save and close the file:
[nginx-stable]

name=nginx stable repo

baseurl=http://nginx.org/packages/centos/$releasever/$basearch/

gpgcheck=1

enabled=1

gpgkey=https://nginx.org/keys/nginx_signing.key
For a quicker path using the distro’s own repository, run this instead:
sudo dnf install epel-release -y

sudo dnf install nginx -y
Either method leaves you with Nginx installed but not running yet. Start and enable it manually, since this does not happen on its own:
sudo systemctl start nginx

sudo systemctl enable nginx
One more check before moving on. Run getenforce to see if SELinux is active. Enforcing mode can later block Nginx from binding to nonstandard ports, so note the result now.
3) Managing the Nginx Service (Start, Stop, Restart, Reload)
A few commands cover almost every situation you will run into.
| Action | Command |
|---|---|
| Start | sudo systemctl start nginx |
| Stop | sudo systemctl stop nginx |
| Restart | sudo systemctl restart nginx |
| Reload config | sudo systemctl reload nginx |
| Enable at boot | sudo systemctl enable nginx |
| Disable at boot | sudo systemctl disable nginx |
| Check status | sudo systemctl status nginx |
Restart and reload do different jobs. A restart fully stops the process, then starts it again, which briefly drops active connections.
A reload applies configuration changes without dropping anything. Use reload for routine config edits, and save restart for larger changes.
Before either one, test the config file for errors:
sudo nginx -tIf something looks wrong after a change, check the logs first:
sudo tail -f /var/log/nginx/error.logThat single command answers most “why isn’t this working” questions before you touch anything else.
4) Configuring the Firewall for Nginx
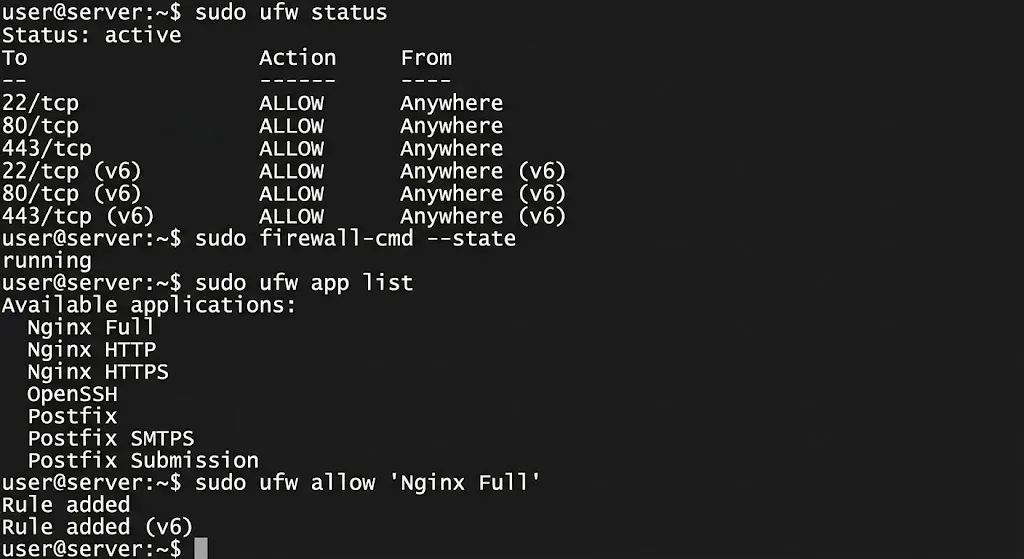
An open server with no firewall rules is an easy target. Check the current firewall status first.
On Ubuntu or Debian with UFW:
sudo ufw statusOn AlmaLinux or Fedora with firewalld:
sudo firewall-cmd --stateOpen only what Nginx needs: ports 80 and 443, rather than a wide-open rule. UFW ships with ready-made Nginx profiles:
sudo ufw app list

sudo ufw allow 'Nginx Full'
That single profile opens both HTTP and HTTPS traffic at once. Confirm the change with sudo ufw status again.
This firewall only controls traffic at the operating system level. The next section covers a layer many people forget entirely.
5) Pointing a Domain to Your Nginx Server
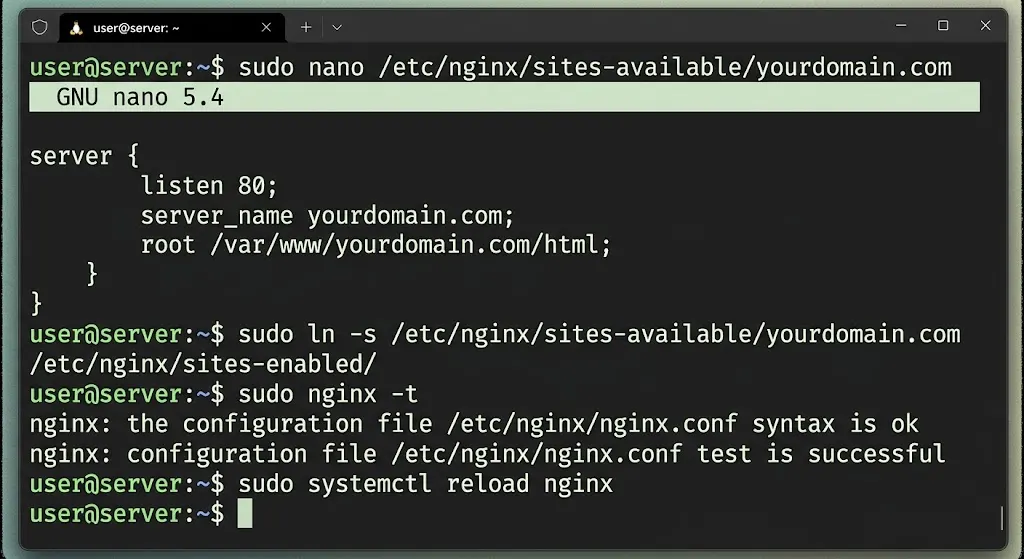
With Nginx running, the next step is to connect an actual domain to it.
First, create an A record with your domain registrar. Point it at the server’s public IP address.
Next, build a server block for that domain:
sudo nano /etc/nginx/sites-available/yourdomain.comA basic block looks like this:
server {

    listen 80;

    server_name yourdomain.com www.yourdomain.com;

    root /var/www/yourdomain.com/html;

    index index.html;

}
Link that file into the enabled sites folder, then reload Nginx:
sudo ln -s /etc/nginx/sites-available/yourdomain.com /etc/nginx/sites-enabled/

sudo nginx -t

sudo systemctl reload nginx
If the domain does not load right away, give DNS a little time. Propagation can take anywhere from minutes to a full day.
6) Securing the Installation with SSL
An unmanaged server does not enforce HTTPS by default, so that step falls on you. Certbot handles most of the work automatically.
Install it along with the Nginx plugin:
sudo apt install certbot python3-certbot-nginx -yRun the automated setup for your domain:
sudo certbot --nginx -d yourdomain.comCertbot edits the Nginx config for you and sets up the certificate. Test that renewal works before you forget about it:
sudo certbot renew --dry-runCertificates from Let’s Encrypt expire every 90 days. Automatic renewal keeps that from becoming a problem later.
Troubleshooting Common Installation Issues
Most problems during a first Nginx install fall into a short list.
Nginx will not start, and port 80 is already in use. Some server images ship with Apache preinstalled. Find out what is holding the port:
sudo ss -tulpn | grep :80If Apache shows up, stop and disable it, then start Nginx again:
sudo systemctl stop apache2

sudo systemctl disable apache2

sudo systemctl start nginx
Nginx runs, but the site still will not load in a browser. This trips up more people on unmanaged servers than any other issue. Most providers run two separate firewalls.
One lives on the server itself, UFW, or firewalld. The other lives in the provider’s dashboard, often referred to as a security group or cloud firewall.
Opening port 80 in UFW does nothing if the dashboard-level firewall still blocks it. Check both, not just the one reachable through SSH.
A page loads with a 403 Forbidden error. Read the actual error before guessing at a fix:
sudo tail -n 30 /var/log/nginx/error.logA line about a missing directory index means no index file exists in that folder. A “Permission denied” line points to ownership, fixed with:
sudo chown -R www-data:www-data /var/www/html

sudo find /var/www/html -type d -exec chmod 755 {} ;

sudo find /var/www/html -type f -exec chmod 644 {} ;
On RHEL-based systems, swap www-data for nginx, since that is the user Nginx runs as there.
A config edit breaks Nginx after a reload. Run sudo nginx -t before every reload or restart, no exceptions. It names the exact file and line causing trouble.
Certbot fails to issue a certificate. This almost always traces back to the two-firewall problem above. The certificate authority cannot reach port 80 from outside.
Confirm that the domain resolves to the correct IP address. Make sure port 80 stays open on both firewalls, then try certbot again.
FAQs
Can I install Nginx without a control panel like cPanel?
Yes. Every step in this guide runs through the command line alone. Nginx does not need a control panel to install, configure, or run.
Is Nginx harder to set up than Apache on an unmanaged server?
Not really. Both install with a single package command and start the same way. Nginx’s configuration syntax reads a little differently, but the learning curve stays about the same.
How often do I need to update Nginx manually on an unmanaged server?
Check for updates on a regular schedule, weekly or monthly, which works for most sites. Run sudo apt update && sudo apt upgrade or the dnf equivalent, then restart Nginx after any update.
Your Nginx Server Is Live
Nginx is installed, the firewall covers both layers, SSL is active, and the domain resolves correctly. That is a full, working setup on a server with no support desk behind it.
An unmanaged server rewards steady habits more than one-time effort. Updates, log checks, and certificate renewals all need a place on your calendar, not just this week’s to-do list.
A monitoring tool or automated backup service closes the gap most people leave open after this point. Set one up before traffic arrives, not after something goes wrong.