Domain SearchInstantly check and register your preferred domain name
 Web Hosting
 cPanel HostingHosting powered by cPanel (Most user friendly)
 KE Domains
 Reseller HostingStart your own hosting business without tech hustles
 Windows HostingOptimized for Windows-based applications and sites.
 Free Domain
 Affiliate ProgramEarn commissions by referring customers to our platforms
 Free HostingTest our SSD Hosting for free, for life (1GB storage)
 All DomainsBrowse and register domain extensions from around the world
 .Com Domain
 WhoisLook up domain ownership, expiry dates, and registrar information
 VPS Hosting
 Managed VPSNon techy? Opt for fully managed VPS server
 Dedicated ServersEnjoy unmatched power and control with your own physical server.
 SupportOur support guides cover everything you need to know about our services
Your website was running fine until traffic started growing. Then came the slow loading pages, random downtime, and those moments when your site suddenly feels stuck for no clear reason. That is usually the point where shared hosting starts holding you back.
A VPS gives you more power, better performance, and greater control without the high cost of a dedicated server. Instead of sharing resources with dozens of websites, you get your own dedicated portion of a server, which means your website runs faster and more reliably.
For growing businesses, developers, online stores, and high traffic websites, VPS hosting gives you the flexibility to scale without constantly worrying about performance issues.
In this guide, you will learn exactly how to host a website on a VPS step by step, even if you have never managed a server before.
If you are ready to get started, check out Truehost VPS Hosting and launch your server today. Otherwise, keep reading and we will walk you through the entire setup process.
What You Need Before You Start
Before you start, make sure you have these ready. It will save you from stopping halfway through the setup:
- A VPS hosting plan, either Linux or Windows-based
- A registered domain name, preferably a .co.ke for the Kenyan market
- Your SSH access details: server IP address, username, and password or SSH key
- Basic comfort with the command line
- A control panel like cPanel or Plesk if you prefer clicking over typing commands
Step 1: Choose a VPS Hosting Plan
Not all VPS providers are the same. Look for one with good uptime, reliable support, and servers that are physically close to where your visitors are. The further your server is from your audience, the slower your pages load, and in Kenya where mobile internet is the primary way most people browse, every second counts.
According to Google’s Web Vitals research, even a one second delay in load time can reduce conversions by up to 20 percent. If your customers are in Nairobi, Mombasa, Kisumu, or anywhere else in Kenya, a locally hosted server will consistently outperform one based in Europe or the US.
Truehost has Kenya Cloud VPS plans hosted locally, built for Kenyan businesses, and priced in Kenya Shillings so there are no currency surprises on your bill. For most websites starting out, a plan with 1 to 2 vCPU cores, 2 to 4 GB RAM, and SSD storage is enough. Just make sure you get full root access so you are in control of your own server.
Step 2: Choose Your Operating System and Stack
Once your VPS is active, pick an operating system. Most websites run on Linux, either Ubuntu, CentOS, or Debian, because it is free, well supported, and has a large developer community behind it. If your application specifically needs Microsoft technology like ASP.NET, then Windows Server is the one to go with.
After that, choose your stack. This is the combination of software your website will run on:
- LAMP (Linux, Apache, MySQL, PHP): the standard setup that works for most websites
- LEMP (Linux, Nginx, MySQL, PHP): a faster option that handles more traffic with fewer resources
- Node.js: the right choice if you are building a JavaScript-based application
If you are running WordPress, which powers a large number of Kenyan business websites, both LAMP and LEMP work well. You can also check out Truehost WordPress Hosting Kenya if you want a setup that comes pre-configured for WordPress without the manual installation steps.
Step 3: Secure Your Server Before Anything Else
This is the step most beginners skip, and it is the one that causes the most problems later. The moment your VPS goes online, it is visible to the internet, and that includes bots and automated attacks looking for easy targets.
Start by updating all your system packages so nothing is running on an outdated version. Create a new user account instead of working directly from the root account. Disable root login entirely, set up a firewall using UFW or iptables to control what traffic can get in and out, and switch to SSH key authentication instead of passwords.
SSH keys are much harder to break into than passwords. The Linux UFW documentation is a good reference if you have not set up a firewall before.
None of this takes long. You can get through it in under 30 minutes and your server will be significantly harder to compromise from day one.
Step 4: Install the Web Stack
Now you can start setting up the software that will actually run your website.
You need three things working together. A web server like Apache or Nginx, which receives requests from visitors and serves your pages back to them. A database like MySQL or MariaDB, which stores everything from your content to your user accounts. A server-side language like PHP or Node.js, which handles the logic that makes your site work dynamically.
Get all three installed and configured and your VPS is ready to serve a live website.
Step 5: Upload Your Website Files and Database
With your server ready, the next step is moving your website onto it. There are a few ways to do this depending on how comfortable you are with the tools:
- FileZilla or WinSCP are good options if you want a visual interface and prefer not to use the terminal
- Git is what most developers use because it keeps everything version-controlled and makes future updates much cleaner
- scp or rsync are command-line tools that work fast, especially for large file transfers
If your website has a database, like a WordPress site or a Laravel application, you will also need to import it. You can do this through phpMyAdmin or directly through the MySQL command line, whichever you are more comfortable with.
Once your files and database are on the server, you are close to being live.
Step 6: Set Up Your SSL Certificate
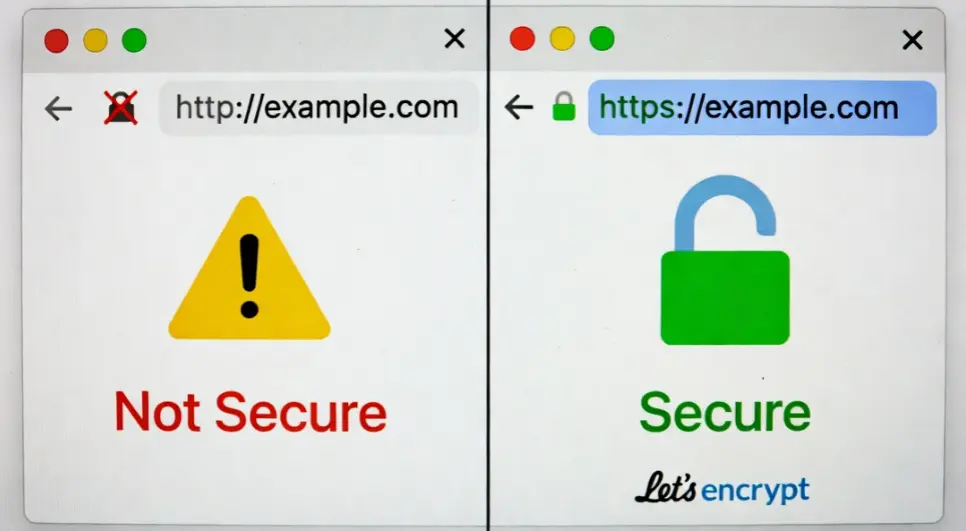
Security is not something you want to skip.
You’ll need to install an SSL certificate so your website can run on HTTPS instead of HTTP. A popular free option is Let’s Encrypt, though you can also use paid certificates if needed.
Once installed, SSL does a few important things:
- It encrypts data between your site and users
- It improves your search engine ranking
- It makes your website look more trustworthy
Most browsers today even flag websites without SSL, so this step is essential.
Step 7: Connect Your Domain to Your VPS
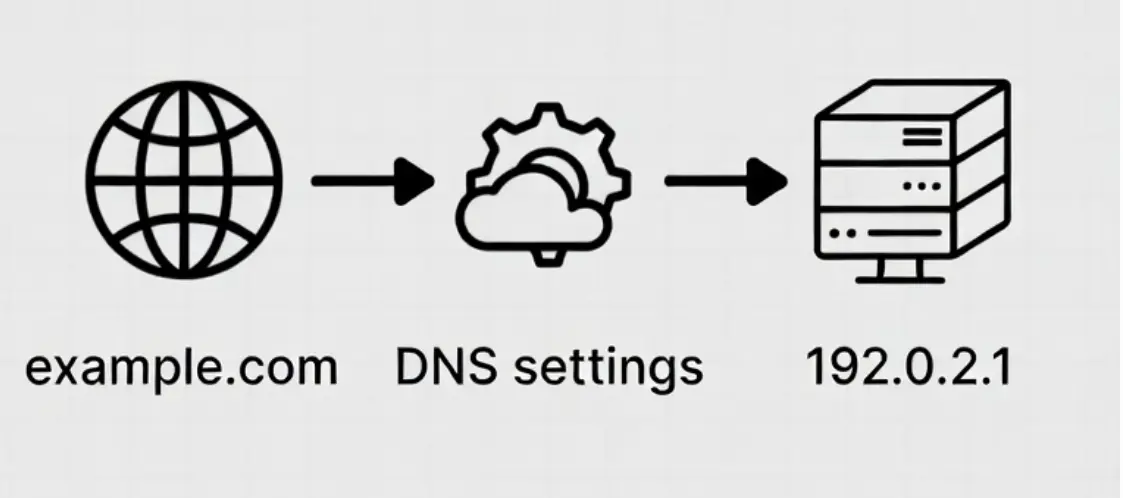
Your domain and your server are two separate things. To connect them, update your DNS settings:
- Add an A record that points your domain to your VPS IP address
- Add a CNAME record to cover the www version of your domain
Once you save those changes, it does not go live immediately. DNS propagation usually takes anywhere from a few minutes to a few hours, though in some cases it can take up to 24 hours before your site is accessible everywhere.
If you do not have a domain yet, register a .co.ke or .com domain through Truehost Kenya and manage it alongside your hosting in one place. A .co.ke domain also signals to Kenyan visitors and Google Kenya that your business is locally based, which can help with local search rankings.
Step 8: Speed Up Your Website
If you want your website to feel fast and responsive, this step counts a lot. Even a powerful VPS can feel slow if it’s not optimized properly.
Start by enabling caching using tools like Redis or Memcached. These help your server store frequently used data so it doesn’t have to reload everything from scratch each time.
You can also use a CDN like Cloudflare to deliver your content faster to users, especially those far from your server location.
Don’t forget the basics too, compress and optimize your images and files so they load quicker, and enable Gzip compression to reduce the size of data being sent to browsers.
At the end of the day, speed isn’t just about performance; it directly affects how users experience your site and even how well you rank on search engines.
Step 9: Set Up Backups and Monitoring
A VPS gives you a lot of control, but that also means you are responsible for what happens to your data. Servers can fail. Updates can break things. Files can get corrupted. If you do not have backups, you could lose everything with no way to recover it.
Set up automatic backups that run daily or weekly and store them somewhere outside your VPS, like Google Drive, AWS S3, or another remote server. That way, even if your server has a serious problem, your data is still there.
Pair that with a monitoring tool that checks your site regularly and sends you an alert the moment something goes wrong. The faster you find out about a problem, the less damage it does.
Step 10: Lock Down Your Server
Once your site is live, security becomes an ongoing task rather than a one-time setup.
Install Fail2Ban to automatically block IP addresses that repeatedly fail login attempts. Keep your system and software updated regularly so known vulnerabilities get patched before someone can exploit them. Only keep the ports open that you actually need, review your login methods periodically, and check your server logs every so often to spot anything that looks off.
Most attacks are not sudden. They leave traces in the logs first. Checking them regularly means you can deal with a problem before it turns into a bigger one.
Step 11: Scaling and Reliability
One of the reasons Kenyan businesses move to VPS is that you can grow on the same infrastructure without rebuilding from scratch.
When your traffic increases, you upgrade your RAM or CPU. If that is not enough, you can add load balancing to distribute traffic across multiple servers, or move your database to a dedicated machine. When you outgrow VPS entirely, Truehost Dedicated Servers are the next step for websites that need maximum resources and full hardware control.
You do not start over at each stage. You build on what is already there.
Getting Started with VPS Hosting
If you’re just starting, don’t overcomplicate things. Begin with a small VPS plan and upgrade as your traffic grows. The goal is to learn, deploy, and scale at a pace that matches your project.
Truehost VPS pricing for Kenya servers is as follows.
| Plan | Price (KES/month) | vCPU | RAM | Storage | Bandwidth |
| Kenya Cloud VPS 1 | KSh 1,400 | 1 Core | 1 GB | 25 GB SSD | 1 TB |
| Kenya Cloud VPS 2 | KSh 2,800 | 1 Core | 2 GB | 50 GB SSD | 2 TB |
| Kenya Cloud VPS 3 | KSh 5,600 | 2 Cores | 4 GB | 100 GB SSD | 6 TB |
If you’re ready to move beyond shared hosting and take full control of your website performance, a VPS is the next logical step. Choose a plan that fits your current needs, set it up step by step, and scale as you grow.
FAQs
How long does it take to set up a VPS in Kenya?
Most people can get a website live on a VPS within a few hours following a guide like this one. It takes a bit longer the first time. After that, the process becomes much quicker.
Do I need technical skills to host a website on a VPS?
Basic command-line knowledge helps, but it is not required. You can use a control panel like cPanel or Plesk if you prefer a visual interface. If you get stuck at any point, the Truehost Kenya support team is available to help.
Is VPS hosting better than shared hosting for Kenyan websites?
For a growing website, yes. With shared hosting, you are competing for resources with other websites on the same server. With a VPS, your resources are yours. That means better performance, especially important for visitors on mobile data in Kenya where connection speeds vary.
Why should I choose a Kenya-based VPS over one hosted abroad?
A local server means lower latency for Kenyan visitors, faster page loads, and better performance on Google Kenya search results. It also means your data stays within the country, which is increasingly relevant as Kenya’s data protection regulations develop.
Does Truehost VPS come with an SSL certificate?
You can install a free SSL certificate through Let’s Encrypt on any Truehost VPS plan. The support team can help you get it set up if you need assistance.
Can I upgrade my VPS plan later?
Yes. You can upgrade your RAM, CPU, or storage without migrating to a new server or losing your existing setup.
What happens if my server goes down?
Truehost monitors server uptime and has a local support team ready to help when issues come up. Having your own backups and monitoring set up, as covered in this guide, means you are covered even in the worst case.
Can I pay for Truehost VPS using M-Pesa?
Yes. Truehost Kenya supports M-Pesa payments, making it easy to pay for your hosting without needing a credit card or foreign currency.Share
Stop Letting Slow Hosting Cost You Customers
Every time your site is slow or goes down, you are losing visitors, losing sales, and losing trust. That is true anywhere, but in Kenya where competition online is growing fast, a slow website hands your customers directly to whoever shows up next in the search results.
With Truehost VPS, you get a locally hosted Kenya server, SSD storage, full root access, billing in Kenya Shillings, and a support team based in Kenya that understands your market. Follow this guide and you can have your website running on a VPS within a few hours.