Domain SearchInstantly check and register your preferred domain name
 Web Hosting
 cPanel HostingHosting powered by cPanel (Most user friendly)
 KE Domains
 Reseller HostingStart your own hosting business without tech hustles
 Windows HostingOptimized for Windows-based applications and sites.
 Free Domain
 Affiliate ProgramEarn commissions by referring customers to our platforms
 Free HostingTest our SSD Hosting for free, for life (1GB storage)
 All DomainsBrowse and register domain extensions from around the world
 .Com Domain
 WhoisLook up domain ownership, expiry dates, and registrar information
 VPS Hosting
 Managed VPSNon techy? Opt for fully managed VPS server
 Dedicated ServersEnjoy unmatched power and control with your own physical server.
 SupportOur support guides cover everything you need to know about our services
If you’ve just installed CyberPanel on your Truehost VPS, the next thing you’ll want to do is add your domains.
But why would you want to add domains in CyberPanel?
Well, once your CyberPanel is running, adding domains lets you host multiple websites on the same VPS.
Each domain gets its own space for files, databases, emails, and settings. You get full control without extra cost, and you can manage everything from one clean dashboard.
Truehost’s VPS plans make this even better because they come with good resources and unlimited domains on most packages. No restrictions holding you back.
Plus, CyberPanel keeps the process simple with a clean dashboard, fast performance, and built-in tools like free SSL certificates and LiteSpeed caching.
You can add .co.ke, .com, and many other domain extensions in just a few minutes.
But before you begin, make sure a few things are ready:
- CyberPanel should already be installed on your VPS server.
- Your domain name should already be registered.
- You should have your CyberPanel login details and server IP address.
- Your domain’s A record should point to your VPS IP address so the domain can connect to the server.
If you already have all these checked out, let’s go ahead and see how to add domains in CyberPanel.
Step-by-Step: How to Add Domains in CyberPanel
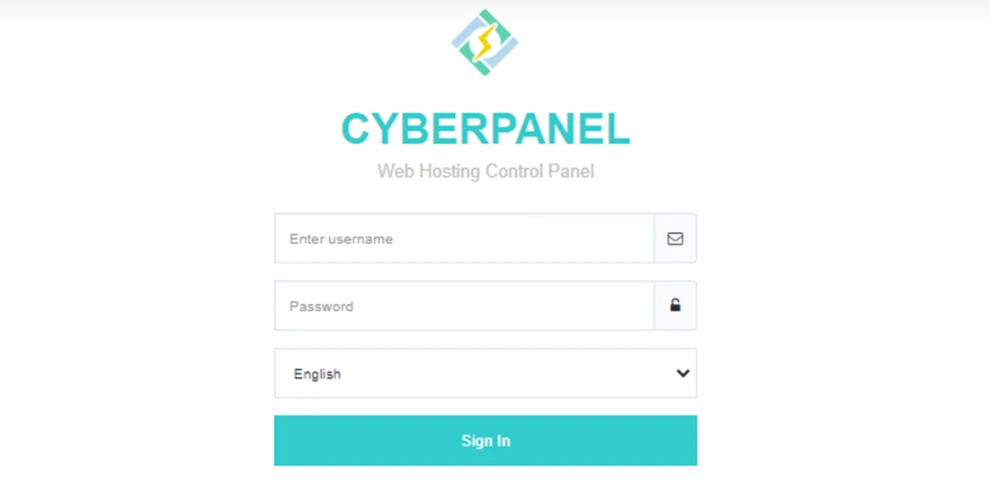
Step 1: Log in to CyberPanel
Start by opening your browser and visiting https://your-server-ip:8090.
Replace your-server-ip with the actual IP address of your VPS server. Once the login page opens, enter your CyberPanel admin username and password to access the dashboard.
After logging in, you will see the main control panel where you can manage websites, domains, emails, databases, and server settings from one place.
Step 2: Navigate to the Website Creation Section
On the left-hand menu, click “Websites” and then select “Create Website.”
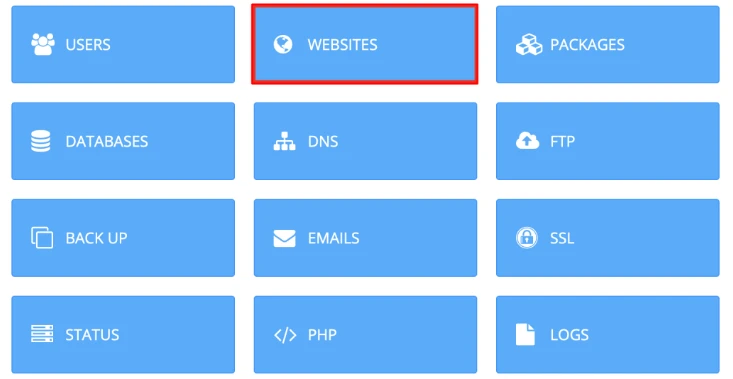
This section is where you add new domains to your VPS hosting account.
Step 3: Fill in the Domain Details
You will now see a form with several options. Here is what each field means and what you should select.
1) Select Package
Choose the hosting package you want to assign to the domain.
For most setups, the default package works perfectly fine. If you created custom hosting packages inside CyberPanel, you can choose one of those instead.
2) Select Owner
Here, you can leave this as admin.
This option only changes if you created additional users inside CyberPanel and want a different user to manage the website.
3) Enter the Domain Name
Type your full domain name, such as example.co.ke.
Do not include www in this field.
If you are creating a subdomain, simply enter the full subdomain name instead, like blog.example.co.ke.
CyberPanel will automatically configure it as a separate website.
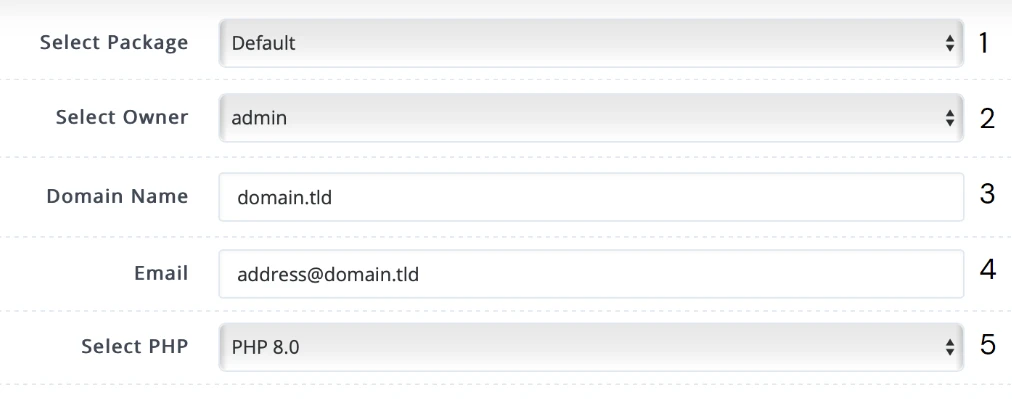
4) Add an Email Address
Enter a valid administrative email address for the website.
CyberPanel may use this email for SSL notifications, server alerts, and website-related updates.
5) Choose a PHP Version
Select the latest stable PHP version available, such as PHP 8.2 or PHP 8.3.
Newer PHP versions usually offer better performance, stronger security, and improved compatibility with modern applications like WordPress.
You can still change the PHP version later if needed.
Step 4: Select Additional Features
CyberPanel gives you several optional features during setup. It is a good idea to enable most of them from the beginning.

1. SSL Certificate
Enable the SSL option to install a free Let’s Encrypt SSL certificate automatically.
This allows your website to load securely over HTTPS.
2. DKIM Support
Turn on DKIM support if you plan to send emails from your domain.
This helps improve email delivery and reduces the chances of messages landing in spam folders.
3. Open Base Directory Protection
Enable this option for additional security.
It helps isolate website files and prevents unauthorized access between accounts on the server.
4. Create Mail Domain
Check this option if you want to create email accounts linked to your domain, such as [email protected].
This saves time later since CyberPanel prepares the email configuration during setup.
Step 5: Create the Website
Once everything looks correct, click the “Create Website” button.
CyberPanel will begin setting up the domain, configuring the web server, creating the SSL certificate, and preparing the hosting environment.
The process usually takes less than a minute.
Step 6: Verify That the Domain Was Added Successfully
After the setup finishes, go back to “Websites” and then “List Websites.”

You should now see your new domain in the list.
Open your domain in a browser to confirm it is working correctly. If the DNS settings have already propagated, you will either see the default CyberPanel page or your uploaded website files.
Note: Adding a subdomain follows the exact same process. The only difference is you enter the subdomain in the domain name field during setup.
CyberPanel treats subdomains like regular websites, which makes them easy to manage independently.
Post-Creation Tips and Management
Once your domain is live, CyberPanel gives you a central place to manage almost every part of your website.
You can upload website files through the File Manager or FTP, create and manage databases, install WordPress and other applications with one click, and set up professional email accounts linked to your domain.
CyberPanel also makes ongoing website management easier with built-in SSL support, automated renewals, and server tools that help keep your websites secure and running smoothly.
Truehost CyberPanel VPS plans include daily backups as an added layer of protection for your files and data.
If you want to host additional websites later, simply repeat the same steps covered in this guide. You can add as many as your plan allows; in fact, most Truehost plans support unlimited domains.
Also, as your hosting needs expand, you can switch PHP versions per site, create staging environments, or connect Git for easier development.
Ready to grow your online presence?
Log into your CyberPanel now and add your first domain. If anything feels off or you get stuck, our Truehost support team is always ready to help.
Go ahead and get that site live!