You can build and test your website on your own computer without paying for hosting.
This is useful when you want to practice, learn, or fix your site before going live.
Many beginners struggle because the web hosting xampp setup looks hard or they see strange error messages.
Do not worry. This guide shows every step in clear and simple English.
We will use XAMPP. It is a free tool that turns your computer into a small server.
You can use it to test WordPress, practice PHP, or build any website. It works without the internet once installed.
Here is what you will learn:
- Why XAMPP is good for local testing
- What you need before installing
- How to download and install XAMPP
- How to start and configure services
- How to create a database
- How to host your files
- How to test your site
- How to fix common issues
- How to move your site to online hosting
Let us begin.
I. What Is XAMPP
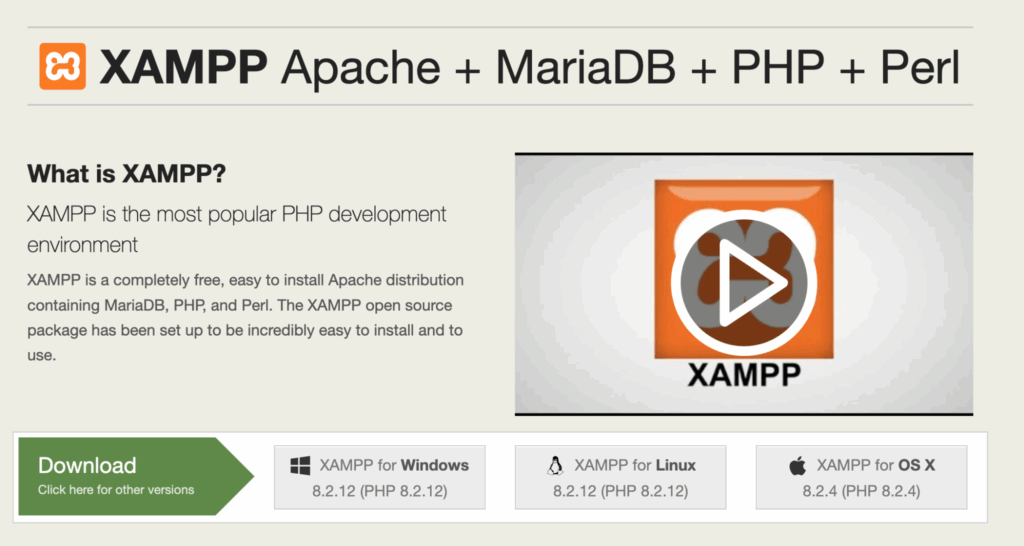
XAMPP is a free package that includes Apache, MySQL, PHP, and phpMyAdmin.
These tools help you build and run websites. Apache shows your pages, MySQL stores your data, and PHP handles your code.
You can install XAMPP on Windows, macOS, or Linux.
With XAMPP you can:
- Build websites without internet
- Test themes and plugins safely
- Learn web development at no cost
- Make changes quickly because pages load faster on your computer
Why Use XAMPP for Local Development
- Fast speed: Pages load very fast because everything runs on your computer.
- Save money: You do not need to pay for hosting while learning or testing.
- Safe testing: You can test risky plugins or updates without damaging your live site.
Keep in mind XAMPP is for local work. It is not safe for public use. When ready to go online, use real hosting.
II. Prerequisites For Web Hosting XAMPP
Before you install XAMPP, your computer must meet a few basic needs.
This helps XAMPP run smoothly and prevents errors during setup.
Here is everything you should check first.
1) Check Your Operating System
XAMPP works on three main systems:
- Windows: Works best with Windows 10 or Windows 11.
- macOS: Use macOS Ventura or a newer version.
- Linux: Use Ubuntu 22 or newer.
Older systems may still run XAMPP but can be slow or cause errors. If possible, update your system first.
2) Check Your Computer Hardware
You do not need a powerful computer, but these minimum levels help XAMPP run without freezing:
- RAM: At least 4GB. If you have 8GB or more, XAMPP will run smoother.
- Storage space: At least 2GB free for XAMPP and your website files.
- Processor: Any modern dual-core processor works.
If your computer is slow, close other apps while running XAMPP.
3) Make Sure You Have Internet for the Download
You only need internet to download the installer. The file is about 150–160 MB, which takes a few minutes on a normal home connection.
After installing XAMPP, you can work offline.
4) Choose a Good Browser for Testing
Use a modern browser because it loads local sites correctly:
- Google Chrome
- Mozilla Firefox
These browsers also work well with phpMyAdmin and WordPress installers.
5) Check for Software That May Block XAMPP
Some programs can stop Apache or MySQL from starting. Check these before installing:
Antivirus Software
Antivirus tools sometimes block XAMPP files by mistake.
Pause your antivirus during installation, then turn it back on later.
Apps Using Port 80 or 443
Apache uses port 80 and 443. Some apps use these ports too, such as:
- Skype
- Zoom
- IIS (Internet Information Services)
- Some VMware tools
Close them before installation to avoid errors.
6) Windows Users: Turn Off User Account Control (UAC) Temporarily
On Windows, UAC can block parts of XAMPP during installation.
To avoid this:
- Open the Start Menu.
- Search for “User Account Control”.
- Open the settings.
- Move the slider to the lowest level.
- Turn it back on after installing XAMPP.
7) Make Sure Your Firewall Will Not Block Apache
Windows Defender may block Apache the first time it tries to run.
You will see a pop-up asking if you want to allow Apache.
Click Allow for private networks (for home or office Wi-Fi).
8) Quick Summary Table
| Item | Why You Need It | Tip |
| OS | XAMPP requires a modern system | Windows 10 or 11 works well |
| RAM & Storage | Smooth performance | Close other apps |
| Browser | For testing your site | Use Chrome |
| Internet | To download installer | Turn off other downloads |
| Ports | Required for Apache | Free port 80 and 443 |
| Antivirus | May block files | Pause during install |
III. Downloading and Installing XAMPP
Follow these steps to install XAMPP correctly.
Step 1: Download XAMPP
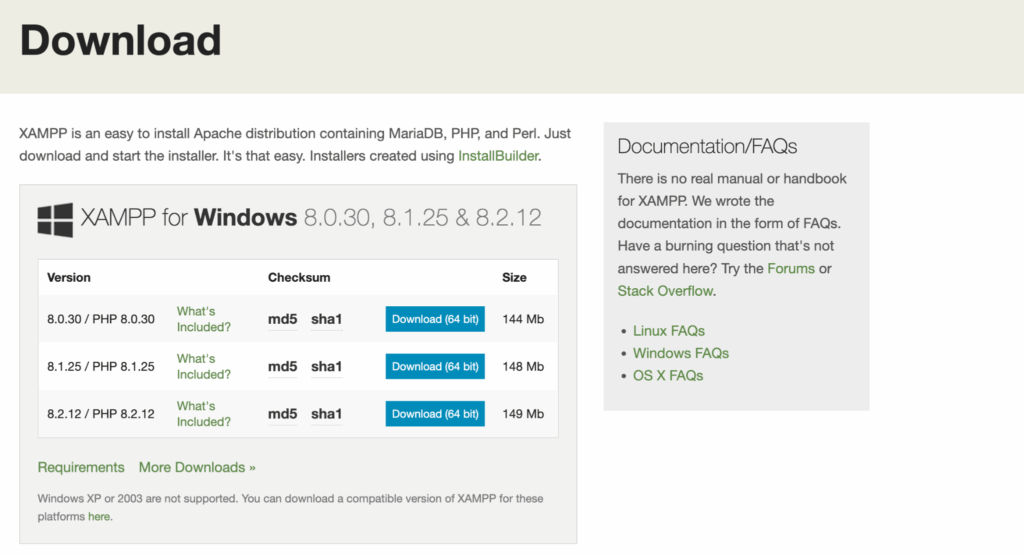
Go to the official website apachefriends.org. Download the version for your system.
Most users should choose the Windows installer with PHP 8.2 because it supports modern themes and plugins.
Step 2: Install XAMPP
- Open the downloaded file.
- Click Next on the setup screens.
- Choose Apache, MySQL, PHP, and phpMyAdmin.
- Use the default installation folder (C:\xampp).
- Wait for the installation to finish.
Step 3: Complete the Setup
XAMPP may ask for firewall permissions. Allow Apache on private networks so it can run.
After installation, open the XAMPP Control Panel. If Apache and MySQL show green, you are ready to continue.
Typical installation times:
| OS | File Type | Time Needed |
| Windows | exe | 5 to 7 minutes |
| macOS | dmg | 4 to 6 minutes |
| Linux | run | 6 to 8 minutes |
IV. Starting and Configuring XAMPP Services
XAMPP uses modules to run your local server. The main ones are Apache and MySQL.
Step 1: Open Control Panel
Open XAMPP Control Panel from your desktop or start menu.
Step 2: Start Apache and MySQL
Click Start next to Apache. Then click Start next to MySQL. When they turn green, they are running.
If you see errors, do not panic. It is usually a port issue.
Step 3: Fix Port Problems
If Apache fails to start, another program may be using port 80. Try the following:
- Close Skype, Zoom, or any program using ports.
- Change the Apache port from 80 to 8080 in the httpd.conf file.
- Restart Apache.
To test, open your browser and visit:
http://localhost
orhttp://localhost:8080(if you changed the port)
Step 4: Set Simple Settings
- Turn on SSL if needed.
- Allow MySQL to start with your computer.
- Set a MySQL root password such as xampp2025.
V. Setting Up a Database
Most dynamic sites like WordPress or online shops need a database.
Step 1: Open phpMyAdmin
Visit http://localhost/phpmyadmin. This is where you create and manage your databases.
Step 2: Create a Database
- Click Databases.
- Enter a name such as mysite or wp_local.
- Choose utf8mb4_unicode_ci.
- Click Create.
This format supports many languages, including Swahili, Kikuyu, and Somali.
Database Use Cases
| Type | Use | Example |
| MySQL | WordPress | Blog or store |
| MariaDB | E-commerce | Inventory data |
| None | Static sites | Portfolio |
VI. Hosting Your Website Files
Your website files go inside the htdocs folder.

Step 1: Open htdocs
In the Control Panel, click Explorer and open the htdocs folder. This is the root folder for your websites.
Step 2: Add Your Website
Create a new folder. For example, name it myshop. Add your HTML, CSS, JS, or PHP files inside this folder.
WordPress Setup Steps
- Download the latest WordPress ZIP file.
- Extract it inside htdocs/myshop.
- Copy wp-config-sample.php and rename it to wp-config.php.
- Add your database name, username, and password.
Example settings:
define(‘DB_NAME’, ‘myshop’);
define(‘DB_USER’, ‘root’);
define(‘DB_PASSWORD’, ”);
define(‘DB_HOST’, ‘localhost’);
$table_prefix = ‘wp_’;
Step 3: View Your Site
Visit:http://localhost/myshop
If you changed your Apache port, visit:http://localhost:8080/myshop
WordPress will ask you to complete the setup. Follow the steps and create an admin account.
VII. Testing Your Local Website
Testing helps you confirm that everything works well.
Basic Test for PHP
Create a file named test.php inside your folder:
<?php echo “Hello from XAMPP”; ?>
Visit http://localhost/myshop/test.php. If you see the message, PHP works.
Testing WordPress
- Login at
/wp-admin - Create a test post
- Upload an image
- Install a plugin
- Check if your site loads on your phone while connected to the same network
VIII. Troubleshooting Common Issues
Here are common problems and fixes.
Apache or MySQL Not Starting
Check port usage:
- Close programs using port 80
- Change Apache to port 8080
- Add Apache to Windows Defender allow list
403 Forbidden Error
Make sure your folder permissions allow access. Update httpd-xampp.conf if needed.
Upload File Too Large
Open php.ini and increase:
- upload_max_filesize
- max_execution_time
Restart Apache.
Website Crashes After Plugin Installation
Check WordPress logs in wp-content/debug.log. Remove the plugin folder inside wp-content/plugins if the site breaks.
IX. Best Practices and Going Live
Once your website works well on XAMPP, you can follow these best practices to keep everything clean, fast, and ready for real hosting.
Improve Performance
Good performance makes your local website load faster and helps you work without delays. Here are simple ways to do that:
1) Turn On Gzip Compression in Apache
Gzip compression makes your pages smaller. This helps them load faster in your browser.
To enable it:
- Open the Apache “httpd.conf” file from the XAMPP Control Panel.
- Search for the line that says “mod_deflate”.
- Make sure it is not disabled.
- Save the file, then restart Apache.
This is very helpful when testing large themes or images.
2) Keep Your Folders Organized
Create clear folders for each project in your htdocs directory.
This makes it easier to manage files and avoid mistakes.
For example:
- htdocs/myshop
- htdocs/blog
- htdocs/portfolio
Avoid mixing files from different websites.
3) Use Simple File Names
Use short and clean names so your site loads without issues.
Good examples:
- index.php
- about.html
- shop.css
Avoid names with spaces or symbols.
Moving Your Site Online
After testing on XAMPP, you can move your site to real hosting so people can see it online.
This process is called migration. Here is a simple step-by-step path.
Steps to Move Your Site
| Step | What to Do | Tool |
| 1 | Export your database | phpMyAdmin |
| 2 | Upload your website files | FTP or File Manager |
| 3 | Import the database to your hosting | Hosting phpMyAdmin |
| 4 | Update your wp-config settings | Edit database details |
| 5 | Update all URLs from localhost to your domain | Search and replace plugin |
Why Use a Hosting Provider
Real hosting helps your website load faster for users. It also gives you a real domain name and full security.
At Truehost we offer fast servers, easy setup, and local support, which makes the move from XAMPP much smoother.
Conclusion
You now know how to host a website using XAMPP on your local PC.
You learned how to install XAMPP, set up Apache and MySQL, create a database, add your files, test your site, fix common issues, and move your site online.
XAMPP gives you a safe and free space to learn and improve before going live.
When ready, choose a reliable hosting plan and publish your site for the world to see.
 Domain SearchInstantly check and register your preferred domain name
 Web Hosting
 cPanel HostingHosting powered by cPanel (Most user friendly)
 KE Domains
 Reseller HostingStart your own hosting business without tech hustles
 Windows HostingOptimized for Windows-based applications and sites.
 Free Domain
 Affiliate ProgramEarn commissions by referring customers to our platforms
 Free HostingTest our SSD Hosting for free, for life (1GB storage)
 Domain TransferMove your domain to us with zero downtime and full control
 All DomainsBrowse and register domain extensions from around the world
 .Com Domain
 WhoisLook up domain ownership, expiry dates, and registrar information
 VPS Hosting
 Managed VPSNon techy? Opt for fully managed VPS server
 Dedicated ServersEnjoy unmatched power and control with your own physical server.
 SupportOur support guides cover everything you need to know about our services


