Domain SearchInstantly check and register your preferred domain name
 Web Hosting
 cPanel HostingHosting powered by cPanel (Most user friendly)
 KE Domains
 Reseller HostingStart your own hosting business without tech hustles
 Windows HostingOptimized for Windows-based applications and sites.
 Free Domain
 Affiliate ProgramEarn commissions by referring customers to our platforms
 Free HostingTest our SSD Hosting for free, for life (1GB storage)
 All DomainsBrowse and register domain extensions from around the world
 .Com Domain
 WhoisLook up domain ownership, expiry dates, and registrar information
 VPS Hosting
 Managed VPSNon techy? Opt for fully managed VPS server
 Dedicated ServersEnjoy unmatched power and control with your own physical server.
 SupportOur support guides cover everything you need to know about our services
Want to host multiple websites on your Truehost account without upgrading your plan? You can do that by creating an addon domain in cPanel.
An addon domain lets you run separate websites, each with its own files, email, and SSL- under one hosting account.
In this guide, you’ll learn how to create an addon domain in cPanel, what to check before setup, and what to do after to get your site live.
Requirements and Prerequisites
Start by confirming a few basics. This helps you avoid setup errors.
Make sure you have an active Truehost hosting account with a primary domain already set up in cPanel.
Your hosting plan must support addon domains, and most Truehost plans do.
Check that the new domain isn’t already in your account. It shouldn’t exist as a primary domain, addon domain, or parked domain.
You can confirm this in cPanel.
Next, point your domain to Truehost nameservers:
ns1.cloudoon.comns2.cloudoon.netns3.cloudoon.org
Log in to your domain registrar and update the nameservers. This step is critical. DNS changes usually take 1–24 hours, but in some cases up to 48 hours.
If you’re moving an existing site, prepare your DNS records (like MX or TXT) in advance. This reduces downtime during the switch.
Once everything checks out, move on.
Step-by-Step: Creating the Addon Domain
1) Log in to cPanel
Go to your Truehost Client Area:
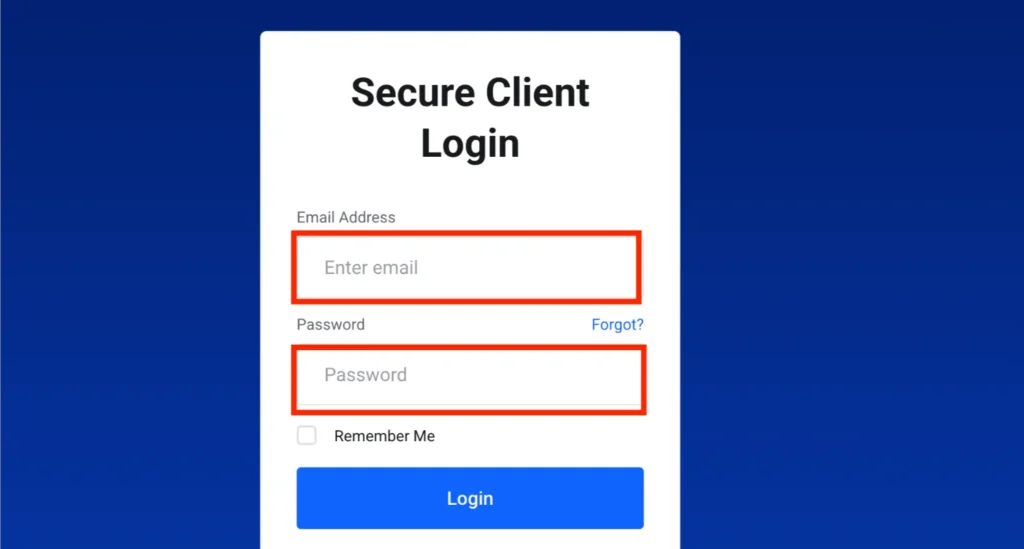
Enter your login details and access your dashboard.
Then:
- Click Services → My Services
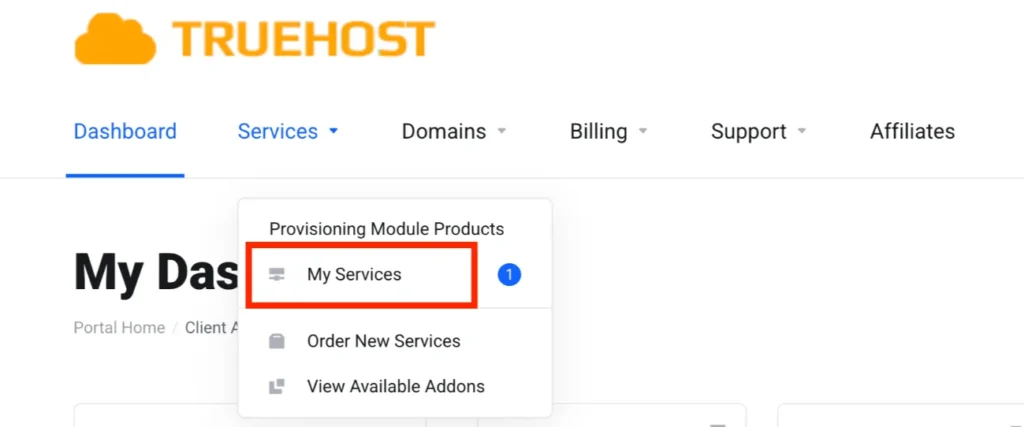
- Select your hosting package
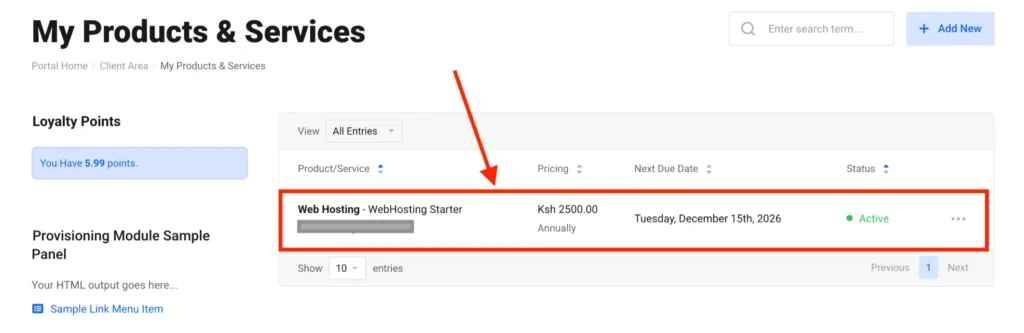
- Click Login to cPanel
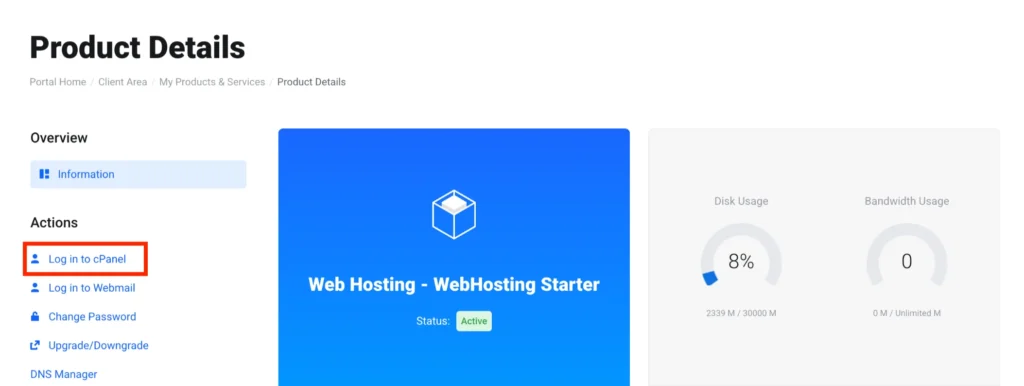
You’ll access cPanel instantly without entering credentials again.
2) Find your way to the Addon Domains Tool
Scroll to the Domains section inside cPanel.
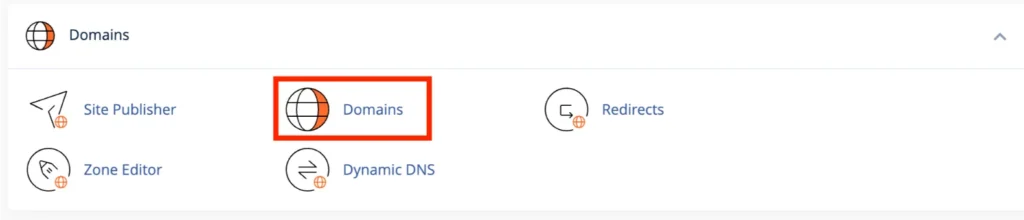
Click Addon Domains.
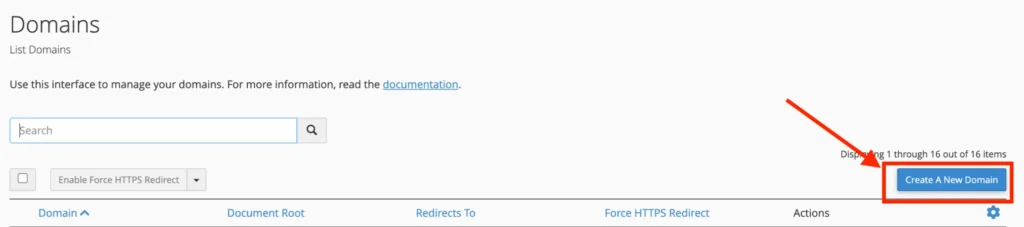
If you’re using the newer interface(just like in this guide), open Domains, then select the option to create a new domain.
3) Fill in the Domain Details
Enter your domain name (e.g., guideyou.co.ke). Don’t include ‘www’ or ‘https’.
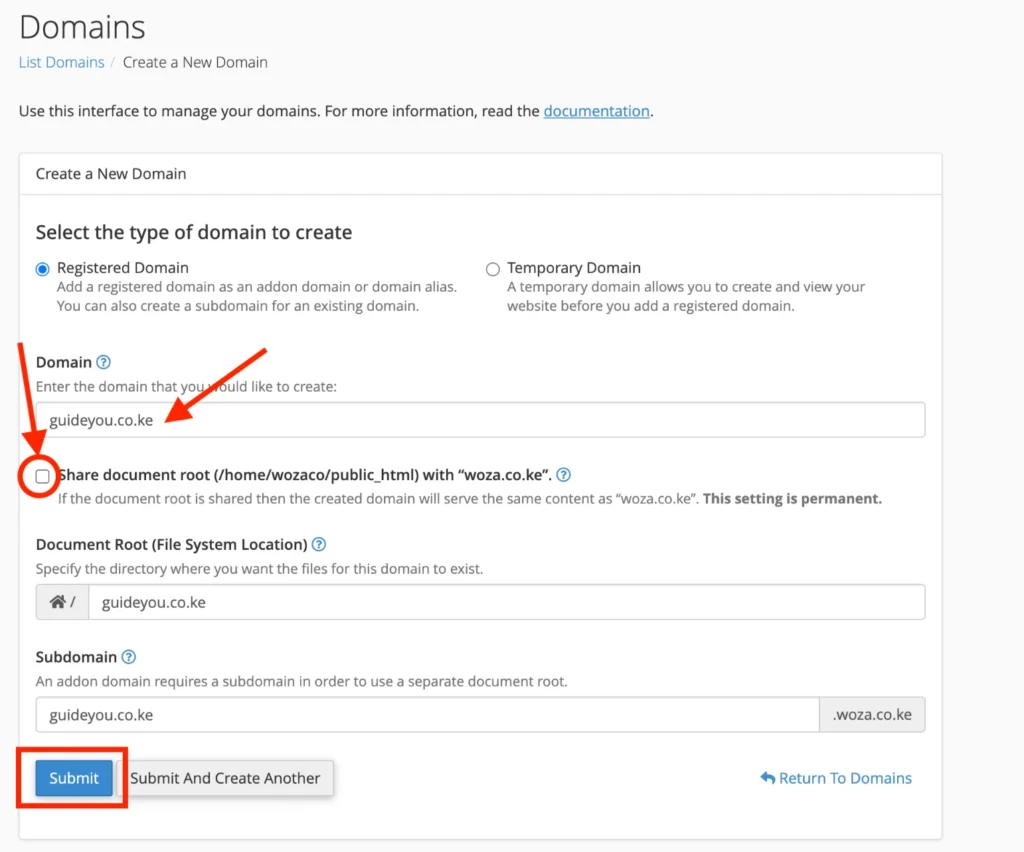
Uncheck the option to share the document root. This step is very important since it keeps your sites separate, secure, and easier to manage.
cPanel will auto-fill:
- Subdomain
- Document Root (e.g.,
/home/username/guideyou.co.ke)
You can adjust the folder name if needed.
If you want separate FTP access, create an FTP account here.
Click Submit to complete the setup.
4) What Happens After Submission
cPanel handles everything in the background. It creates the folder, configures the domain, and updates DNS settings.
Once done, you’ll see a confirmation message. Your new domain will appear in the addon domains list.
No extra DNS setup is needed if you’re using Truehost nameservers.
After Creation: Next Steps and Management
Uploading Website Files
Open File Manager in cPanel.
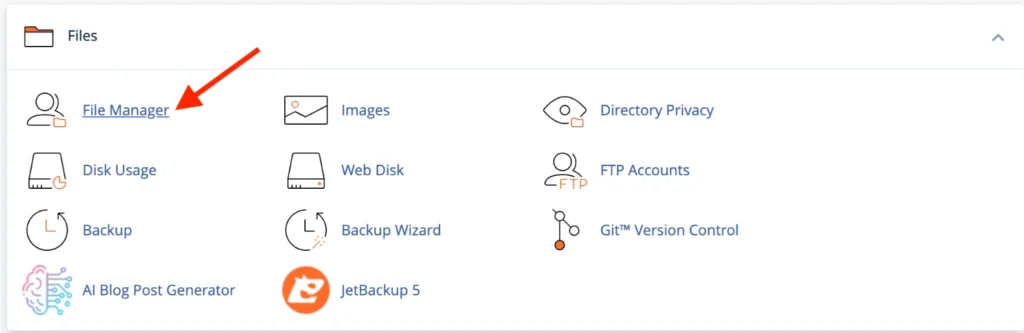
Go to your new domain’s folder (document root).
Upload your files using:
- Drag-and-drop in File Manager
- FTP/SFTP tools
- Softaculous for quick app installs (like WordPress)
Each addon domain runs independently, so your files stay separate.
Setting Up Emails, SSL, and Other Features
- Emails: Go to Email Accounts, select your domain, and create addresses like
[email protected]

- SSL: Use Let’s Encrypt or AutoSSL in the Security section. SSL usually activates automatically within a few hours
- Configure redirects or rules as needed using .htaccess
Common Issues and Troubleshooting Tips
Here’s how to handle common problems:
- Domain already exists
Check if the domain is already added or parked in your account - Site not loading
Confirm your nameservers are correct and wait for DNS propagation - Wrong site showing
Check your document root and make sure files are in the correct folder - Propagation delay
This is normal. Test using incognito mode or check DNS status online
If you still run into issues, open a support ticket with details.
What Next: Best Practices for Multi-Domain Setup
Verify the Setup
Open your new domain in an incognito browser.
If everything worked, your site (or a default page) should load.
Monitor Shared Resources
Addon domains share your hosting resources.
Track usage in cPanel under:
- Disk Usage
- Bandwidth
Upgrade your plan early if you approach limits.
Maintain Regular Backups
Use cPanel Backup or JetBackup.
Back up:
- Files
- Databases
- Emails
This protects your sites from errors or data loss.
Get Support When Needed
If something breaks or slows down, reach out via the Client Area.
You can also check the knowledge base for quick fixes and guides.
Also check our article on how to choose a domain for your business or brand in Kenya.
Closing Note
Adding an addon domain in cPanel gives you flexibility without extra cost. Set it up once, manage it properly, and you can run multiple sites from a single account with no issues.
Keep your DNS settings correct, organize your files well, and stay on top of backups. That’s all you need to scale smoothly.
Ready to expand? Add your next domain and keep building.