Domain SearchInstantly check and register your preferred domain name
 Web Hosting
 cPanel HostingHosting powered by cPanel (Most user friendly)
 KE Domains
 Reseller HostingStart your own hosting business without tech hustles
 Windows HostingOptimized for Windows-based applications and sites.
 Free Domain
 Affiliate ProgramEarn commissions by referring customers to our platforms
 Free HostingTest our SSD Hosting for free, for life (1GB storage)
 All DomainsBrowse and register domain extensions from around the world
 .Com Domain
 WhoisLook up domain ownership, expiry dates, and registrar information
 VPS Hosting
 Managed VPSNon techy? Opt for fully managed VPS server
 Dedicated ServersEnjoy unmatched power and control with your own physical server.
 SupportOur support guides cover everything you need to know about our services
Many websites in Kenya still load painfully slowly.
Most of them are stuck with old and slow name servers.
We see this issue all the time with our Truehost customers.
The good news? You can fix it with one simple change.
Just switch to faster name servers and your site suddenly feels much quicker for every visitor.
We help thousands of Truehost users make this switch every month, and the difference is amazing.
In this guide, I will walk you through the process of changing domain name servers in your Truehost account.
Preparation
You protect your site before you touch anything. Follow these steps, and you will stay safe.
- Back up your entire website using JetBackup or the tools in your Truehost hosting panel.
- Take screenshots or note your current DNS records, pay special attention to A/AAAA records for your hosting IP, MX records for email, and TXT/SPF/DKIM/DMARC entries.
- Optionally, lower the TTL on your existing records if you still control the DNS.
- Create a free Cloudflare account at
cloudflare.comif you do not have one yet.
Spend these few minutes now so you avoid any surprises later.
Step-by-Step: Change Nameservers at Truehost Client Area
This part forms the core of the process. You handle everything inside your Truehost account.
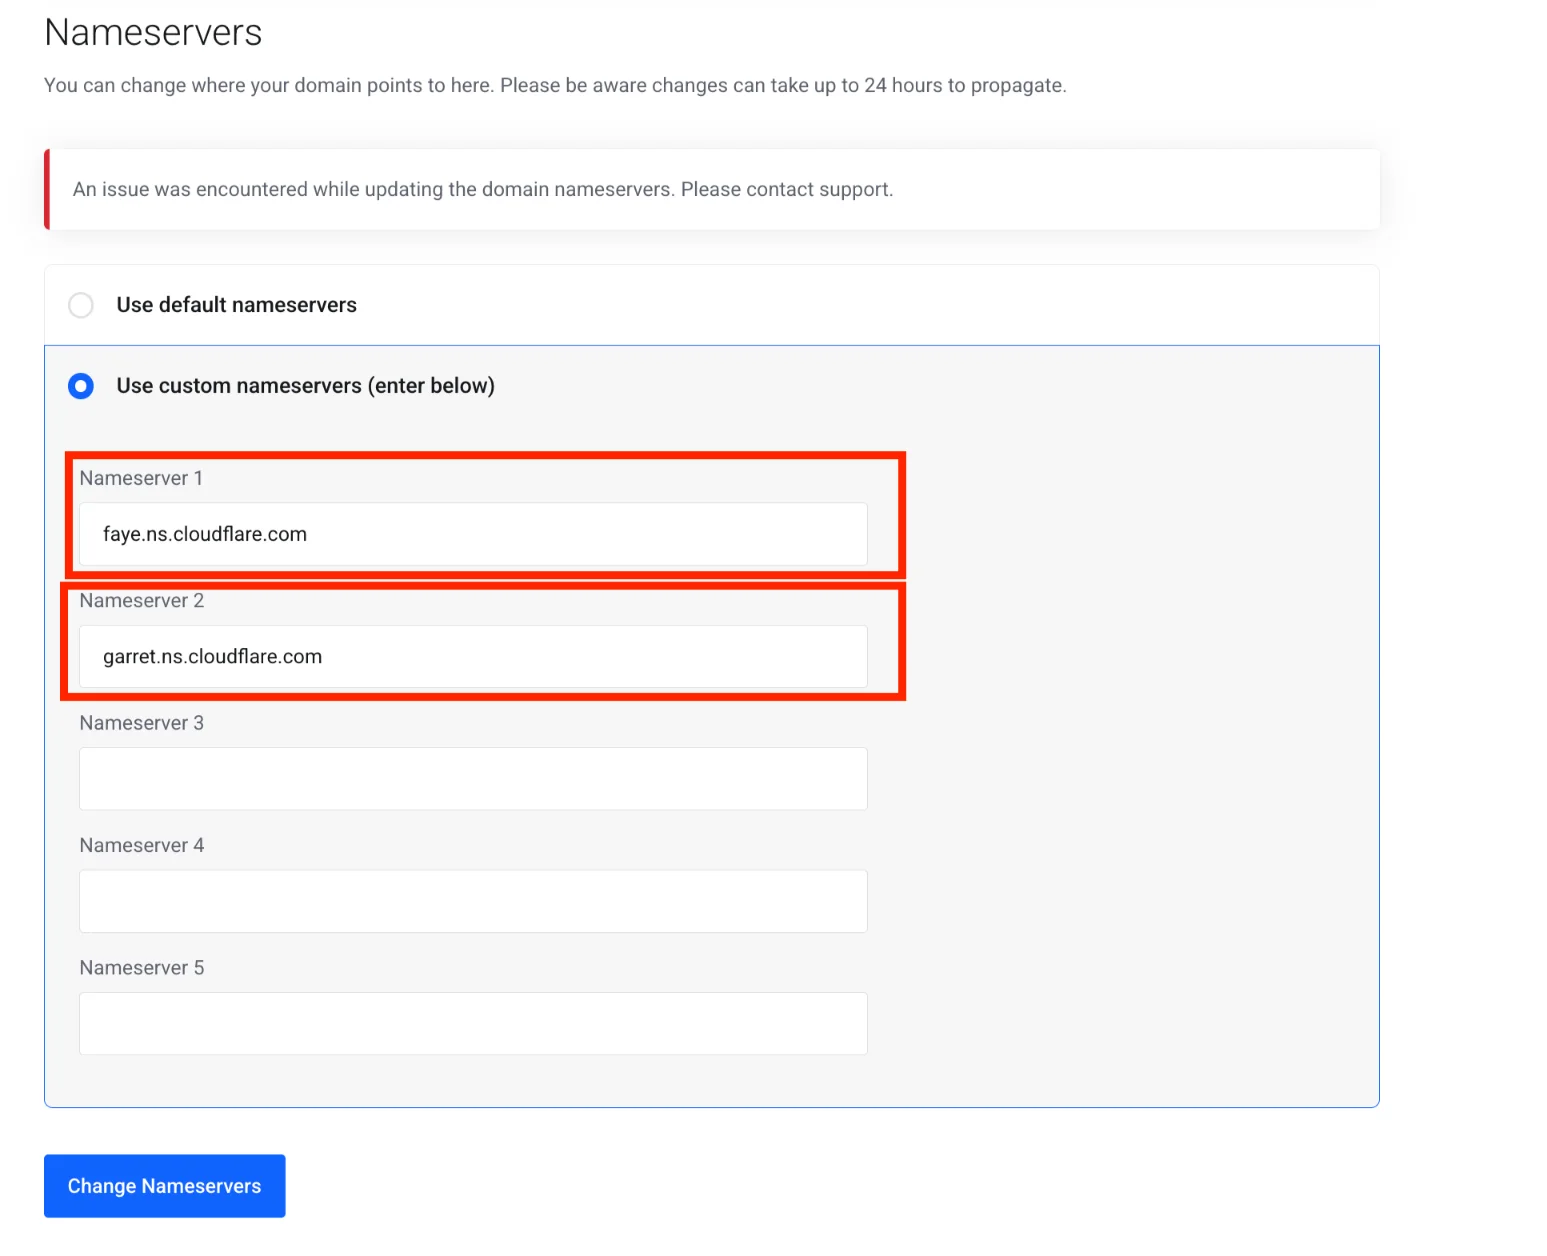
Before you start, keep your two Cloudflare nameservers ready. You receive them after you add your domain to Cloudflare.
They can look something like faye.ns.cloudflare.com and garret.ns.cloudflare.com.
Every domain gets its own unique pair. Work on a computer so you can copy and paste easily.
Follow these steps:
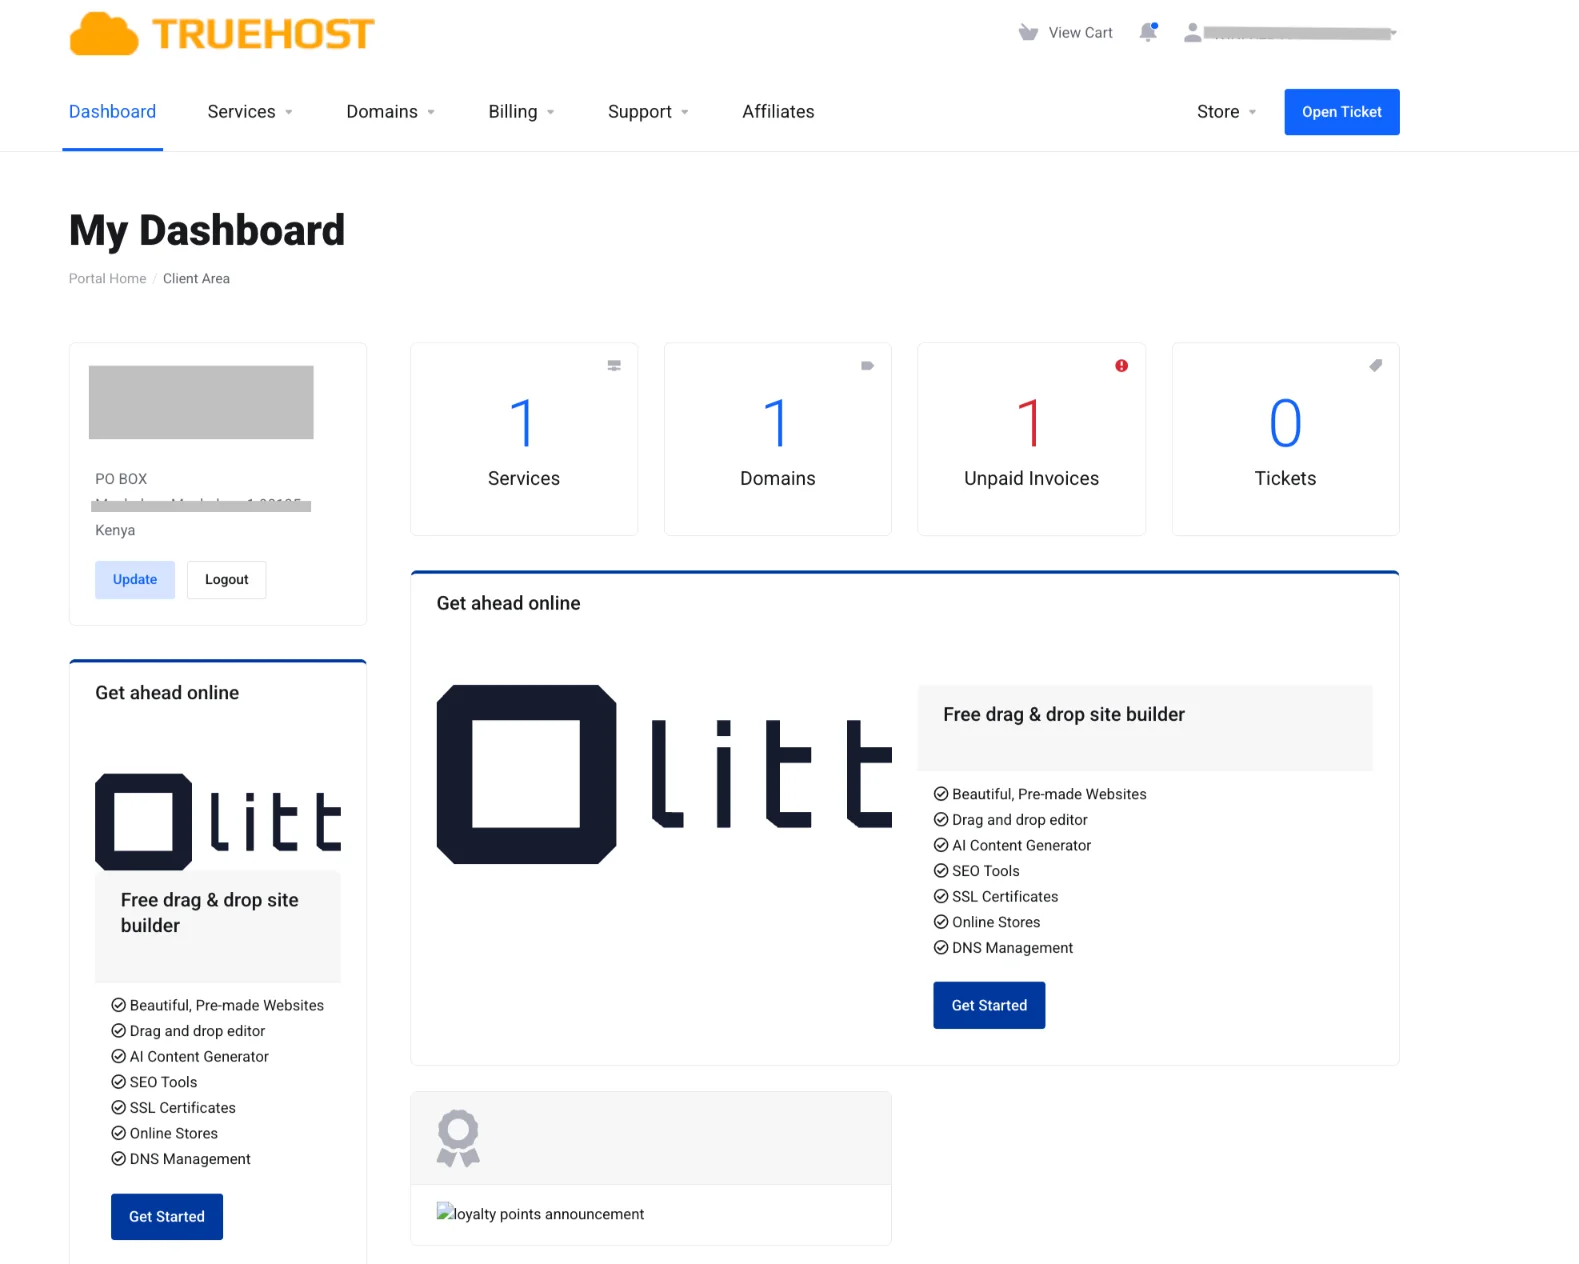
1) Log in to your Truehost Client Area
Go to Truehost client area and log in with your email and password.
2) Navigate to Domains
In the left menu or top navigation, click on Domains. You will see a list of all domains registered under your account.
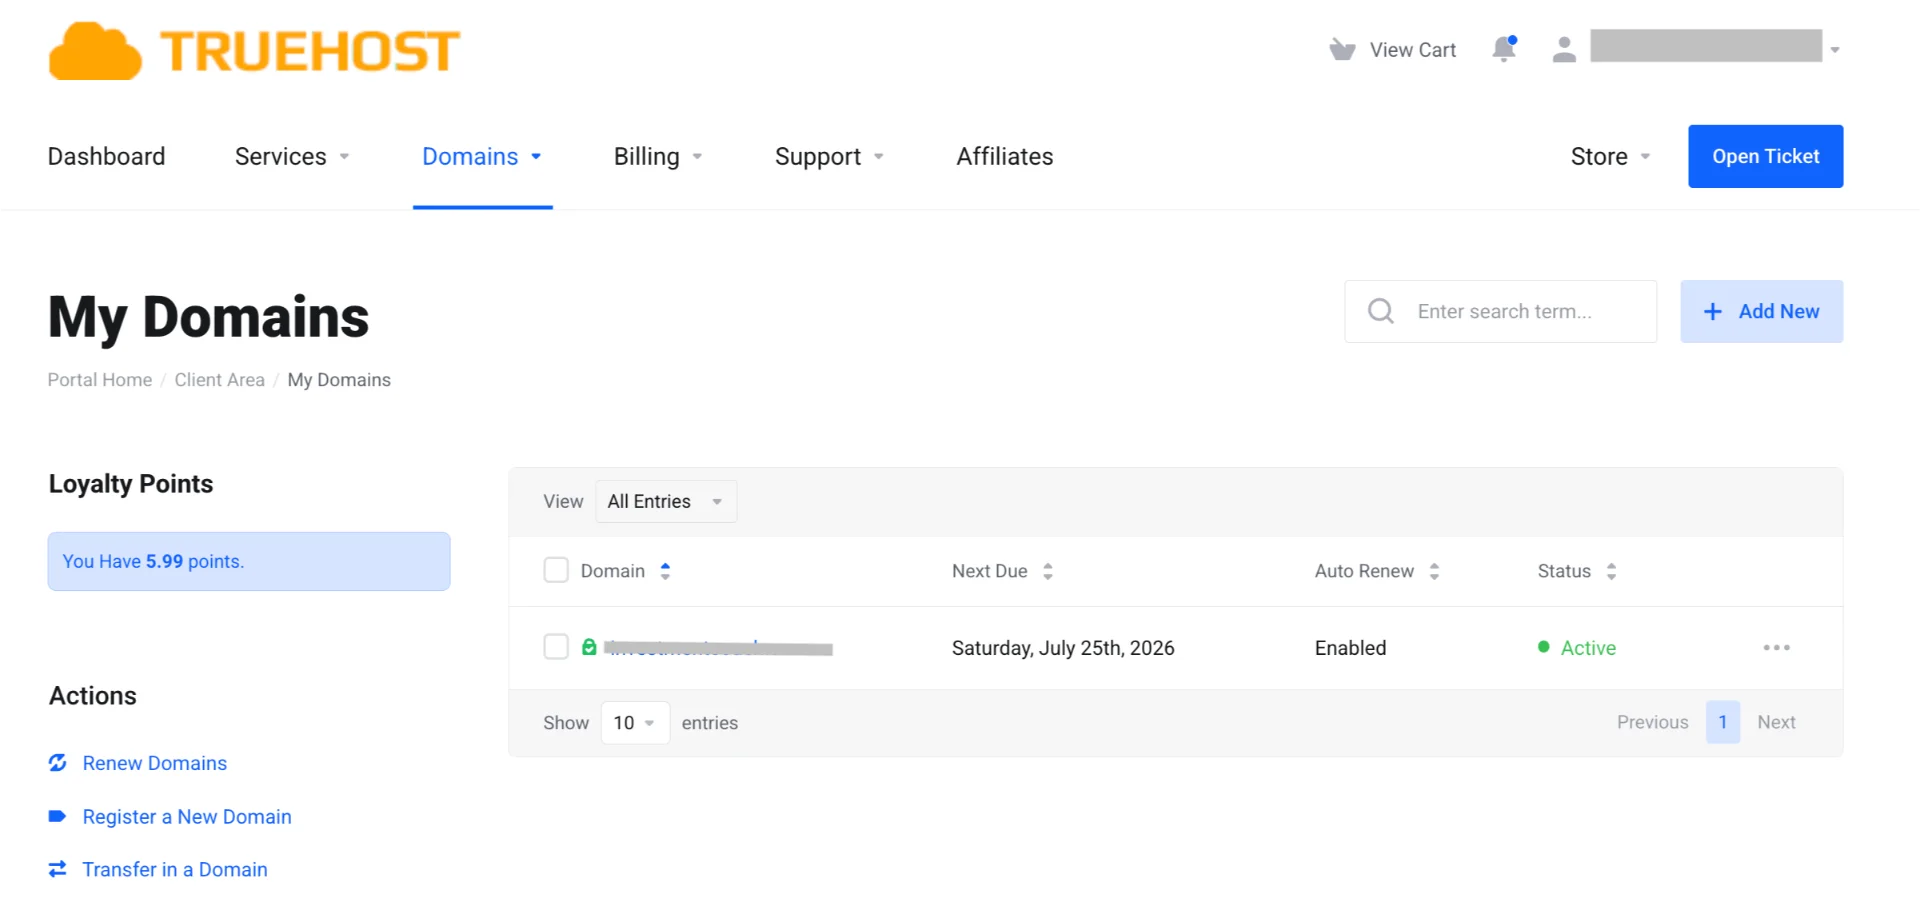
3) Select the domain you want to update
Find the domain you want to speed up. Click the dropdown arrow (three dots ‘…’ or small arrow) next to it.
4) Choose Manage Nameservers
From the dropdown menu, select Manage Nameservers.
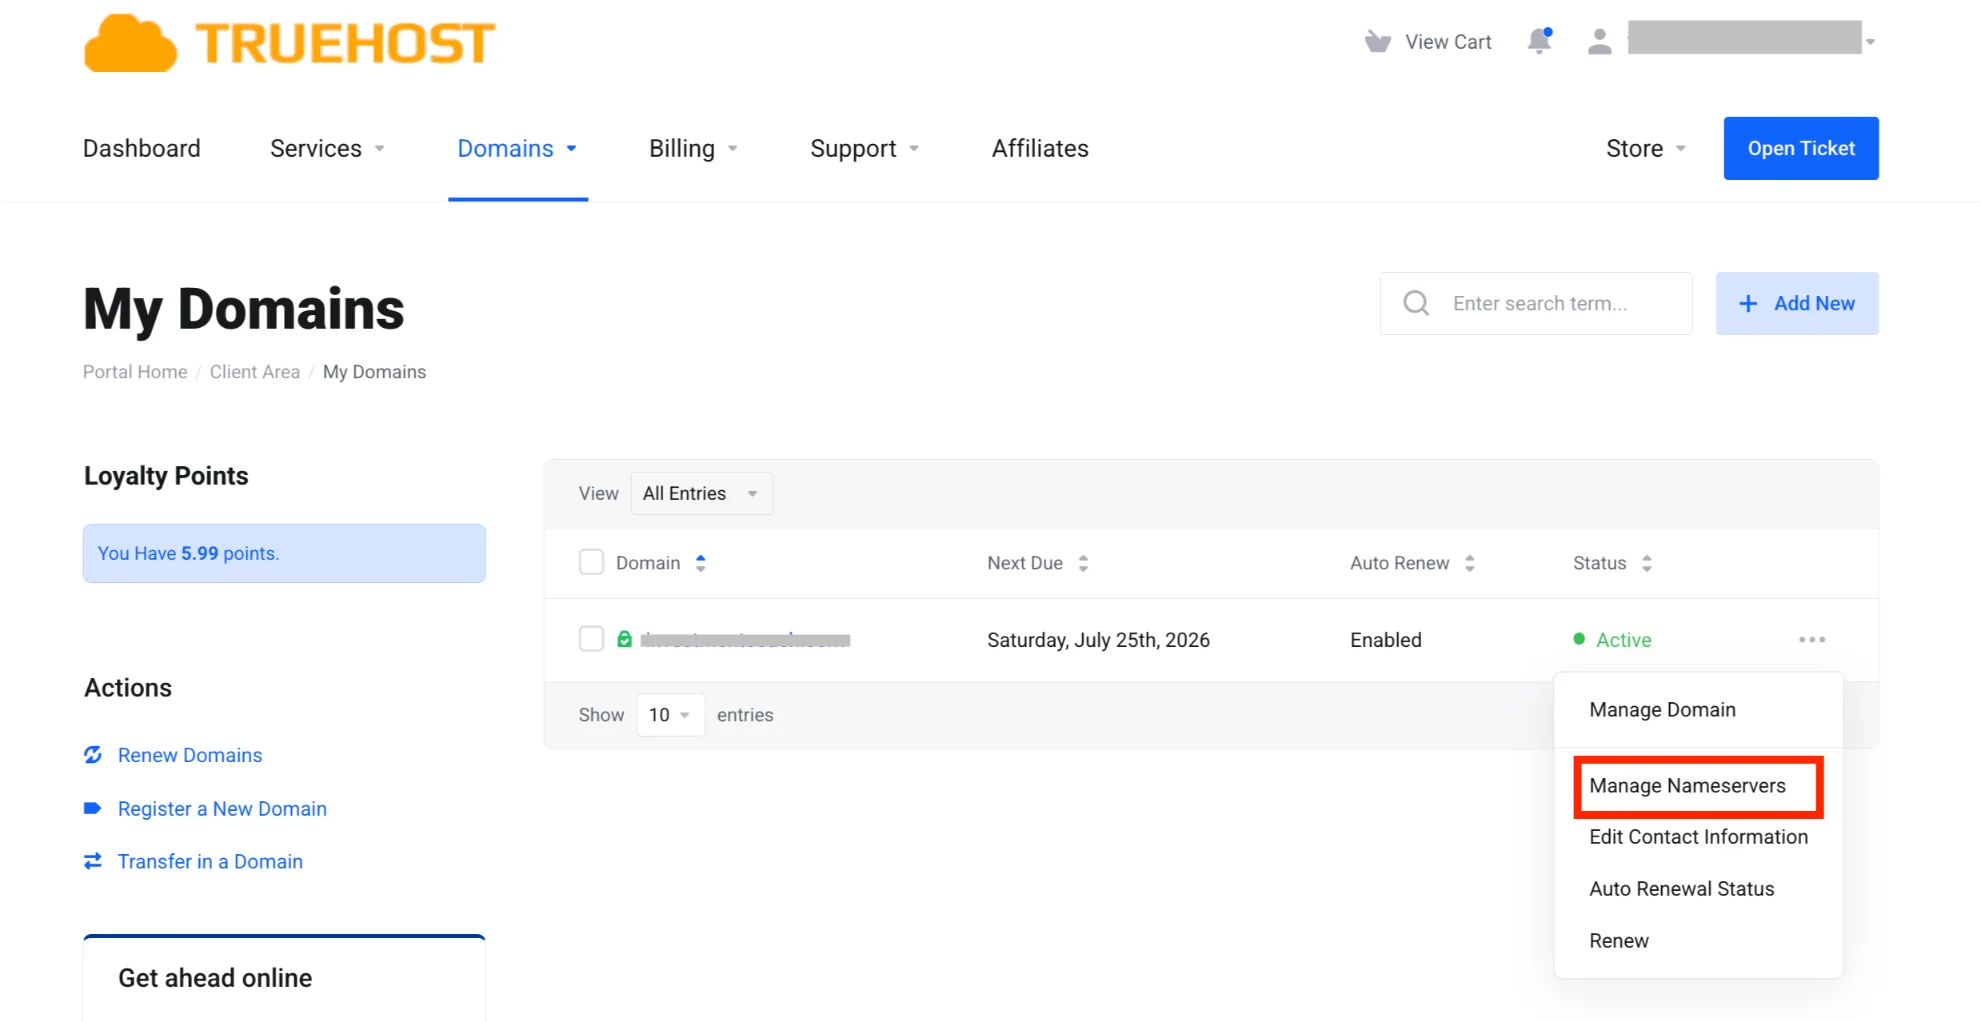
5) Go to the Nameservers option
On the left sidebar of the new page, click Nameservers.
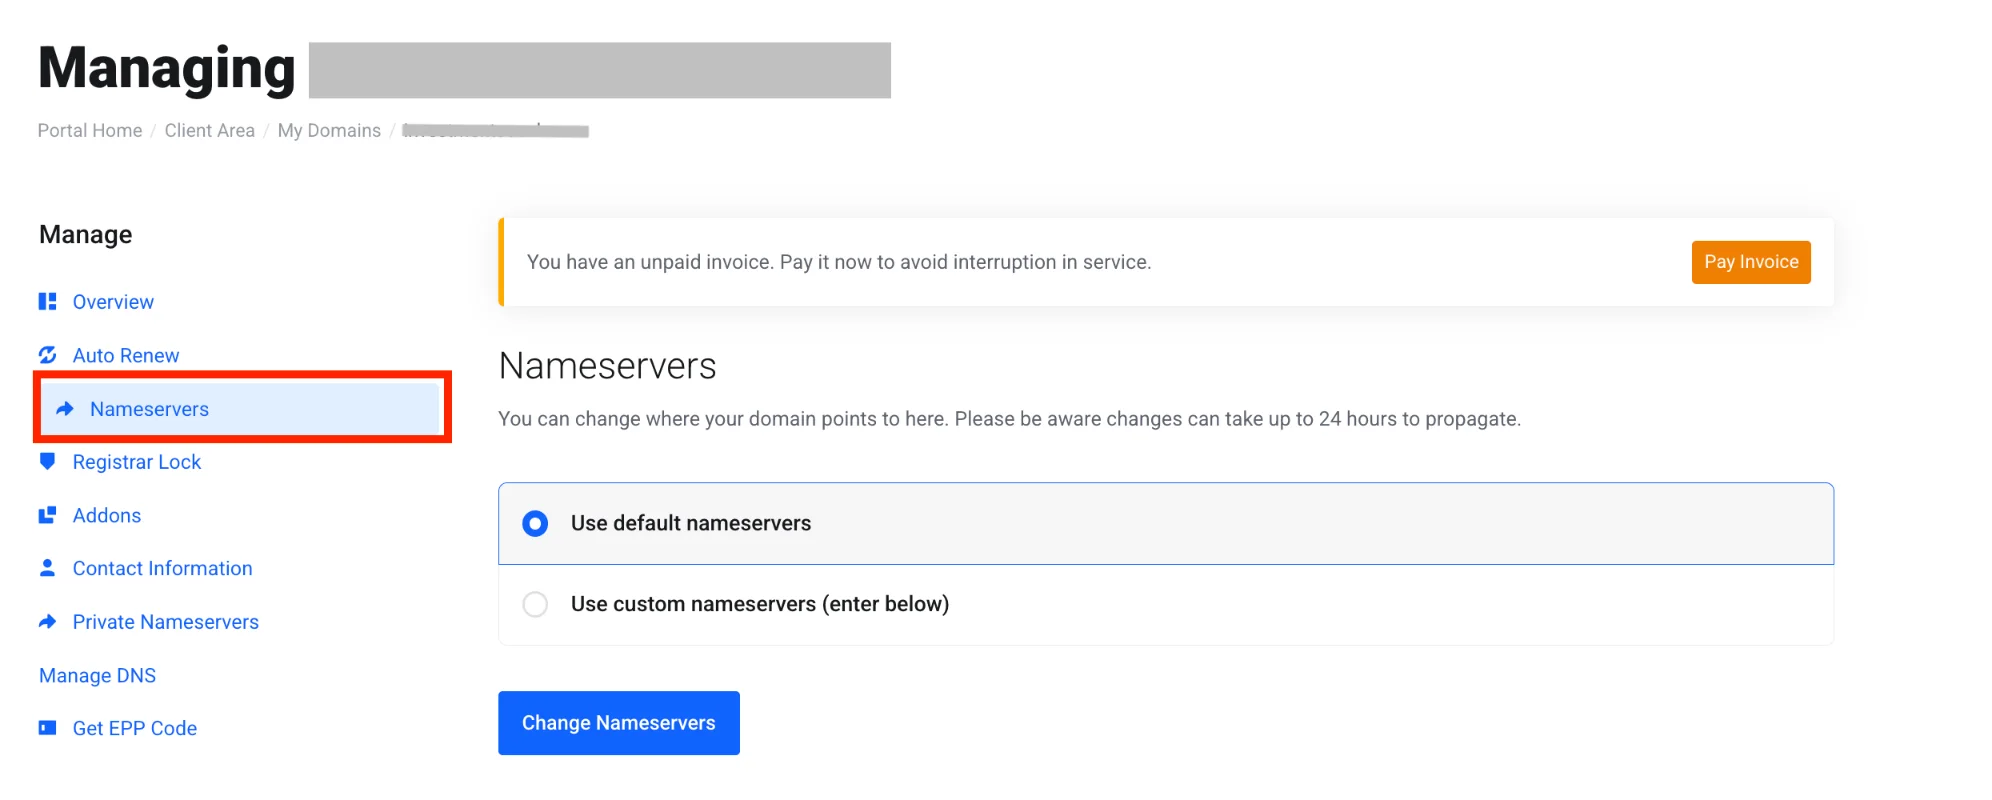
You will now see the current nameservers (usually Truehost’s own nameservers).
6) Replace the old nameservers with Cloudflare’s
Delete the existing nameservers (Truehost ones).
Paste the two Cloudflare nameservers exactly as shown in your Cloudflare dashboard.
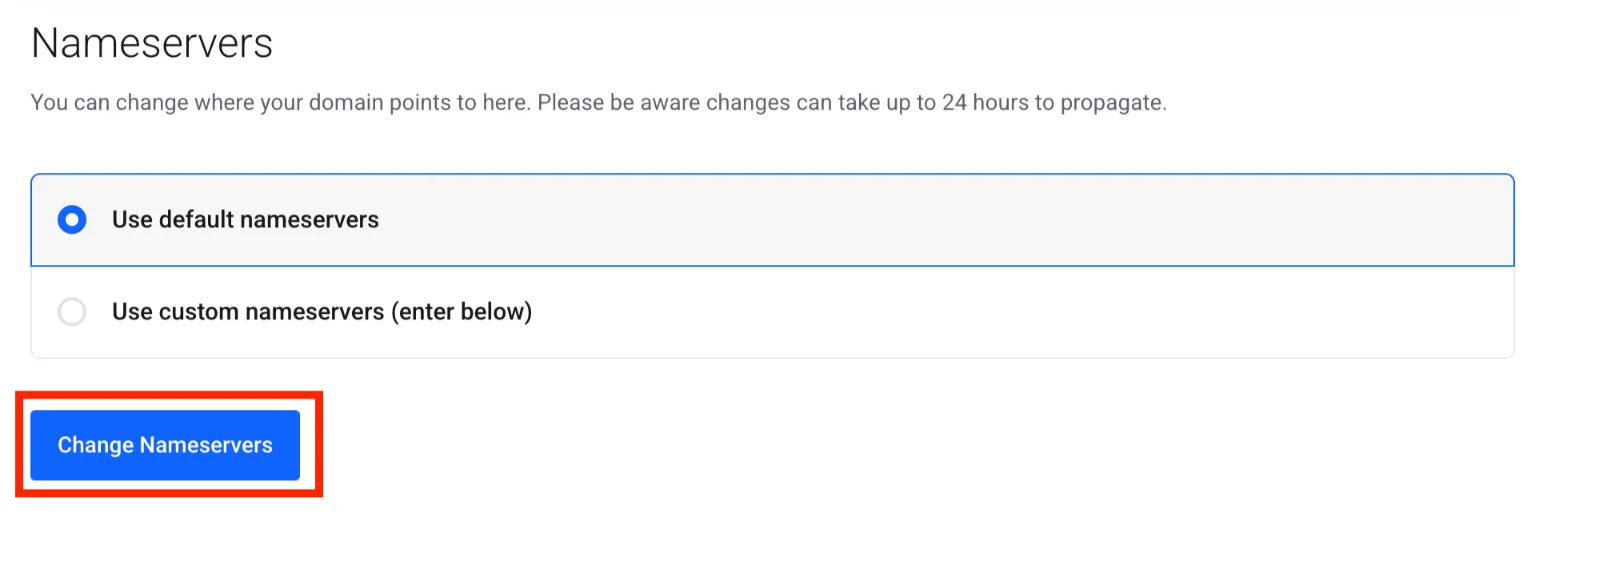
7) Save the changes
Click the Change Nameservers button at the bottom.
You should see a success message like ‘Changes saved successfully.’
8) What happens immediately after?
Truehost will no longer manage your DNS records. Cloudflare will automatically scan and import most of your existing records (A, MX, TXT, etc.) within a few minutes.
Important Tips:
This change affects only DNS; your website files, databases, and email hosting stay right where they are on Truehost.
You can reverse the change at any time by switching back to Truehost nameservers with the same steps.
Propagation usually begins within minutes, but a full global update takes 5 minutes to 24 hours (often faster in Kenya thanks to Cloudflare’s local edge servers in Nairobi and Mombasa).
Once you see the success message, move straight to setting everything up properly inside Cloudflare.
Set Up Your Site in Cloudflare Dashboard
- You now head over to your new Cloudflare account.
- Add your domain in Cloudflare and follow the prompts.
- Review the imported DNS records and confirm your hosting IP appears correctly as A/AAAA records for @ and
www. - For the main domain and www records, toggle the orange cloud icon to Proxied. This activates Cloudflare’s CDN and security features.
- Do not proxy email-related records (MX and similar).
Enable Performance & Security Optimizations
You unlock the real speed and protection now.
- Go to the Speed tab and enable Auto Minify for HTML, CSS, and JS plus Brotli compression.
- In the Caching tab, set caching level to Standard and Browser Cache TTL to Respect Existing Headers.
- For WordPress sites, install the official Cloudflare WordPress plugin. (You can enable APO later if you upgrade.)
- Under SSL/TLS, set it to Full (Flexible) or Full (Strict) depending on your hosting SSL certificate.
- In Security, turn on the basic free features which include DDoS protection.
Wait for DNS Propagation & Verify
Once you make the change, you just let it spread on its own.
This process is called propagation, and it usually takes between 5 minutes and 24 hours, often even faster in Kenya.
In rare cases, it can take up to 48 hours.
As you wait, you can check the progress on WhatsMyDNS by searching for the NS records of your domain.
You can also open your site in incognito mode on different devices and networks to see how it’s loading in different places.
Finally, make sure everything is still working well by sending and receiving a few test emails.
Test the Speed Boost (Before vs After)
You can measure the difference using tools that support Kenyan locations where possible.
Start by testing your site on GTmetrix or Google PageSpeed Insights.
You can also use WebPageTest and choose a Nairobi or Kenya server for better results. To check DNS speed, try DNSPerf.
You will usually see very fast DNS lookups. The Time to First Byte (TTFB) can drop by 50% or more, and your site will feel much faster on mobile.
After the Change
Your hosting stays the same, and that is on Truehost.
You now manage your DNS on Cloudflare, which gives you faster performance and access to the extra features you turned on.
Keep an eye on your site for a few days and enjoy the improved speed.
Enjoy Boosted Site’s Performance
Changing domain name servers to Cloudflare is one of the simplest ways to boost your site’s speed and security, and it doesn’t cost anything.
If you’re using Truehost, the impact can be noticeable, especially with faster loading and better performance across different locations.
Many people start seeing improvements within a few hours after propagation. And if you ever change your mind, you can easily switch back.
If you’re ready to speed up your Kenyan website, head over to your Truehost domains page and get started.
You can register a new domain or manage the one you already have.
At the end of the day, it’s all about keeping things simple so you can focus on growing your business instead of dealing with slow DNS.
Your faster site is just a few clicks away.