
Most newbies often start with WordPress.com only to realize its limitations such as limited ability to monetize, unable to install plugins, etc. Because of such they decide to switch to the self-hosted WordPress.org platform like Truehost.
In this guide, I will show you how to successfully move your blog from WordPress.com to Truehost in 4 simple steps.
It is important to note that WordPress.org gives you complete ownership of your website and freedom to control all its features unlike when using WordPress.com.
What You Need To Know Before Getting Started.
1. You need to have a domain name.
2. You need to have a hosting plan or package.
3. You need to have the login details to your wordpress.com account. That is the email and the password.
4. Last but not least, you need NOT have any technical knowledge to perform this.
Step 1: Export your existing WordPress.com content.
First you need to sign in to your WordPress.com account and go to your blog’s dashboard.
This will take you to your admin dashboard and you will be able to see a list of blogs you have (in case you have more than one).
Be sure to click on the particular blog that you want to export its content.
From the left column that appears, click on ‘Tools’ and then click on ‘Export’ from the drop-down that will appear. This will automatically take you to the content that you want to export. Click on “Export All.”
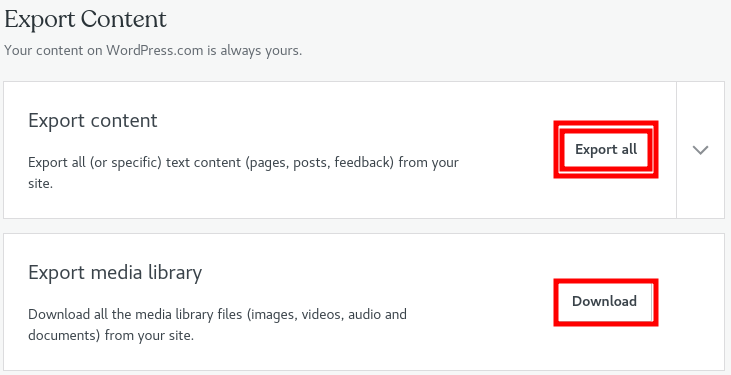
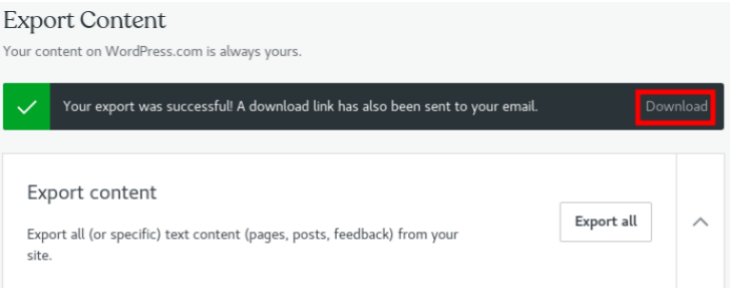
Upon clicking, a download link will be sent to your email and you will also be able to download it just from the admin dashboard by clicking “Dashboard.”
A zipped file will be downloaded to your machine to the directory that you will choose.
Step 2: Install WordPress.
Login to your Cpanel and scroll to down to the software section and install WordPress.
Step 3: Import your content into your new WordPress site.
Once the installation is done it is now time to import your exported content from wordpress.com to you Truehost.
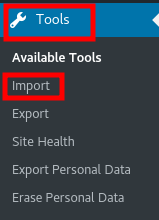
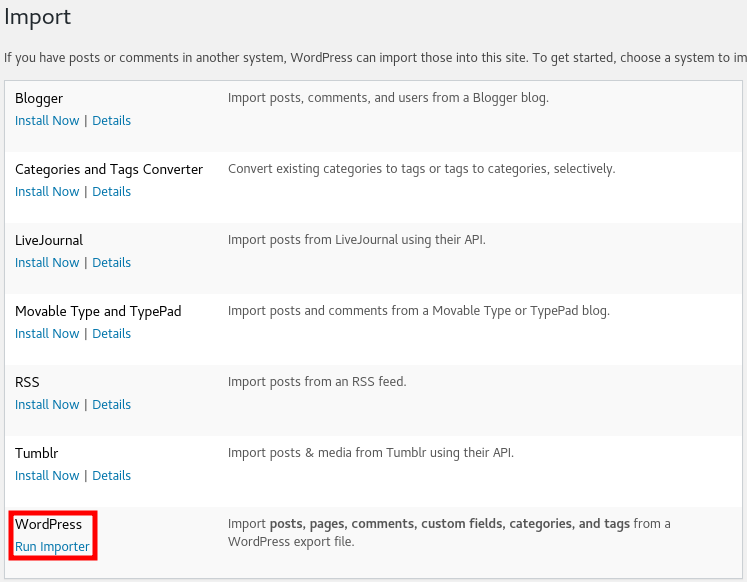
To do that, log in to your new WordPress installation admin dashboard. From the left column click on “Tools” and then “Import” on the drop-down that will appear.
Now, click on “Install Now” under WordPress at the bottom as shown below
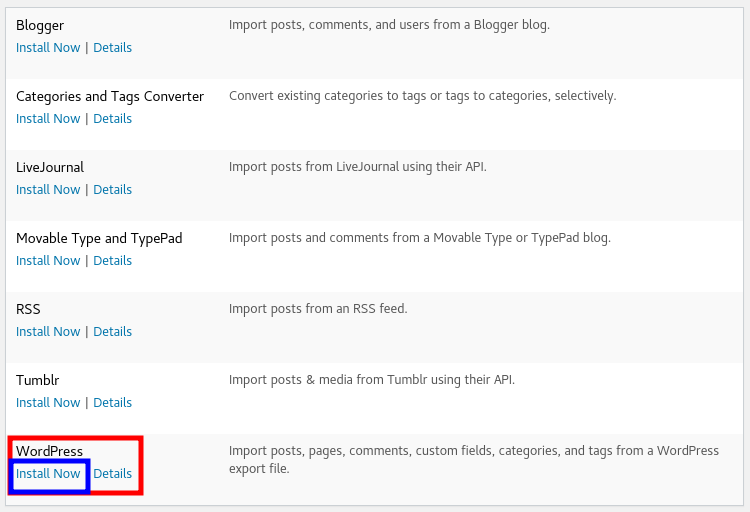
Once the installation is done, the “Install Now” will change to “Run Importer”
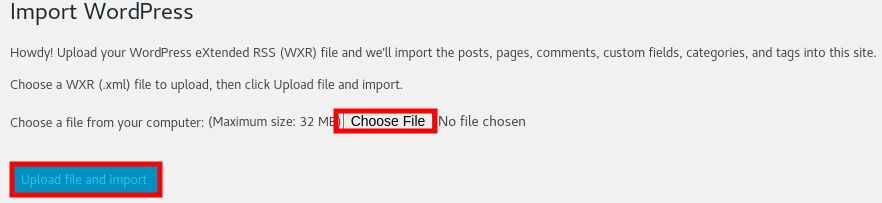
Before you choose the file to import, ensure you have extracted it so as to get an XML file. That is the only file extension that you will allow to import. (When you export from wordpress.com it comes in zipped form) Once you have extracted it, now proceed to choose the file and click “Upload file and import.”
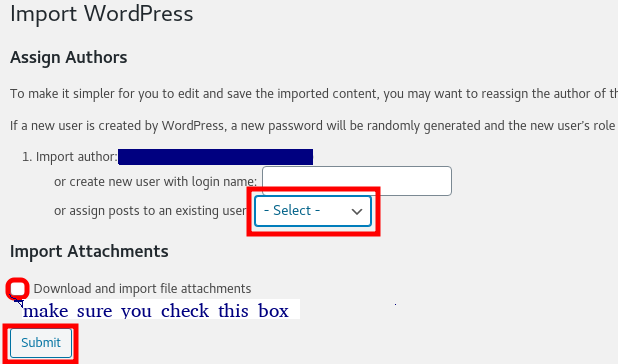
On the next page, ensure you assign your posts to the existing user, tick the ‘Download and import file attachments’ box and finally click import.
Step 4: Install A Theme and Customize.
Upon completion, the default theme will be used to display the content in your WordPress.
However, you are able to change this by installing a new theme of your choice.
All you have to do is click on “Appearance>Themes” to and then add a new theme.
It’s surprisingly easy to migrate WordPress.com to WordPress.org which is installed in your Truehost Cpanel. You don’t need to pay a single cent for the actual migration process.
With your new self-hosted WordPress site, you’ll be able to customize to whichever design you would like to.
Kudos, You made it!

Leave A Comment?