
cPanel provides an interface where you can add, remove or edit DNS records of your domain names. DNS records that can be managed from cPanel include the following which have simplified explanations alongside them:
• A record – This basically refers to the IP address of your domain/subdomain
• MX records – These are DNS records that handle emails for your domain • TXT records – These include SPF, DKIM, DMARC records – which are useful for emails.
• CNAME record – This refers to a subdomain you want your domain to point to.
Why Manage DNS records
You may want to manage DNS records for various reasons such as:
• If you want to use a different email service other than what is provided in cPanel eg Gsuite, Zoho
• If you want to use your domain with a website you have created elsewhere such as Shopify, Odoo etc
• If you want to use your domain with a cloud server you have rented with us or elsewhere.
How to Manage DNS records
To manage your DNS records, follow the steps below
1. Login to your cPanel
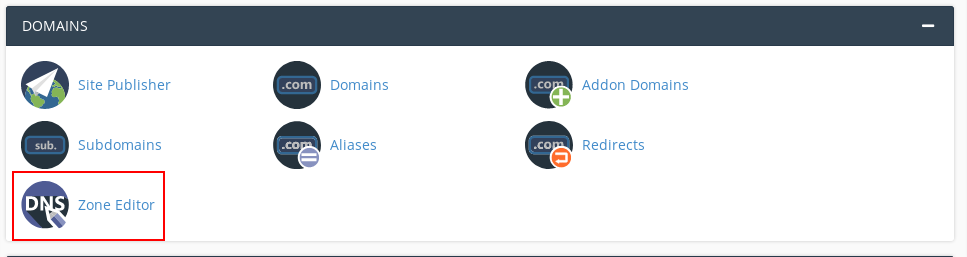
2. Navigate to Zone Editor under Domains section and click on it.
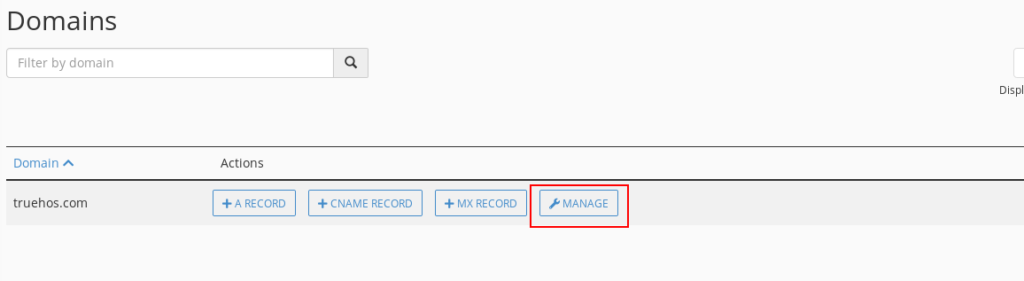
3. Click Manage
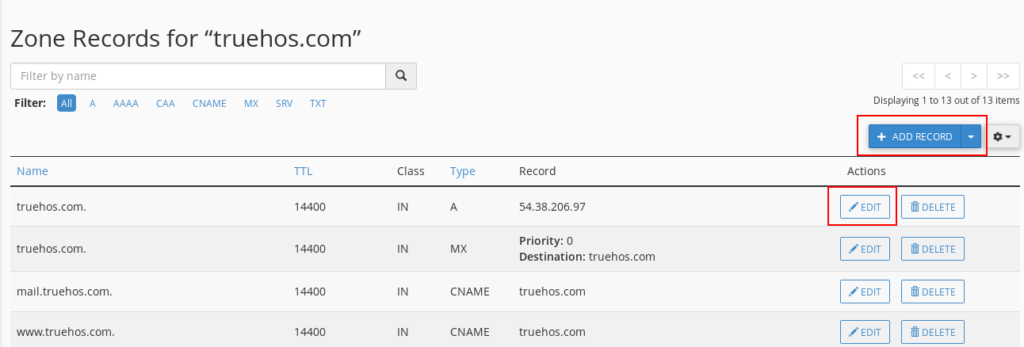
4. Click Add Record to add a new DNS record or Edit if you want to change an existing DNS record
If you would like to remove all custom changes you have made on your Zone Editor and restore our default DNS settings, use the steps below:
- Login to your cPanel and navigate to Zone Editor under Domains section
- Click Manage
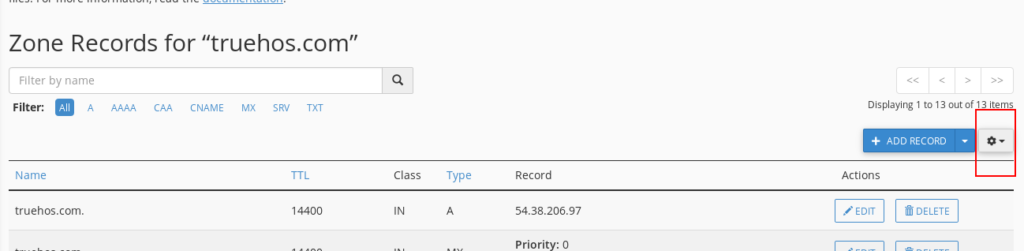
- Click the Settings icon on your top-right
4. Click Reset Zone then select Continue
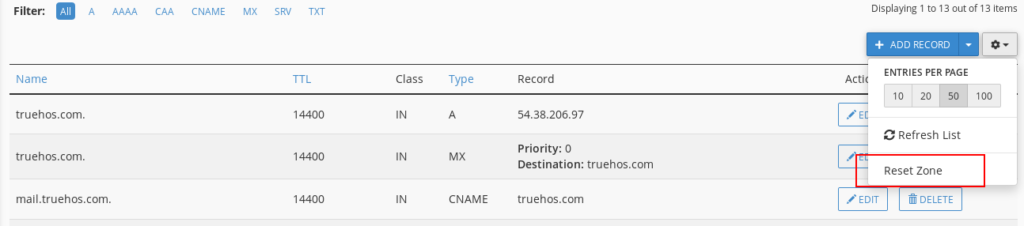
Your DNS records will be restored to the default ones we provide.

The documentation seems to be for an older version of cPanel. Can you send me the link to the current cPanel version?