
Disabling or deactivating WordPress plugins is one of the ways to troubleshoot plugin-related errors on wordpress websites. At some instances, a malfunctioned or troublesome plugin may throw errors and bar a user completely from logging into the WordPress dashboard.
At this point, you have the option of deactivating them from the cpanel section. The following are the steps:
Step I.
Login to the cpanel and navigate to the root folder of your wordpress installation, for instance (public_html).

Step II.
Open the Wp-content folder, to see several other folders including the plugins folder. To deactivate ALL the plugins , rename the plugins folder to a name you can recall, in case you would want to revert.

Step III
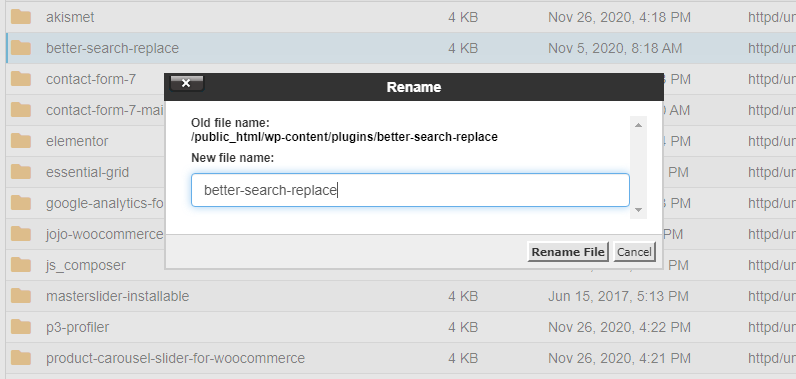
To deactivate a specific plugin, open the plugins folder and rename the specific plugin folder name. Remember to do it in a manner that you can easily revert or bring back the original name to activate it once again. A tip: You can do that by adding a letter at the beginning of the name and proceed with troubleshooting:
Final
By following the above steps, you will be able to identify a troublesome plugin for instance by disabling specific plugins in turns and reloading the site to be able to single out the problematic plugin in the end.
END

Leave A Comment?