Last updated on November 24th, 2021 at 10:50 am
Today, I want to show you how to create a website in Kenya from scratch and by yourself without having to hire freelancers or developers. But of course, if you have some cash to spare, by all means, have a look at our specialized marketplace.
Having a website in 2021 is the best investment you can have as far as your business is concerned.
Of course, it doesn’t have to be a business website. You can create a website in Kenya to display your expertise or even share your thoughts on a specific topic.
Now, in this ultimate guide, I will be using an example of how to create a blog in Kenya using Truehost Cloud.
Having said that, what do you need to create a website in Kenya 2021?
Requirements to create a website in Kenya
- A domain name– what will your website be called? read ahead to find out how to answer this question and how to pick the best domain for your website so you will not regret later
- A web hosting account– think of it as the house of your new website. I will show you how to register for Truehost hosting account
- WordPress– this is the content management system for your new blog in Kenya. You will need it to publish new content. I will show you how to install it. Alternatively, you can pick any other CMS of your choice. There various types
In a nutshell, to create a website in Kenya, you need a secure web address, which is your domain name and a website hosting company to make your website accessible to your readers.
Consequently, without one or the other, your website will not see the light of the day.
Once you’ve secured these two pillars, you need software to manage content on your new website. And the best tool for such a task is none other WordPress.
WordPress powers more than 30% of the global internet. Just look around you, everyone is using it for reasons we will look at later in this guide.
It is now time to dive into the details of how to create a website in Kenya in 2021
Step #1: Pick A Domain Name
First things first:
What’s a domain name and how does it work?
Quite simply, a domain name is the address of your new website. This is the name people will have to type into their web browser to find your website.
Example:
Cloudpap is the domain name and com is an extension.
How to pick the best name of your website (domain name)
Since you now know what a domain name is, let’s look at how to pick yours.
As we’ve mentioned, this is the name of your website, which means you need to go for a name that fits your business.
This can make or break you.
Why is this so important?
- Your website’s name is the first thing people see. Therefore, a good name can make a positive and lasting impression on your readers. On the other hand, a bad domain name can send your readers running
- It affects your website’s SEO rankings. Having a keyword in your domain name can give you a positive boost on search engine rankings. Although Exact Match Domains (EMD) is no longer a thing. But it works
- A domain name is a chance to boost your business visibility. This is a chance to drive brand recognition since some names linger for long in our memories
These are the aspects that make choosing a domain name in Kenya so crucial.
So, how do you name your website in Kenya?
Here’s a checklist you will need when picking the domain name. Use it.
- Use recognizable extensions such as co.ke, .com, .org or .net
- The shorter the better. Avoid long names.
- Easy to pronounce
- Choose brandable over generic.
Better yet, consider using your name. Brandable means that it stands for something. For instance, Cloudpap.com is a website that talks about cloud backup solutions, cloud servers, see more on its Facebook Page. As you can see, it contains the word ‘Cloud’ on its name.
Step #2: Registering Your Domain Name And Web Hosting
A domain name, check.
Time to register it so no one else can claim and get a hosting account.
Here’s a step by step process of how to register your domain name in Kenya and get a web hosting account
- Visit Truehost.co.ke
- Look for ‘Search for a domain Name’

3. Type in the name you picked in step #1 and hit search (takes some seconds).

Here, you are trying to find out if the name you chose is already taken or available. If it’s taken, don’t worry, you can still brainstorm another domain name. Otherwise, go to the next step.
For the purpose of illustration, I will be registering the name, Kevin Kipkoech
4. Choose your preferred extension, .com, .co.ke, .org, or .net and click on Buy It Now and wait for it to load
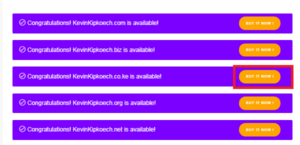
Once done, you’ll see a message reminding you that you do not have hosting get, so go ahead and click on ‘Click to Add’

You will be directed to a page where you can select the perfect web hosting package for you.
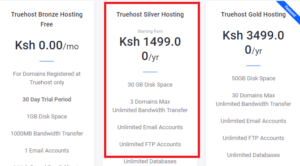
Here, you will find six web hosting packages and the first one is a free web hosting in Kenya. Based on your needs, pick the package that best suits your needs.
For my website, I will go for the Truehost Silver Hosting package. Click on Order Now
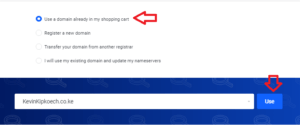
You will be asked to choose a domain… but since you had already put it in your cart, click on ‘Use a domain already in my cart’ then proceed by clicking on Use
This is where you will see the summary of your order.
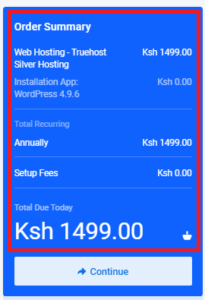
Check to make sure everything is okay.
Choose your billing cycle; annually, biennially, or triennially.

Depending on your goals, pick one.
On the app installation, choose WordPress

As for the additional services,
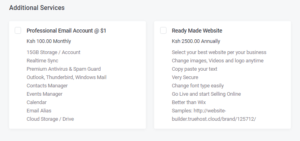
You can include the ones you deem necessary for your new website
Once done, click on Continue

Review your cart and checkout.
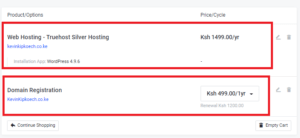
Here, you will see what you just ordered
And if you have a promotion code, you can use it to receive a discount
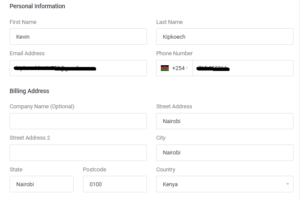
Create an account with Truehost by filling in the information

On the billing details, provide all the information required to create a website in Kenya
Finally, choose the preferred payment method.
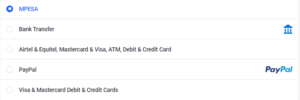
And we have several options such as M-PESA, Bank Transfer, and PayPal among others.
Remember to check on Terms of Service the finish by clicking on Checkout
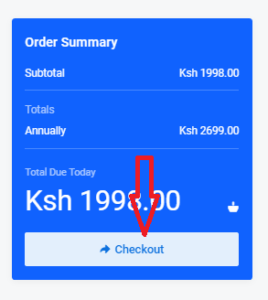
In the page, you will be guided on how to pay for your domain name and web hosting registration in Kenya. straightaway, depending on the payment option you chose, proceed to make your payment
As soon as the system verifies your payment, it will take less than 4 minutes to get instant access to your Truehost hosting account.
Specifically, the following will be sent to the email you used to register
- Login details to a Truehost cPanel where you can install WordPress, add email addresses among other stuff. However, depending on the Truehost hosting package you choose, this might be missing
![]()
- Login details to your Truehost client area where you can manage your domain name; register new ones, renew expired ones, or even transfer a domain from a different host
![]()
With the above details, you are ready for the next step
Step #3: Installing WordPress
As soon as you register your website’s name and acquired the Truehost website hosting package, you can now install the content management system (CMS).
As mentioned earlier, WordPress is the best CMS by far. And here’s why
- WordPress is highly customizable, thanks to thousands of free themes and plugins to provide additional features that will make your site look professional
- It is user friendly hence a complete beginner can use it without knowing how to code
- WordPress sites have can easily rank on search engines such as Google
- It is FREE. That’s right. No fees to download, install and use this epic software
- WordPress is safe and secure.
The list of benefits of using WordPress goes on and on.
How To Install WordPress With Just One Click
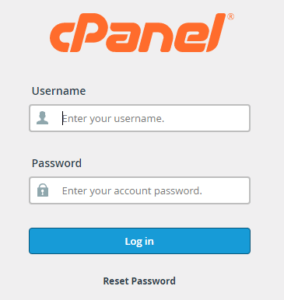
Log in to your Truehost cPanel
Scroll down and Look for a Softaculous apps installer. This is a script installer. Click on ‘WordPress’
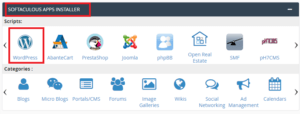
Click on the WordPress icon
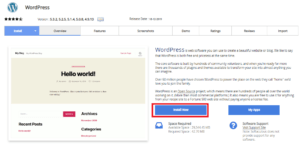
On this screen, you will see a brief introduction concerning the WordPress version you are about to install.
To proceed, click on Install and a ‘software setup’ window like the one below will be shown.

Pick the right protocol from the two options; ‘http://www and https://www. Use the https if you have an SSL certificate installed on your domain. Then choose the domain and leave the ‘In Directory empty.’ Unless of course, you intend on installing WordPress on a subfolder.
Next, fill in your WordPress site’s setting details as shown below.

Provide the name of your new website followed by a short description.
Proceed to provide the admin’s username, create a password or generate one right and then by clicking on the key symbol and them provide the email.

Later, you will need all of these details to log in to your website. Therefore, make sure you have a strong password.
Scroll down to proceed
Choose the preferred theme and plugins.
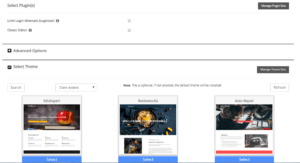
Here, you have the option to pick the plugins and the WordPress theme you want. Do not forget to provide an email address on the box written, “Email installation details to.”

Then click on the ‘Install’ button.
The Softaculous app installer will check the information you provided, and then proceed to install WordPress. Once done, you will be redirected to a congratulation page and below it is login URLs to your new WordPress website in Kenya.
Test your WordPress website by typing the admin’s URL. For example, https://www.example.com/wp-admin/.
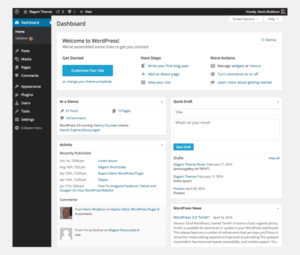
Once it loads, log in by providing username and the password (you picked earlier). You will be taken directly to your WordPress dashboard like the one below:
A domain name, check!
Truehost web hosting package, check!
Installed WordPress, check!
Congratulations!
Time to customize your new website.
How to customize a brand new website in Kenya
Since you just learned how to create a website in Kenya, I want to take to another level: customizing your new website. This way, it can be ready for the intended use and most importantly, reflects your personal preferences such as colors.
The customization button is found under the ‘>appearance’ section on your WordPress dashboard. And with it, you can edit the following:
Changing the WordPress Theme
On WordPress, the theme is the ultimate determinant of the overall layout and design of the website.
Additionally, the theme can also add additional features such as post sliders, unique home page layout, among others.
Therefore, you need to pick the best WordPress theme that will radiate your preferences. Of course, you might not find a theme that checks all your boxes, but you should settle for one that is close. The rest can be achieved by installing plugins.
To change the theme, go to Appearance > Themes > Add New. Then search for the theme you want and click on Install > Activate.
Done.
Refresh your website to see the changes.
Add Widgets, Sidebar, and Menus
Widgets can help you further customize your website’s sidebars as well as other widget-ready parts of your site.
As for the sidebar, you can choose not to have any (no sidebar), sidebar to the left, or sidebar to the right.
Most websites have their sidebars to the right.
On the other hand, Menus helps your readers easily navigate your website. And you can use it to direct readers to important parts of your website.
For example:
About us page, Services page, or Shop page
Add Pages To Your Site
Just so we can understand each other:
Pages are different from Posts.
Posts are meant to be updated constantly and hence ordered chronologically. For example, what you are reading now is a post, while pages are static, timeless content. An example of a page is ‘Contact us,’ ‘About.’
To add pages to your blog, go to WordPress dashboard >Pages > Add new. Then give a name to the page and write the corresponding content/text then hit ‘Publish.’
Add Your First Post
A website is nothing without content.
It’s like a Ferrari without gas.
Content is what will bring you thousands of readers every month as well as sales (if you are selling a product or services).
To publish your first post:
Go to Dashboard > Posts >Add New. As soon as you finish editing the article, hit Publish.
Readers can now enjoy reading your articles.
Bravo!
You are ready to launch.
Now, start sharing the good news about your new website. Share links on social media to drive traffic back to the website.
Final Thoughts On How To Create A Website In Kenya
Launching your new website doesn’t mean you are done. In fact, you are just getting started.
Remember a website without traffic/readers is not a website. So, your efforts now should be focused on creating and publishing quality content consistently like once a week.
Once your readership numbers reach a certain threshold, consider monetizing it using affiliate marketing, selling products, or a service.

Good Morning,
Thank you for the explanation that provides a useful guide for those wishing to start a website. I would like to start one but need assistance. My question is should I desire your service to create it from start to finish, what is the total sum.
Hello Mary, glad you found the guide helpful. The costs depend on the hosting package you pick and the domain you will register. For example; If you are going to register a .co.ke domain, and get silver hosting package, you will pay KES 599 for the domain and KES 1499 for the hosting, which is a total of KES 2098 per year. Here is an article talking about the costs https://truehost.co.ke/cost-to-create-a-website-in-kenya/
Do apps like joomla and prestashop require additional payment after logging into my CPANEL?